This no bake Rice Krispie bites recipe is a playful twist on a childhood favorite, but with a little more sophistication. I love how quick and forgiving it is—no stove, no fuss, just a bowl and a spoon. It’s perfect for those moments when you need a sweet fix but don’t want to mess around with melting chocolates or boiling sugar.
What really keeps me coming back to this recipe is how flexible it is. You can toss in a handful of toasted nuts, a handful of dried fruit, or even a dash of sea salt and smoked paprika for a savory kick. It’s a reminder that simple ingredients can become something a little more special with just a bit of creativity and a few minutes of your time.
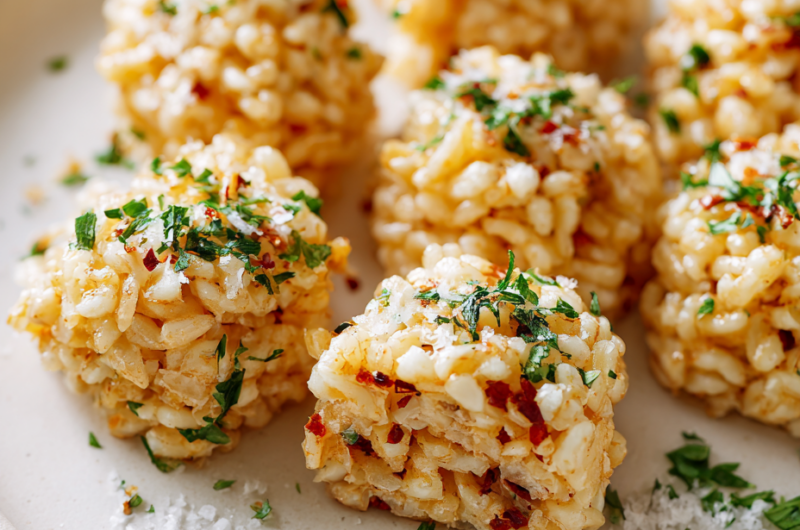
This recipe is a nostalgic nod to childhood, but with a twist: adding a dash of sea salt and a sprinkle of smoked paprika to elevate the simple sweetness and add a surprising savory depth.
A Childhood Treat Reinvented
- Making these bites takes me back to lazy Saturday afternoons at my grandma’s house, where she always kept a jar of these in the fridge.
- There’s a quiet satisfaction in mixing up the gooey marshmallow and butter until it smells like childhood, then watching the Krispies soak it all up.
- I love that I can whip up a batch in under ten minutes—perfect for last-minute sweet cravings or unexpected guests.
- These bites remind me that sometimes, simple ingredients and a little patience make the most comforting snacks.
- Sharing this recipe with friends always sparks a nostalgic smile, and a few stories about how we used to sneak extras for ourselves.
The story behind this recipe
- This recipe came about one chaotic afternoon in my tiny kitchen, where I needed something quick, satisfying, and pretty much foolproof. I remember digging through the pantry, grabbing the last bag of Krispies, and thinking, why not turn this into a no-bake treat? It’s funny how sometimes, the simplest ideas—like sticking marshmallows and cereal together—can turn into my go-to snack when I’m short on time but still craving something homemade.
- I’ve made these bites so many times now, tweaking ingredients here and there—adding a pinch of salt, tossing in chocolate chips, or even a dash of vanilla. They’re my little escape from complicated desserts, a reminder that you don’t need much to satisfy a sweet tooth. Every batch feels like a small victory, especially when I share them with friends and kids, who always ask for more.
- heading: ‘The story behind this recipe’
Historical & Cultural Tidbits
- These bites are a modern twist on the classic childhood treat, which originated in early 20th-century America as a way to use up leftover cereal and marshmallows.
- The first Rice Krispies treats were invented in the 1930s by the Kellogg Company, quickly becoming a beloved party and school snack.
- This no bake version is inspired by the traditional recipe but adapted for quick, fuss-free snacking, reflecting the 21st-century craving for instant gratification.
Ingredient breakdown: key components
- Marshmallows: I love how gooey and sweet they get, creating that sticky, irresistible texture. If you want less sweetness, try a bit of honey or agave syrup.
- Butter: It gives richness and helps everything stick together. For a dairy-free version, coconut oil adds a subtle coconut aroma and keeps the bites tender.
- Rice Krispies: The classic crunch, but you can swap in other crispy cereals for variety—like quinoa puffs or gluten-free options for a different crunch.
- Sea Salt: Just a pinch enhances sweetness and adds depth. Try smoked paprika instead for a smoky undertone that surprises the palate.
- Optional Add-ins: Nuts, dried fruits, or chocolate chips can be folded in. Toasted nuts introduce a warm, nutty aroma, while dried berries add a chewy burst.
- Vanilla Extract: A splash boosts flavor and rounds out sweetness. If you don’t have vanilla, almond extract can add a lovely, nutty aroma.
- Optional Spices: Cinnamon or a dash of chili powder can bring a warm or spicy complexity. Use sparingly to keep the cereal flavor front and center.
Spotlight on key ingredients
Marshmallows:
- I love how gooey and sweet they get, creating that sticky, irresistible texture. If you want less sweetness, try a bit of honey or agave syrup.
- Butter: It gives richness and helps everything stick together. For a dairy-free version, coconut oil adds a subtle coconut aroma and keeps the bites tender.
- Rice Krispies: The classic crunch, but you can swap in other crispy cereals for variety—like quinoa puffs or gluten-free options for a different crunch.
Sea Salt:
- Crispy cereal: The crunch is essential, but experimenting with toasted oats or gluten-free options can add a new texture and flavor dimension.
- Just a pinch enhances sweetness and adds depth. Try smoked paprika instead for a smoky undertone that surprises the palate.
Notes for ingredient swaps
- Dairy-Free: Swap butter for coconut oil or dairy-free margarine. Expect slightly different richness and a hint of coconut aroma.
- Sweeteners: Use honey, agave syrup, or maple syrup instead of marshmallows for sweetness. These will alter the texture, making it a bit stickier and less gooey.
- Crispy Cereal: Try puffed quinoa, cornflakes, or gluten-free cereal if you need a different crunch or catering to dietary needs.
- Flavor Boosts: Add a splash of vanilla extract or a pinch of cinnamon to enhance aroma and depth. Adjust to taste for personalized flavor.
- Salt Variations: Instead of sea salt, try smoked paprika or chili powder for a savory or smoky twist that heightens flavor complexity.
Equipment & Tools
- Large mixing bowl: To combine marshmallows and cereal thoroughly.
- Silicone spatula: To stir and fold the mixture smoothly.
- 20x20cm (8×8 inch) pan: To shape and set the bites evenly.
- Parchment paper: For easy removal and cleanup.
- Sharp knife: To cut the set mixture into bites cleanly.
Step-by-step guide to Rice Krispie Bites
- Gather your equipment: a large mixing bowl, a silicone spatula, a 20x20cm (8×8 inch) pan, and parchment paper. Line the pan with parchment for easy removal.
- In a microwave-safe bowl, add 4 cups of mini marshmallows and 3 tablespoons of butter. Microwave on high in 30-second bursts, stirring between, until melted and smooth, about 1-2 minutes. The mixture should be bubbly and oozy.
- Pour the melted marshmallow mixture into the large bowl with 6 cups of Rice Krispies. Quickly stir with the spatula until all the cereal is evenly coated and sticky. If the mixture cools too much, microwave for 10 seconds to warm it slightly.
- Transfer the mixture into the prepared pan. Use the spatula or your hands (dampened with a little water if sticky) to press it down evenly. Don’t pack too tightly; just a gentle, firm press is enough. Smooth the top with the spatula.
- Let sit at room temperature for about 30 minutes. This allows the bites to set and firm up. If you’re in a rush, pop it in the fridge for 15 minutes, but keep an eye on it to prevent over-hardening.
- Once firm, cut into 12-16 squares or rectangles with a sharp knife. For clean edges, wipe the knife with a damp cloth between cuts. Serve immediately or store for later.
Allow the bites to rest at room temperature or in the fridge until set. Use a sharp knife to cut clean slices. Serve immediately or store in an airtight container for up to 3 days.
How to Know It’s Done
- Mixture is well combined and sticky before pressing.
- Bites hold their shape when cut without crumbling.
- Golden edges or slight sheen indicates proper setting.
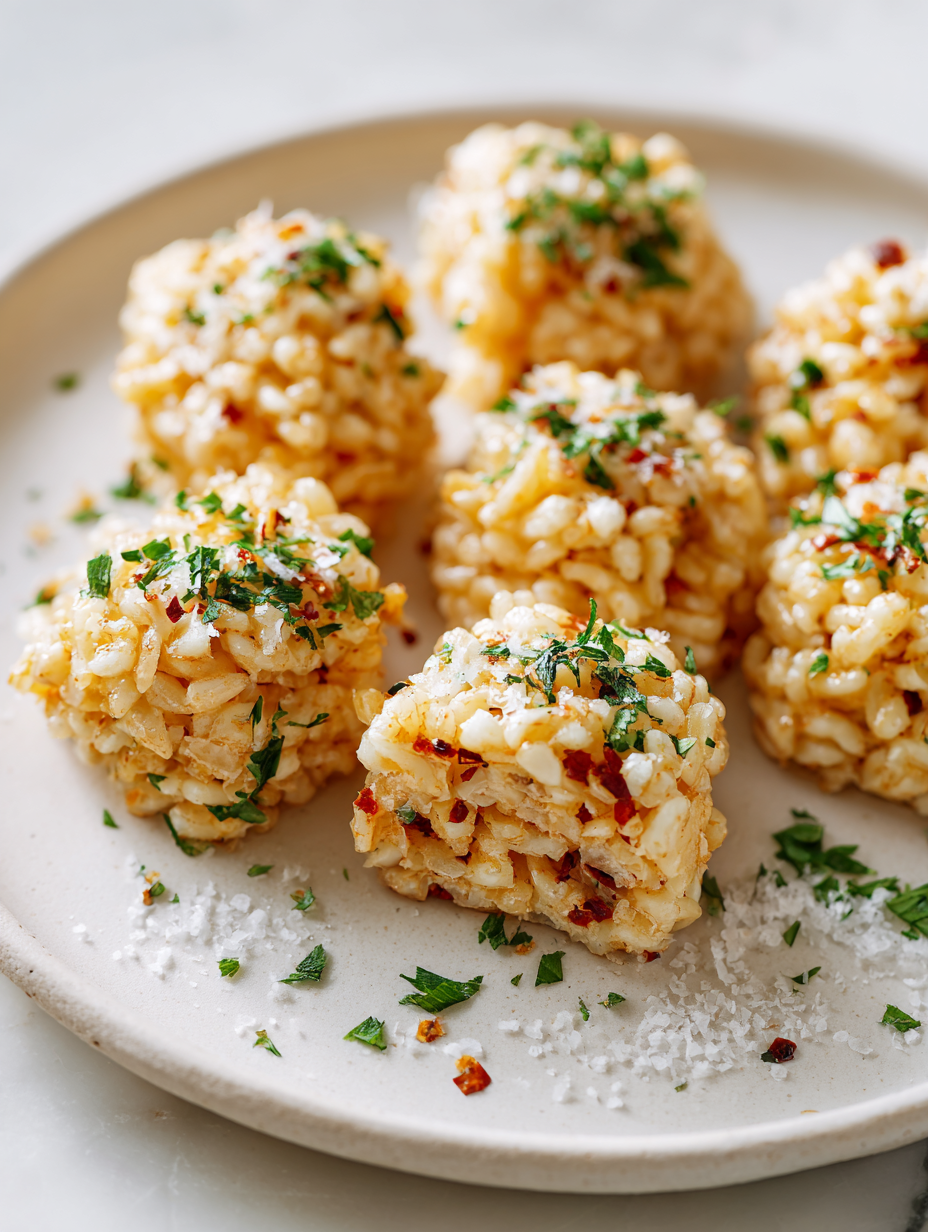
No-Bake Rice Krispie Bites with a Savory Twist
Ingredients
Equipment
Method
- Line your pan with parchment paper and set aside. In a large bowl, combine the mini marshmallows and butter. Microwave in 30-second bursts, stirring after each, until the mixture is smooth, bubbly, and fragrant, about 1-2 minutes.
- Pour the melted marshmallow mixture over the cereal, then sprinkle with sea salt or smoked paprika. Use a silicone spatula to gently fold and coat all the cereal evenly with the gooey mixture, making sure every piece gets covered.
- Transfer the coated cereal mixture into the prepared pan. Press down gently with the back of a spatula or damp hands to create an even, compact layer without pressing too hard, which keeps the bites light and tender.
- Let the mixture sit at room temperature for about 30 minutes to set. For quicker results, you can refrigerate it for 15 minutes, but avoid over-hardening.
- Once firm, lift the set mixture out of the pan using the parchment paper. Use a sharp knife to cut into 12-16 squares, wiping the blade with a damp cloth between slices for clean edges.
- Serve these bites immediately for the best texture or store them in an airtight container at room temperature for up to 2 days, or in the fridge for longer freshness. Enjoy the perfect balance of crunchy, gooey, sweet, and savory in every bite!
Pro tips for perfect Krispie bites
- Use slightly damp hands when pressing the mixture into the pan to prevent sticking and ensure an even layer.
- Microwave marshmallows in short bursts, about 30 seconds, to prevent burning and achieve a smooth, oozy texture.
- Stir the cereal quickly after adding the marshmallow mixture to coat all pieces evenly before it starts to set.
- Let the assembled bites sit at room temperature for at least 30 minutes, or chill in the fridge for 15 minutes, for best firmness.
- Wipe your knife with a damp cloth between cuts to get clean, sharp slices without crumbling or sticking.
- Add a pinch of sea salt to the mixture for a flavor boost—try smoked paprika for a surprising smoky note.
- If the mixture cools too much and becomes stiff, microwave for 10 seconds to loosen it up for easier mixing.
Common mistakes and how to fix them
- FORGOT to evenly press mixture → Use damp hands to avoid sticking.
- DUMPED too much marshmallow → Measure carefully for the right gooey consistency.
- OVER-TORCHED marshmallows → Microwave in short bursts to prevent burning.
- MISSED to chill before cutting → Rest in fridge for cleaner slices and better shape.
Quick fixes and pantry swaps
- When mixture is too stiff, splash in a little warm water and stir gently.
- If bites crumble, patch with a tiny dab of melted marshmallow to hold together.
- Splash a few drops of vanilla or salt if flavour feels flat or dull.
- Patch over cracks with a small spoon of melted marshmallow for quick fixes.
- Shield sensitive cereals from moisture by storing in airtight containers to keep crunch crisp.
Prep, store, and reheat tips
- You can prepare the mixture a day in advance; keep it covered in the fridge to prevent drying out, which helps it stay sticky and easy to press into the pan.
- Store the assembled bites in an airtight container at room temperature for up to 2 days, or in the fridge for 4–5 days—expect a firmer texture over time.
- For longer storage, freeze the bites in a single layer on a baking sheet, then transfer to a zip-top bag; they’ll last up to 3 months, but expect some textural change once thawed.
- Reheat by letting the bites come to room temperature or giving them a quick 10-second zap in the microwave; they should soften slightly and smell warm and sweet, ready to enjoy.
Top questions about Rice Krispie Bites
1. Can I use regular marshmallows instead of mini ones?
Use mini marshmallows for easier melting and a smoother texture. Regular-sized marshmallows work too, but may take longer to melt.
2. Can I make these without marshmallows?
Yes, you can substitute honey or maple syrup, but you’ll need extra cereal to get the right consistency.
3. How do I prevent the cereal from sticking together unevenly?
Stir quickly after adding the marshmallow mixture to evenly coat all the cereal before it starts to set.
4. Should I refrigerate the bites after making them?
Chill the bites in the fridge for about 15 minutes for a firmer texture, or leave at room temperature for softer bites.
5. How can I flavor these bites beyond sweet?
Add a pinch of sea salt or smoked paprika to enhance flavor and add a surprising savory note.
6. How do I cut the bites neatly?
Use a sharp knife wiped with a damp cloth between cuts for clean slices without crumbling.
7. How long do these bites stay fresh?
Store in an airtight container at room temperature for 2 days or in the fridge for up to 5 days.
8. Can I freeze these bites?
Freeze for up to 3 months by laying the bites on a baking sheet first, then transfer to a bag.
9. What if the mixture cools too much and becomes stiff?
Microwave for 10 seconds if the mixture becomes too stiff, or if the bites are too hard after chilling.
10. Can I make these dairy-free?
Use coconut oil instead of butter for a dairy-free option that still binds well and adds a subtle aroma.
These no bake Rice Krispie bites are a messy, nostalgic treat that somehow feels both comforting and fun to make. They’re perfect for days when a quick sweet fix is needed, and they bring a little chaos into the kitchen in the best way. Sometimes, the simplest ingredients create the most satisfying moments.
Sharing these bites with friends or family turns into a small celebration of childhood flavors with a twist. No matter how many times I make them, I’m always surprised by how quickly they disappear. That’s the thing about simple, honest snacks—they remind us to enjoy the little, imperfect moments.

Hi, I’m Grace Morgan, and welcome to my kitchen. This is a space shaped by family meals, curious hands reaching for snacks, paws under the table, and recipes that come together in the middle of real life. I’m a food blogger, a mother, and a passionate pet keeper. Most days, I’m cooking with one eye on the stove and the other on someone who needs me, whether that’s a child asking for a taste or a dog hoping something might fall.


