Making no-bake granola bars is like capturing a piece of childhood chaos—sticky fingers, spilled oats, and that satisfying press into a pan. It’s one of those recipes that feels equal parts nostalgic and practical, especially on mornings when time slips away faster than I can brew my coffee. There’s something about the simplicity of mixing, pressing, and chilling that makes me feel a little like a kid again, just with a more discerning palate.
These bars aren’t just a treat—they’re a little act of rebellion against the over-processed snacks that fill store shelves. I love how you can customize them with whatever nuts, seeds, or dried fruit you have on hand, making each batch uniquely yours. And the best part? No oven, no fuss, just a handful of ingredients coming together into something that’s both satisfying and honest—perfect for rushed weekday mornings or those spontaneous snack attacks.
Focusing on the nostalgic joy of creating a healthy, no-bake snack that’s as satisfying to make as it is to eat, perfect for busy mornings or spontaneous cravings.
The story behind this recipe
- I remember the first time I made these bars during a particularly busy week. I was craving something sweet and nourishing, and I didn’t want to turn on the oven. That moment of mixing everything in one bowl and pressing it into a pan felt like a small victory, especially when I realized I could customize the ingredients to match what I had in the pantry. Over the years, they’ve become my go-to for quick breakfasts and emergency snacks, especially when I want something homemade but don’t want to fuss over baking.
- These bars remind me of lazy weekend mornings when I’d gather all the bits and bobs from the kitchen—nuts, seeds, dried fruit—and turn them into something portable. It’s the kind of recipe that feels like a little act of creativity amid the chaos. Every batch carries a bit of nostalgia, a reminder that good things don’t need to be complicated or oven-dependent to taste just right.
- heading
Ingredient breakdown: key components
- Oats: I use old-fashioned rolled oats, which give a hearty chew and absorb the sticky binder beautifully. Swap with quick oats if you prefer a softer texture, but expect a less chewy bar.
- Honey: I love the golden, floral aroma honey adds, it helps everything stick together and sweetens naturally. Maple syrup can be a good substitute, bringing a slightly different, richer sweetness.
- Nuts: Chopped almonds or walnuts add crunch and richness. If you’re allergic or want a nut-free version, try toasted coconut flakes for a different kind of crunch.
- Dried Fruit: I prefer cranberries or raisins for bursts of tartness and sweetness. Dried apricots or cherries work well too, but remember they can be a bit chewier—so chop them small.
- Butter: A touch of melted butter helps everything meld together and adds a subtle richness. For a dairy-free version, coconut oil works, but it’ll add a faint coconut aroma and a slightly softer texture.
- Seeds: Sunflower or pumpkin seeds add a nutty flavor and extra crunch. Toast them lightly before mixing for a more pronounced flavor and aroma.
- Chocolate: Optional but irresistible. I like dark chocolate chips or chunks—melty and rich. For a healthier twist, try cacao nibs, which add bitterness and crunch.
Spotlight on key ingredients
Oats:
- I use old-fashioned rolled oats, which give a hearty chew and absorb the sticky binder beautifully. Swap with quick oats if you prefer a softer texture, but expect a less chewy bar.
- Honey: I love the golden, floral aroma honey adds, it helps everything stick together and sweetens naturally. Maple syrup can be a good substitute, bringing a slightly different, richer sweetness.
- Nuts: Chopped almonds or walnuts add crunch and richness. If you’re allergic or want a nut-free version, try toasted coconut flakes for a different kind of crunch.
Dried Fruit & Butter:
- Dried Fruit: I prefer cranberries or raisins for bursts of tartness and sweetness. Dried apricots or cherries work well too, but remember they can be a bit chewier—so chop them small.
- Butter: A touch of melted butter helps everything meld together and adds a subtle richness. For a dairy-free version, coconut oil works, but it’ll add a faint coconut aroma and a slightly softer texture.
Notes for ingredient swaps
- Sweeteners: Honey adds a floral sweetness and sticky texture, but maple syrup or agave nectar work well for a different flavor profile and are plant-based options.
- Nuts: Chopped almonds or walnuts provide crunch and richness, but toasted coconut flakes can be a great nut-free alternative that adds a chewy, tropical note.
- Dried Fruit: Cranberries or raisins bring tartness and sweetness. Apricots or cherries are good swaps but may be chewier—chop smaller for even distribution.
- Butter: Melted butter lends richness and helps bind ingredients. Coconut oil can replace it for a dairy-free version, though it imparts a faint coconut aroma and softer texture.
- Oats: Old-fashioned rolled oats give chew and absorb the binder well. Quick oats can be used if you prefer a softer, less chewy bar—just expect a slightly different texture.
- Seeds: Sunflower or pumpkin seeds add crunch and nutty flavor. Toast before mixing for more aroma and deeper flavor.
- Chocolate: Dark chocolate chips are classic, but cacao nibs provide a bitter, crunchy contrast. For dairy-free, try carob chips or omit entirely.
Equipment & Tools
- Baking pan (20×20 cm): Holds and shapes the bars as they set.
- Parchment paper: Prevents sticking and makes removal easy.
- Large mixing bowl: Combines dry ingredients easily.
- Spatula: Folds ingredients and presses mixture into pan.
- Sharp knife: Cuts bars into desired size after setting.
Step-by-step guide to no-bake bars
- Gather your equipment: a 20×20 cm (8×8 inch) baking pan, parchment paper, a large mixing bowl, a spatula, and a sharp knife. Line the pan with parchment, leaving some overhang for easy removal.
- In the mixing bowl, combine 2 cups of rolled oats, 1/2 cup of chopped nuts, 1/2 cup of dried fruit, and 1/4 teaspoon of salt. Mix until evenly distributed.
- In a small saucepan over low heat, melt 1/3 cup honey and 1/4 cup butter (or coconut oil) together. Stir until smooth and fragrant, about 2-3 minutes. Remove from heat.
- Pour the warm honey mixture over the dry ingredients. Use a spatula to fold and coat everything thoroughly. The mixture should be sticky and well combined.
- Transfer the mixture to the prepared pan. Using the spatula or the back of a cup, press firmly and evenly into the pan. Ensure the surface is flat and compacted, about 1 inch thick.
- Place the pan in the refrigerator and chill for at least 2 hours, or until firm. During this time, the bars will set and become easier to cut.
- Once chilled, lift the mixture out of the pan using the parchment overhang. Place on a cutting board and cut into 8-10 bars, depending on your preferred size.
- Wrap each bar individually in wax paper or store in an airtight container. Keep refrigerated for up to one week, or freeze for longer storage.
- To serve, enjoy straight from the fridge for a chewy texture or at room temperature for a softer bite. No reheating needed.
Chill the bars in the fridge for at least 2 hours until firm. Use the parchment overhang to lift and cut into portions. Wrap individually or store in an airtight container in the fridge. Enjoy within a week or freeze for longer storage.
How to Know It’s Done
- Mixture is sticky and evenly coated when folding.
- Bars are firm and hold shape after chilling.
- Surface is smooth and compact when pressed into the pan.
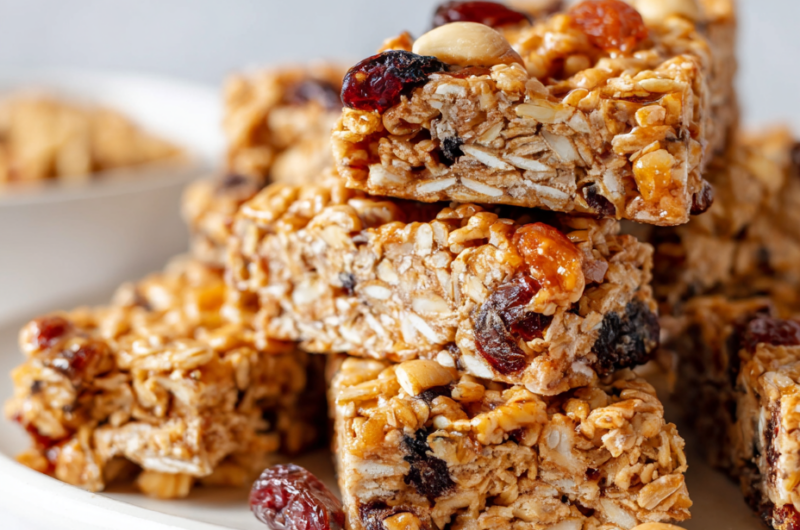
No-Bake Granola Bars
Ingredients
Equipment
Method
- Line your baking pan with parchment paper, leaving some overhang for easy removal.
- In a large mixing bowl, combine the oats, chopped nuts, dried fruit, salt, and toasted seeds. Mix everything together until evenly distributed and looks colorful and textured.
- In a small saucepan over low heat, gently warm the honey and melted butter until they become fragrant and slightly runny, about 2-3 minutes. Stir occasionally to combine.
- Pour the warm honey mixture over the dry ingredients. Use a spatula to fold everything together, pressing the mixture into the bowl to coat all the ingredients evenly. It should be sticky and hold together well.
- Transfer the mixture into the prepared pan. Using the spatula or the back of a sturdy cup, press down firmly and evenly across the surface. Make sure to compress the mixture well for sturdy bars.
- Place the pan in the refrigerator and chill for at least 2 hours until the mixture is set and firm.
- Once chilled, lift the set mixture out of the pan using the parchment overhang. Place it on a cutting board and cut into 8-10 bars with a sharp knife.
- Wrap each bar individually in wax paper for freshness, or store them in an airtight container in the fridge. They’re best enjoyed within a week.
- Enjoy your chewy, crunchy homemade granola bars straight from the fridge or at room temperature for a softer bite.
Quick tips for perfect bars
- Bolded mini-head: Use a silicone spatula → It Scrapes the bowl thoroughly, ensuring no sticky bits are left behind.
- Bolded mini-head: Warm honey slightly → It flows better and coats ingredients evenly, making mixing easier.
- Bolded mini-head: Press firmly into pan → Compact the mixture well to prevent crumbling when cutting.
- Bolded mini-head: Chill thoroughly → At least 2 hours in the fridge helps the bars set completely, avoiding mushiness.
- Bolded mini-head: Evenly distribute ingredients → Toss nuts and dried fruit in flour before adding for better spread and less sinking.
- Bolded mini-head: Use parchment overhang → It makes removing the set mixture smooth and clean, avoiding sticking.
Common mistakes and how to fix them
- FORGOT to evenly press mixture → use a flat-bottomed object for compacting.
- DUMPED mixture too hot → wait 5 minutes before pressing into the pan.
- OVER-TORCHED honey → reduce heat and stir constantly to prevent burning.
- MISSED chilling time → ensure a full 2 hours for proper set.
Quick fixes and pantry swaps
- When mixture is too sticky, splash a little warm water to loosen it.
- If bars crumble, patch with a tiny bit of honey and press again.
- Over-torched honey? Shield the pan with a heat diffuser and stir constantly.
- Forgot to chill? Rescue with a 5-minute blast in the freezer for quick setting.
- Pan swap: use a silicone mold for easier removal and a cleaner finish.
Prep, store, and reheat tips
- Pre-chop dried fruits and nuts to save time and ensure even distribution later.
- Store the prepared dry ingredients in an airtight container for up to a week to keep them fresh and ready to mix.
- The assembled mixture can be refrigerated for at least 30 minutes before pressing, making it easier to handle if it’s too sticky.
- Bars can be wrapped individually in wax paper and kept in the fridge for up to a week; freeze for longer storage.
- Refrigerated bars develop a firmer texture; serve straight from the fridge or let sit at room temperature for 10 minutes to soften slightly.
No Bake Granola Bars FAQs
1. Can I use a different sweetener?
Yes, you can swap honey with maple syrup or agave nectar. The texture stays sticky, but flavor may shift slightly.
2. Can I omit nuts or use different ones?
Absolutely. Nuts like almonds or walnuts add crunch, but toasted coconut flakes work well as a nut-free option.
3. Can I substitute dried fruit?
Dried cranberries or raisins are classic, but you can use chopped apricots or cherries for varied flavor and texture.
4. What if I need dairy-free options?
Yes, coconut oil can replace butter for a dairy-free version, but expect a softer, slightly coconut-scented bar.
5. Can I use quick oats instead?
Quick oats will give a softer, less chewy bar. Expect a different bite but still tasty.
6. Can I add chocolate?
Chopped chocolate chips melt slightly during mixing, creating pockets of rich, melty bits in each bite.
7. How do I know when they’re ready?
Ensure the mixture is firm and holds shape after chilling. If not, chill longer or press more firmly.
8. How should I store them?
Wrap bars individually in wax paper for freshness. They last up to a week refrigerated or longer frozen.
9. What if the mixture is too sticky?
If mixture is too sticky, lightly dust your hands with oats or chill the mixture briefly before pressing.
10. How do I cut the bars neatly?
Use a sharp knife for clean cuts. Warming the blade slightly with hot water helps slice smoothly.
These no-bake granola bars are a quiet reminder that simple ingredients can create something genuinely satisfying. They’re perfect for when the pantry is calling for a little improvisation or when you need a quick, honest snack. Every time I make a batch, I appreciate how they bring a bit of that childhood chaos into my busy days.
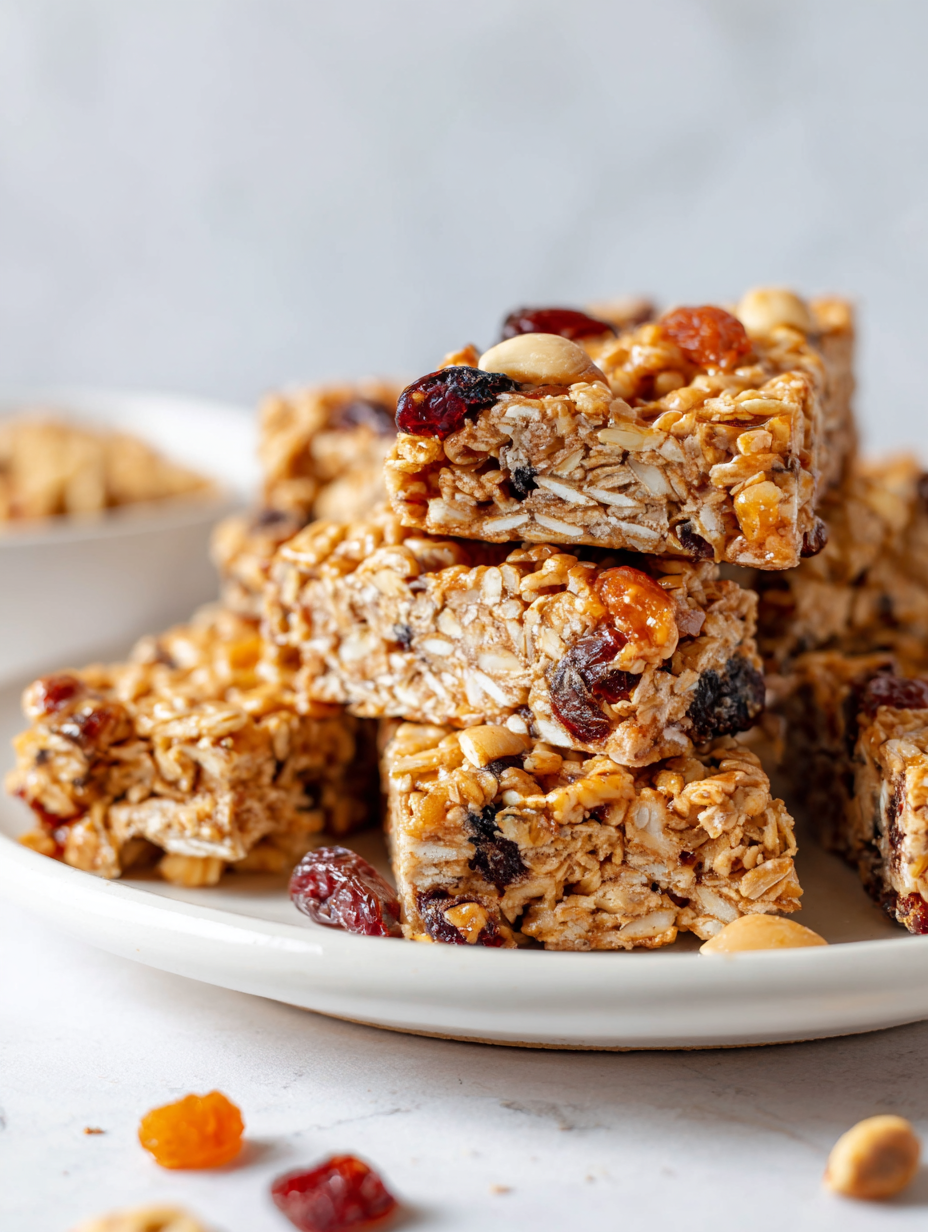
Plus, they’re a flexible canvas—change up the dried fruit or nuts, and each batch feels fresh and personal. No matter how many you stash away, I find myself reaching for them at just the right moment, craving that chewy, nutty bite that’s both familiar and just a little bit special.

Hi, I’m Grace Morgan, and welcome to my kitchen. This is a space shaped by family meals, curious hands reaching for snacks, paws under the table, and recipes that come together in the middle of real life. I’m a food blogger, a mother, and a passionate pet keeper. Most days, I’m cooking with one eye on the stove and the other on someone who needs me, whether that’s a child asking for a taste or a dog hoping something might fall.


