These no-bake nut bars are my go-to for those mornings when I wake up with a sugar craving and no time to spare. They’re quick to mix, no oven required, and somehow manage to be both satisfying and just a little bit nostalgic. I keep a stash in the fridge, ready to rescue me from last-minute sweet emergencies or busy afternoons that demand a little crunch. It’s the kind of recipe that’s become a staple because it’s honest, simple, and totally adaptable to whatever nuts or dried fruits I have lying around.
There’s something about the act of pressing these ingredients into a pan that feels almost meditative, a small ritual of self-care amid chaos. Over the years, I’ve tweaked this recipe to suit my taste—adding a dash of sea salt or a sprinkle of cinnamon—because, let’s be real, it’s all about making it yours. These bars aren’t fancy, but they’re honest, packed with texture, and taste like a little bit of homemade comfort in every bite.
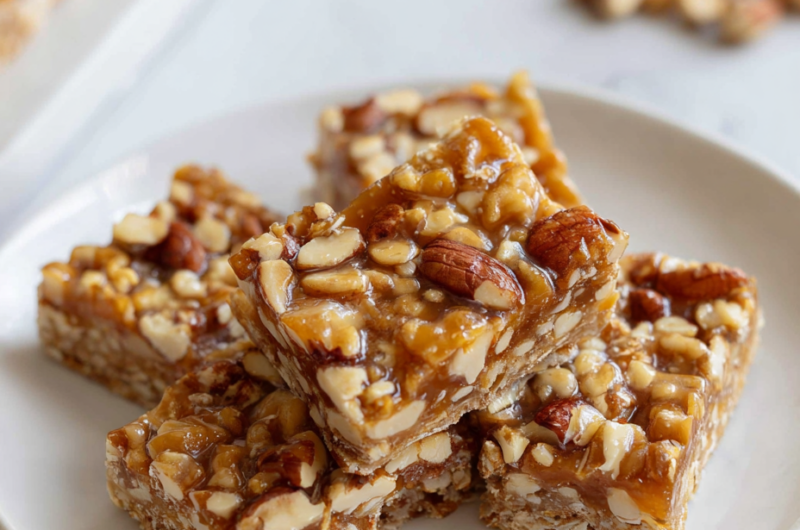
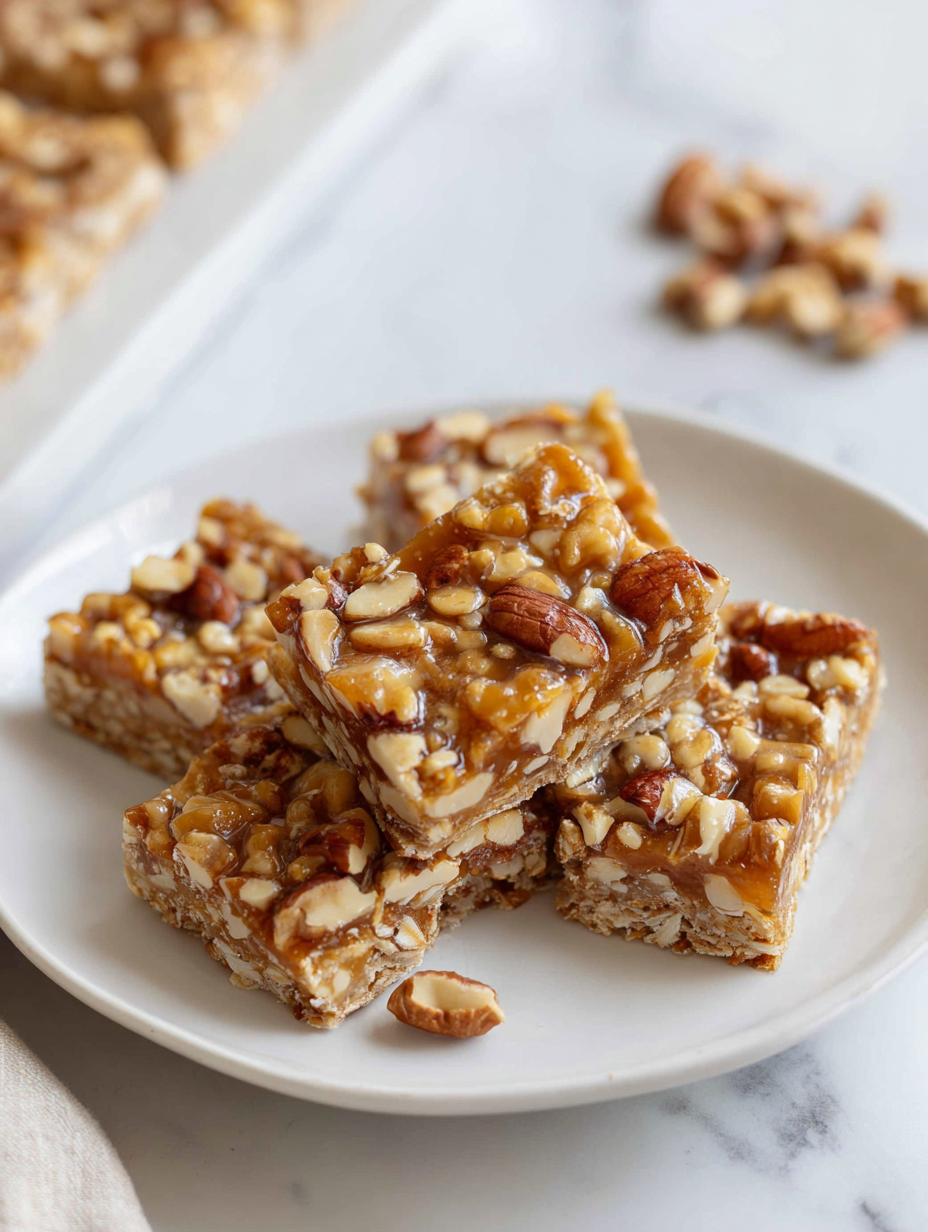
How these no-bake nut bars became my emergency snack, saving me from last-minute sweet cravings and busy mornings.
The story behind this recipe
This recipe started as a way to make a satisfying treat without turning on the oven on scorching summer days. I remember the moment I realized I could press sticky, nutty goodness into a pan and let it set in the fridge—no baking, no fuss. It became a quick fix for unexpected guests, a last-minute snack, or just a small act of self-indulgence after a long day. Over time, I tweaked the ratios, experimented with different nuts, and found that the simplicity of pressing ingredients together is oddly grounding, a little ritual that always leaves me with a snack I trust.
Ingredient breakdown
- Honey: I love the way it adds a subtle sweetness and binds everything together; it’s sticky and fragrant. If you want less sweetness, cut back a bit—your bars will still hold well.
- Mixed nuts: I prefer a chunky mix—almonds, cashews, pecans—each bite offers a different crunch and flavor. Swap in your favorites, but keep the weight consistent for the right texture.
- Dried fruits: Diced dates or apricots add chewiness and a burst of natural sweetness. For a smoky twist, try dried cherries or cranberries—just chop them small.
- Oats: Rolled oats give structure and a nutty flavor. Use gluten-free oats if needed, but avoid instant oats—they can make the bars crumbly.
- Coconut oil: It keeps the mixture moist and glossy, plus it helps set the bars firm. If you’re out, a little butter works, but expect a slightly richer flavor.
- Sea salt: Just a pinch enhances the nuts and honey—don’t skip it. If you’re salt-sensitive, reduce a bit, but it really balances the sweetness.
- Vanilla extract: A splash adds warmth and depth. Skip if you prefer a more straightforward nutty flavor, but I find it elevates the whole thing.
Spotlight on key ingredients
Nuts:
- Honey: It’s sticky, fragrant, and adds a gentle sweetness that helps everything bind together. If you want less sweetness, cut back a little—your bars will still hold well.
- Mixed nuts: They bring crunch and flavor variety—almonds, cashews, pecans—each offers a different texture and taste. Chop them roughly so they distribute evenly and bite nicely.
Dried Fruits:
- Diced dates or apricots add chew and natural sweetness, making each bite a little more interesting. For smoky depth, dried cherries or cranberries work beautifully—just chop small for even distribution.
- Honey: It’s the glue of these bars—smooth, sweet, and fragrant. It melts into the nuts and oats, giving a glossy, sticky texture that sets as it chills.
Notes for ingredient swaps
- Dairy-Free: Swap honey for agave syrup for a plant-based binding that’s slightly less sweet and has a mild caramel taste.
- Nut-Free: Use sunflower or pumpkin seeds instead of nuts. They offer a similar crunch but a different flavor profile.
- Sweetener: Maple syrup can replace honey, adding a richer, more complex sweetness and a hint of caramel aroma.
- Oil: Coconut oil can be swapped for butter or vegan margarine. Expect a slightly different texture and richer flavor.
- Dried Fruits: Apricots or cranberries work well, offering tartness and chewy texture. Adjust quantity for preferred sweetness.
- Oats: Quinoa flakes can substitute rolled oats for a lighter, slightly nuttier crunch. Keep the weight consistent.
- Flavor Boost: A pinch of cinnamon or nutmeg can add warmth; skip if you prefer a straightforward nutty bar.
Equipment & Tools
- Square pan: For pressing, chilling, and cutting the bars.
- Saucepan: Melting honey and coconut oil evenly.
- Spatula or spoon: Mixing ingredients and pressing the mixture into the pan.
- Parchment paper or silicone mat: Prevent sticking and make removal easy.
- Knife: Cutting the set bars into neat rectangles.
Step-by-step guide to no bake nut bars
- Gather your equipment: a 20×20 cm (8×8 inch) square pan, a spatula or spoon, a saucepan, and a parchment paper or silicone mat for lining. The pan is for pressing and setting, the saucepan for melting, and the paper for easy removal.
- Chop your nuts: roughly chop 1 ½ cups of mixed nuts—almonds, cashews, pecans. Smaller pieces distribute better and bite-sized crunch is key.
- Measure your honey and coconut oil: ½ cup honey and ¼ cup coconut oil. Set aside; these will melt together to bind your bars.
- Melt the binder: In a small saucepan over low heat (about 90°C/194°F), warm honey and coconut oil. Stir gently until combined and fragrant, about 2-3 minutes. You should smell warm, toasted notes.
- Combine ingredients: In a large mixing bowl, toss the chopped nuts, 1 cup rolled oats, ½ cup dried fruit (chopped), a pinch of sea salt, and a teaspoon vanilla. Pour the melted honey mixture over and stir until evenly coated. If the mixture feels too dry, add a drizzle more honey.
- Press into pan: Line your pan with parchment or a silicone mat. Transfer the nut mixture and press firmly with a spatula or the back of a spoon to compact. The surface should be level and firm, about 5 minutes of pressing.
- Set in fridge: Cover loosely with plastic wrap or foil. Chill for at least 2 hours, until firm and set. This helps the bars hold together when cut.
- Cut into bars: Use a sharp knife to slice into 8-10 rectangles. For cleaner cuts, wipe the knife with a damp cloth between slices.
- Store: Keep bars in an airtight container in the fridge. They stay good for up to 2 weeks, or freeze for longer storage. Let them sit at room temperature for 5 minutes before serving if chilled too hard.
Chill the bars in the fridge for at least 2 hours until firm. Once set, slice carefully with a sharp knife. Store in an airtight container in the fridge for up to 2 weeks. For serving, let the bars sit at room temperature for 5 minutes to soften slightly and enhance flavor.
How to Know It’s Done
- The mixture is evenly coated and holds together when pressed.
- Bar edges are clean and slices don’t crumble easily.
- The set has a firm but not brittle texture, with a glossy appearance.
No-Bake Nut Bars
Ingredients
Equipment
Method
- Line your square pan with parchment paper or a silicone mat to prevent sticking.
- Roughly chop 1 ½ cups of mixed nuts—almonds, cashews, pecans—to ensure they distribute evenly and offer satisfying crunch.
- In a small saucepan, gently warm ½ cup honey and ¼ cup melted coconut oil over low heat for about 2-3 minutes, until fragrant and just combined.
- In a large mixing bowl, combine the chopped nuts, 1 cup rolled oats, ½ cup dried fruits, a pinch of sea salt, and a teaspoon of vanilla extract. Toss everything together.
- Pour the warm honey and coconut oil mixture over the dry ingredients and stir well until everything is evenly coated and sticky.
- Transfer the mixture to the prepared pan and press firmly with the back of a spatula or spoon to create an even, compact layer. This helps release tension and ensures good set.
- Loosely cover the pan and place it in the fridge for at least 2 hours, or until the mixture is firm and set.
- Once firm, use a sharp knife to carefully cut the set mixture into 8-10 bars, wiping the knife with a damp cloth between cuts for clean edges.
- Store the bars in an airtight container in the fridge for up to 2 weeks, or freeze for longer storage. Let sit at room temperature for 5 minutes before serving to soften slightly.
Pro tips for perfect bars
- Use a silicone spatula for gentle, even pressing—avoids sticking and helps compact the mixture thoroughly.
- Warm the honey and oil slowly over low heat—just enough to melt, releasing fragrant notes without caramelizing.
- Chop nuts roughly—smaller pieces distribute more evenly and enhance crunch in every bite.
- Chill the pressed mixture in the fridge until just firm—about 2 hours—to prevent crumbling when cutting.
- Wipe your knife with a damp cloth between slices—keeps cuts clean and prevents sticking, for neat bars.
- If the mixture feels too dry, add a teaspoon of honey—just enough to bring everything together without making it sticky.
- For extra flavor, lightly toast nuts before chopping—brings out richer aroma and deeper crunch.
Common mistakes and how to fix them
- FORGOT to read the recipe, resulting in uneven mixing and poor setting.
- DUMPED in too much honey; causes overly sticky bars that won’t set properly.
- OVER-TORCHED the nuts during chopping; switch to a sharp knife to avoid burnt flavors.
- MISSED the chilling step; bars won’t firm up or hold together without proper refrigeration.
Quick fixes and pantry swaps
- If mixture is too sticky, splash in a little more oats to balance moisture.
- When bars crumble, patch with a thin drizzle of honey and press again.
- Splash a few drops of water on your chocolate if it seizes during melting.
- When nuts release too much oil, dump and toast fresh nuts for better crunch.
- Patch over cracks in the set bars with a thin layer of melted chocolate to seal imperfections.
Prep, store, and reheat tips
- You can prepare the nut mixture a day ahead; keep it covered in the fridge to maintain freshness and prevent it from drying out.
- Store the fully set bars in an airtight container in the fridge; they stay good for up to two weeks, with flavors mellowing slightly over time.
- For longer storage, freeze the bars wrapped tightly in plastic wrap and then in a freezer bag; they can last up to three months.
- Reheat chilled bars briefly at room temperature for 5 minutes to soften slightly before serving, enhancing the nutty aroma and chewy texture.
- If the bars become too sticky or lose their shape, let them sit at room temperature for a few minutes or add a sprinkle of crushed nuts on top for texture contrast.
Top questions about no bake nut bars
1. Can I make these nut bars vegan?
Yes, you can substitute honey with maple syrup or agave nectar for a vegan option that still holds the bars together well.
2. Are these bars gluten-free?
Absolutely, using gluten-free oats and ensuring your dried fruits are gluten-free makes this recipe suitable for gluten sensitivities.
3. My mixture is too sticky, what should I do?
If the mixture is too sticky, add a bit more oats or chopped nuts to absorb the excess moisture and make it easier to press into the pan.
4. How long should I chill the bars?
Chill the bars for at least 2 hours in the fridge. They should be firm, set, and easy to cut cleanly without crumbling.
5. How long do these bars last in the fridge?
You can keep these bars in an airtight container in the fridge for up to 2 weeks, or freeze them for longer storage.
6. How do I prevent sticking when pressing the mixture?
To prevent the bars from sticking, line your pan with parchment paper and press the mixture firmly with the back of a spatula.
7. How do I get clean cuts in the bars?
Use a sharp knife wiped with a damp cloth between cuts for clean, neat edges and to avoid crumbling.
8. The bars are crumbly, what can I do?
If the bars are too crumbly or dry, add a teaspoon of honey or melted coconut oil to increase moisture and cohesion.
9. Can I change the nuts in the recipe?
Feel free to swap out nuts based on what you have—pistachios, walnuts, or hazelnuts all work well and add unique flavors.
10. Can I customize the flavor?
Yes, these bars are quite forgiving. Adjust sweetness with more or less honey, and add spices like cinnamon or ginger for extra warmth.
These no-bake nut bars are a quiet reminder that simple ingredients can create something unexpectedly satisfying. They’re honest, flexible, and perfect for when you need a quick, no-fuss snack that still feels like a little treat. More than just a recipe, they’re a small act of everyday practicality that keeps me grounded amid busy days.
In a world full of complicated desserts, these bars stay close to the basics—crunchy, sticky, nutty, and just a hint of sweetness. They’re a small, honest pleasure that I come back to when I want something familiar but with a little extra crunch. Sometimes, that’s all you need.

Hi, I’m Grace Morgan, and welcome to my kitchen. This is a space shaped by family meals, curious hands reaching for snacks, paws under the table, and recipes that come together in the middle of real life. I’m a food blogger, a mother, and a passionate pet keeper. Most days, I’m cooking with one eye on the stove and the other on someone who needs me, whether that’s a child asking for a taste or a dog hoping something might fall.


