Making no-bake chocolate coconut bars takes me back to lazy summer afternoons in my childhood. My grandma’s kitchen was always filled with the smell of toasted coconut and melting chocolate, a scent that still makes me smile. These bars are messy, quick, and honest—pretty much how life in her kitchen always was.
There’s something freeing about whipping up a treat without turning on the oven, especially when it’s hot outside. I love that these bars come together with just a few simple ingredients, and they’re ready to chill when I need something sweet but don’t want to fuss. It’s that perfect mix of nostalgia, practicality, and a little bit of indulgence.
This recipe is inspired by childhood memories of helping my grandma in the kitchen, where no-bake treats like these were a staple during the summer heat. It’s about capturing that simple joy of mixing, pressing, and chilling, with all the messy, loving chaos of a busy family kitchen. These bars remind me that sometimes, the best desserts are the easiest—no oven, no fuss, just raw, rich flavor.
The story behind this recipe
This recipe came from a summer spent rummaging through my mom’s old recipe box, where I found a crinkled note about her childhood favorite—no bake coconut bars. That simple, sweet memory made me realize how much I love recipes that are quick, honest, and carry a bit of family history. It’s like capturing a moment of childhood chaos in every bite, with gooey chocolate and toasted coconut that still warm my nose and tongue.
Key ingredients and tips
- Coconut flakes: I use toasted coconut for that deep, nutty aroma, but if you prefer a softer bite, try untoasted. The scent of toasted coconut crackling in the pan is my favorite part.
- Dark chocolate: I love a good bittersweet chocolate here; it balances the sweetness. You can swap in semi-sweet or even milk chocolate, but expect a milder cocoa punch.
- Sweetened condensed milk: It’s the glue that holds these bars together—creamy, thick, and sweet. If you want a less sweet version, try coconut cream but add a touch of honey or maple syrup.
- Butter: I melt a bit to help bind everything smoothly, but for a dairy-free version, coconut oil works well. It adds a faint coconutty shimmer and keeps the texture rich.
- Vanilla extract: Just a splash to enhance all those flavors, but you could swap it for a hint of almond or coconut extract if you want a different aroma. It’s the little whisper of warmth.
- Optional toppings: I often sprinkle sea salt or chopped nuts on top before chilling—these little touches add contrast and crunch, but feel free to skip or customize based on what you have in hand.
- Salt: Just a pinch to cut through the sweetness and brighten all the flavors—don’t skip it, even if it’s not in your usual baking routine.
Spotlight on key ingredients
Coconut flakes:
- I use toasted coconut for that deep, nutty aroma, but if you prefer a softer bite, try untoasted. The scent of toasted coconut crackling in the pan is my favorite part.
- Dark chocolate: I love a good bittersweet chocolate here; it balances the sweetness. You can swap in semi-sweet or even milk chocolate, but expect a milder cocoa punch.
Sweetened condensed milk and butter:
- Sweetened condensed milk: It’s the glue that holds these bars together—creamy, thick, and sweet. If you want a less sweet version, try coconut cream but add a touch of honey or maple syrup.
- Butter: I melt a bit to help bind everything smoothly, but for a dairy-free version, coconut oil works well. It adds a faint coconutty shimmer and keeps the texture rich.
Notes for ingredient swaps
- Coconut flakes: I prefer toasted for that deep, nutty aroma. Skip to untoasted if you want softer texture and milder scent.
- Dark chocolate: I love bittersweet for balance, but semi-sweet or milk chocolate will make it sweeter and creamier, less intense cocoa.
- Sweetened condensed milk: It’s the glue—creamy and thick. Coconut cream works for less sweetness, add honey or maple for flavor.
- Butter: Melts smoothly to bind. Coconut oil is a good dairy-free swap, adds a faint coconut shimmer and rich mouthfeel.
- Vanilla extract: Just a splash deepens everything. Almond or coconut extract can add a different aromatic twist, use sparingly.
- Optional toppings: Sea salt, chopped nuts, or sprinkles. They add contrast and crunch, but feel free to skip or customize based on what you like.
- Salt: Just a pinch brightens all flavors. It’s essential even if you usually skip salt in baking—it balances the sweetness.
Equipment & Tools
- 20cm (8-inch) square pan: Holds the mixture for setting and slicing.
- Parchment paper: Prevents sticking and makes removal easier.
- Microwave-safe bowl: Melts chocolate evenly without mess.
- Spatula: Mixes ingredients thoroughly and presses mixture into pan.
Step-by-step guide to no bake bars
- Equipment & tools: Line a 20cm (8-inch) square pan with parchment paper, a microwave-safe bowl for melting chocolate, and a spatula for mixing.
- Toast coconut: In a dry skillet over medium heat (160°C/320°F), toast coconut flakes until golden and fragrant, about 3-4 minutes. Shake often to prevent burning. Remove from heat and let cool slightly.
- Melt chocolate: In the microwave, heat chocolate in 30-second bursts, stirring in between, until smooth. Be careful not to overheat; chocolate should be shiny and slightly runny, not grainy.
- Combine ingredients: In a large bowl, mix toasted coconut, melted chocolate, sweetened condensed milk, melted butter, and vanilla until well combined. The mixture should be thick and sticky with a rich aroma.
- Press into pan: Transfer the mixture to your prepared pan. Use a spatula or the back of a spoon to press evenly into the corners and smooth the surface. Lightly dampen your fingers to prevent sticking if needed.
- Chill and set: Cover with plastic wrap and refrigerate for at least 2 hours, or until firm. The mixture should be hard to the touch but still pliable when ready.
- Cut and serve: Lift the entire block out of the pan using the parchment edges. Slice into bars or squares with a sharp knife. For clean cuts, wipe the knife with a damp cloth between slices.
- Resting & Finishing: Let the bars sit at room temperature for 10 minutes before serving to soften slightly. Store in an airtight container in the fridge for up to a week, or freeze for longer storage.
- Checkpoints & How to Know It’s Done: The bars should be firm and hold shape, with a glossy chocolate surface. Check for even texture with no sticky or overly soft spots. The aroma should be rich and inviting, with toasted coconut notes.
Cover the pan with plastic wrap and refrigerate until set. Once firm, lift out using parchment edges and cut into bars. Let sit at room temp for 10 minutes before serving for optimal texture.
How to Know It’s Done
- Chocolate is shiny and smooth, not grainy.
- Mixture presses firmly into the pan without crackling.
- Bars are firm and hold their shape after chilling.
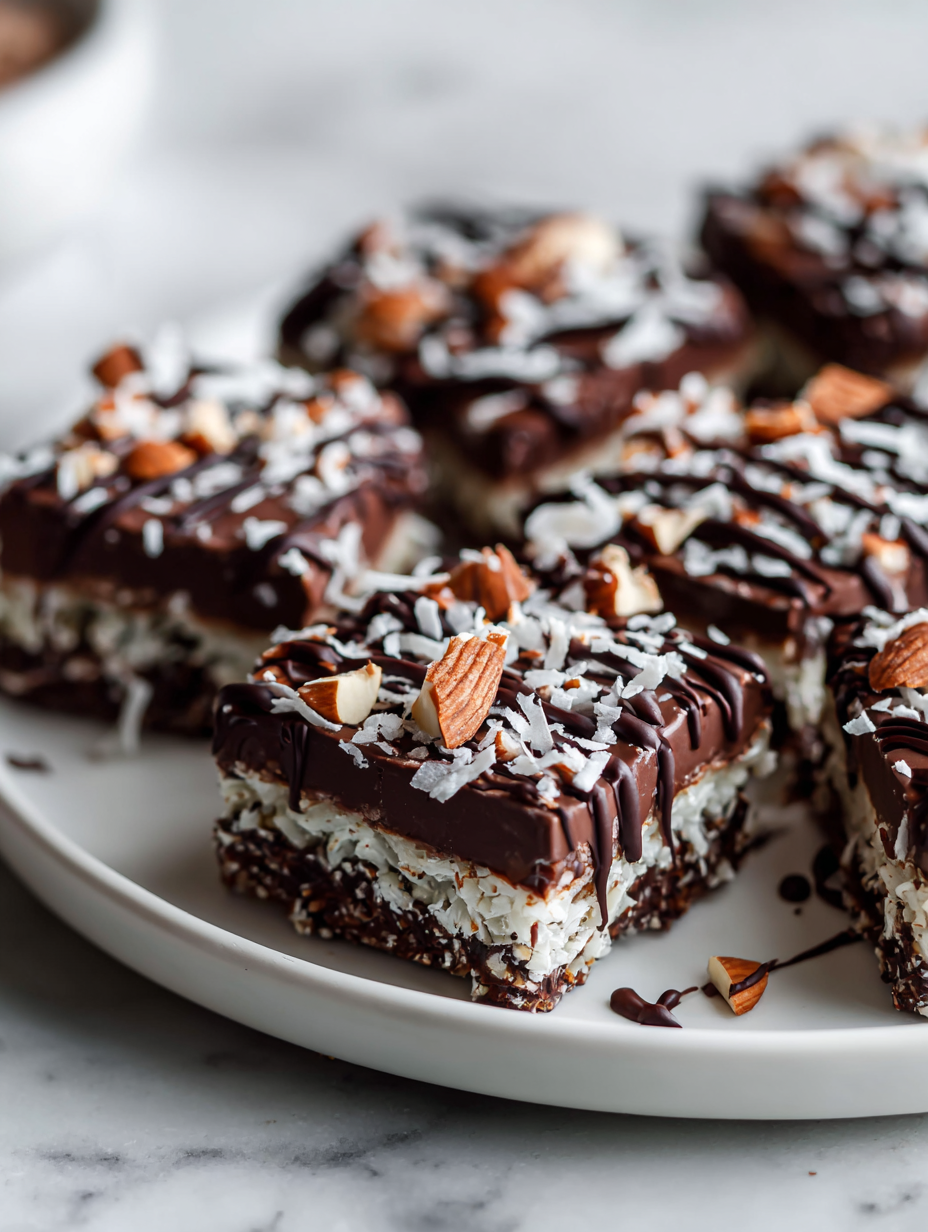
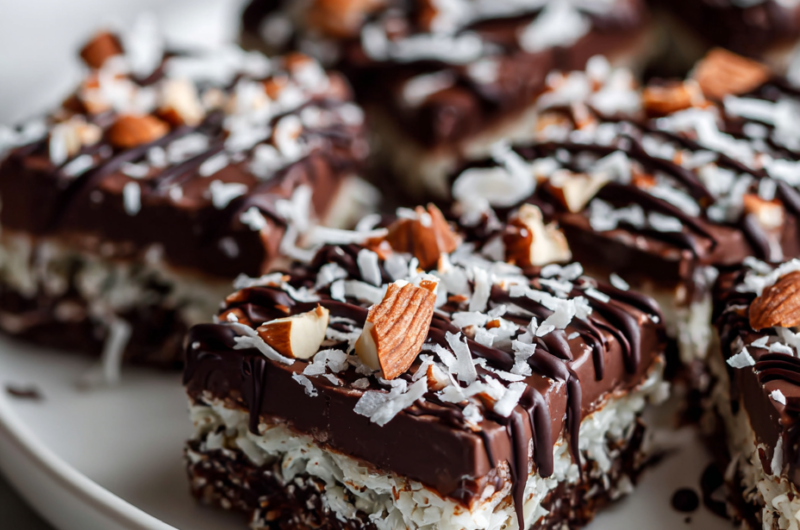
No-Bake Chocolate Coconut Bars
Ingredients
Equipment
Method
- Line the square pan with parchment paper, leaving some overhang for easy removal.
- In a dry skillet over medium heat, toast the coconut flakes, shaking the pan often, until golden and fragrant—about 3-4 minutes. Remove from heat and let cool slightly.
- Place the dark chocolate in a microwave-safe bowl and microwave in 30-second bursts, stirring well after each, until smooth and shiny.
- In a large mixing bowl, combine the toasted coconut, melted chocolate, sweetened condensed milk, melted butter, and vanilla extract. Stir thoroughly until everything is evenly coated and the mixture is thick and sticky.
- Transfer the mixture to your prepared pan. Use a spatula or the back of a spoon to press it evenly into the corners and create a smooth top.
- Cover the pan with plastic wrap and refrigerate for at least 2 hours, or until the mixture is firm and set.
- Once chilled, lift the block out of the pan using the parchment overhang. Place on a cutting board and cut into bars or squares with a sharp knife.
- For clean cuts, wipe the knife with a damp cloth between slices. Let the bars sit at room temperature for about 10 minutes before serving to soften slightly.
- Enjoy these rich, chewy bars with a glossy chocolate topping and toasted coconut aroma. Store leftovers in an airtight container in the fridge for up to a week or freeze for longer storage.
Pro tips for perfect bars
- Bolded Mini-Head: Use low heat when toasting coconut to prevent burning and develop a deep, nutty aroma.
- Bolded Mini-Head: Melt chocolate in short bursts to keep it shiny and smooth—overheating causes graininess.
- Bolded Mini-Head: Press mixture firmly into the pan with damp fingers for an even, compact layer that slices cleanly.
- Bolded Mini-Head: Chill the bars thoroughly—at least 2 hours—until they’re firm and set for clean cuts and easy serving.
- Bolded Mini-Head: Wipe your knife with a damp cloth between slices to avoid sticking and ensure neat edges.
- Bolded Mini-Head: Toast coconut evenly, shaking the pan often, until it’s golden and fragrant—this enhances flavor and aroma.
- Bolded Mini-Head: For softer bars, let them sit at room temperature for 10 minutes before cutting—this prevents cracking.
Common mistakes and how to fix them
- FORGOT to check chocolate temperature → Slightly over-melted chocolate becomes grainy, fix by stirring vigorously.
- DUMPED all ingredients into pan → Uneven mixing causes inconsistent flavor, stir thoroughly for even distribution.
- OVER-TORCHED coconut → Burnt coconut tastes bitter; remove from heat immediately and start with fresh coconut.
- FORGOT to line pan with parchment → Sticks to pan, use parchment for easy removal and clean slices.
Quick fixes and pantry swaps
- When chocolate seizes, splash in a teaspoon of vegetable oil to smooth it out.
- If mixture is too crumbly, patch with a drizzle of warm coconut oil and mix thoroughly.
- Splash a little extra condensed milk if bars don’t set firmly in the fridge.
- Shield edges from sticking by lining pan with parchment—rescue in 5 seconds with a sharp knife.
- Pan too hot? Cool it briefly before pressing mixture to prevent melting and uneven texture.
Prep, store, and reheat tips
- Prepare the mixture and press into the pan a day ahead; it firms up better overnight, making slicing neater.
- Store the bars in an airtight container in the fridge for up to a week; the cool temperature keeps the chocolate glossy and coconut fragrant.
- For longer storage, freeze the bars wrapped tightly for up to 3 months; let thaw at room temperature for 10 minutes before serving, until slightly softer and fragrant.
- Reheat briefly in the microwave—10 seconds at a time—until just softened and warm, watching for melty, glossy chocolate. Perfect for an indulgent, gooey bite.
Top questions about no bake bars
1. Can I use shredded coconut instead of flakes?
Yes, you can substitute coconut flakes with shredded coconut, but the texture might be less chewy and more crumbly.
2. Can I use different types of chocolate?
Absolutely, dark chocolate melts smoothly and balances the sweetness. Milk or semi-sweet chocolate will be sweeter and creamier.
3. Can I make this dairy-free?
Using coconut oil instead of butter works well for a dairy-free version, adding a faint coconut aroma and keeping the texture rich.
4. How long should I chill the bars?
Chilling for at least 2 hours ensures the bars are firm and slices cleanly. Letting them sit at room temp for 10 minutes helps soften before serving.
5. My mixture is too sticky, what do I do?
If the mixture is too sticky, dust your hands with a little coconut or powdered sugar when pressing into the pan.
6. How should I store these bars?
Store leftovers in an airtight container in the fridge for up to a week or freeze for longer. Thaw at room temp for best texture.
7. Chocolate gets grainy, how do I fix it?
If your chocolate seizes, add a teaspoon of vegetable oil and stir until smooth again.
8. How do I get the mixture to press flat?
When pressing mixture into the pan, dampen your fingers to prevent sticking and achieve an even surface.
9. How can I make the bars softer?
For softer, more pliable bars, let them rest at room temperature for about 10 minutes before slicing.
10. How do I get neat cuts?
Use a sharp, warm knife to cut the bars for clean, neat slices without cracking or sticking.
These no-bake chocolate coconut bars are more than just a quick treat; they carry a nostalgic weight, reminding me of summer afternoons in my childhood kitchen. The rich aroma of toasted coconut and melting chocolate still lingers in my memory, making each bite a moment of simple joy.
Sharing these bars with friends or family feels like passing on a little piece of that carefree, messy kitchen magic. They’re perfect for when you need something sweet without the fuss, especially during warm weather or when you’re pressed for time. Sometimes, the simplest recipes hold the most comforting stories.

Hi, I’m Grace Morgan, and welcome to my kitchen. This is a space shaped by family meals, curious hands reaching for snacks, paws under the table, and recipes that come together in the middle of real life. I’m a food blogger, a mother, and a passionate pet keeper. Most days, I’m cooking with one eye on the stove and the other on someone who needs me, whether that’s a child asking for a taste or a dog hoping something might fall.


