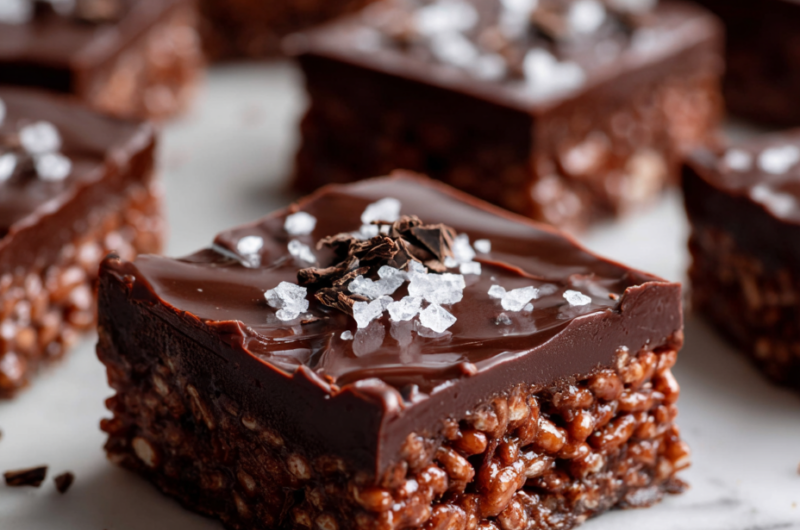
These no-bake chocolate crunch bars are my answer to those days when I need something sweet, fast. There’s no fussing with ovens or waiting for dough to chill—just a handful of ingredients, a little stirring, and you’re set. They remind me of childhood afternoons, sneaking bites of crunchy, chocolatey goodness while my mom wasn’t looking.
What I love most is how adaptable they are. You can toss in whatever nuts or dried fruit you’ve got lying around, making each batch a little different. Plus, they’re perfect for when the pantry’s looking sparse but you still crave that rich, crispy, chocolate fix—no oven required.
This recipe is inspired by my childhood obsession with crunchy, chocolatey treats that are quick to whip up, perfect for when I crave something sweet but don’t want to turn on the oven or wait. It’s a reminder that sometimes, the simplest ingredients combined with a bit of patience create the most satisfying bites. I love how these bars balance richness with a satisfying crunch, making them a go-to for busy afternoons or spontaneous chocolate cravings.
The story behind this recipe
- This recipe came about one rainy afternoon when I was digging through my childhood snack stash and realized how much I missed that perfect crunch and rich chocolate flavor. I wanted something quick, no fuss, that reminded me of simpler times. So I started experimenting with what I had—cereal, chocolate, honey—and it just clicked.
- It’s funny how a small moment like that can turn into a go-to treat. Now, whenever I need a quick fix, these bars come together fast and bring back that nostalgic crunch. Plus, they’re a real testament to how imperfect ingredients can still create something satisfying.
- heading: ‘The story behind this recipe’
Ingredient breakdown: key components
- Dark chocolate: I prefer a good quality 70% cocoa bar; it melts smoothly and gives that deep, smoky flavor. You can swap with milk chocolate if you want it sweeter, but you’ll lose some richness.
- Crispy cereal: I use plain rice cereal for that satisfying crunch that sticks to the chocolate. Cornflakes work well too, just watch for any added sugar that might make the bars overly sweet.
- Honey: I love the sticky, slightly floral aroma honey adds—makes the mixture glossy and cohesive. Maple syrup can be a good substitute, but it brings a different, more caramelized note.
- Butter: I melt unsalted butter for richness and to help everything bind together. If you’re going dairy-free, coconut oil works but adds a faint coconut scent and slightly softer texture.
- Nuts or dried fruit: I toss in chopped almonds or dried cranberries for extra texture and flavor. Feel free to skip or switch with pretzels or mini marshmallows for a different crunch or chew.
- Vanilla extract: Just a splash boosts the chocolate’s aroma and depth. You can skip it if you prefer a more straightforward chocolate flavor, but it really rounds out the sweetness.
Spotlight on key ingredients
Dark chocolate:
- I prefer a good quality 70% cocoa bar; it melts smoothly and gives that deep, smoky flavor. You can swap with milk chocolate if you want it sweeter, but you’ll lose some richness.
- Crispy cereal: I use plain rice cereal for that satisfying crunch that sticks to the chocolate. Cornflakes work well too, just watch for any added sugar that might make the bars overly sweet.
- Honey: I love the sticky, slightly floral aroma honey adds—makes the mixture glossy and cohesive. Maple syrup can be a good substitute, but it brings a different, more caramelized note.
Crispy cereal:
- The texture is critical—lightly toasted, it creates that crunch that contrasts with the smooth chocolate. Avoid overly sweetened cereals to keep the flavor balanced.
- Nuts or dried fruit: They add a burst of flavor and texture. Chopped almonds or cranberries are my favorites. Toast nuts first for extra flavor and to prevent sogginess.
- Butter: Melting unsalted butter helps everything stick together. For dairy-free, coconut oil works but adds a faint coconut scent and softer texture.
Notes for ingredient swaps
- Dairy-Free: Swap regular butter with coconut oil to keep it vegan, but expect a slightly softer, coconut-scented bar.
- Chocolate Type: Use milk chocolate instead of dark for a sweeter, creamier bite, but lose some of that smoky depth.
- Sweetener: Replace honey with maple syrup for a caramel note, but it will be a tad runnier and less sticky.
- Cereal: Cornflakes can replace rice cereal for a more rustic crunch, though they may be slightly greasier.
- Add-ins: Dried fruit or nuts can be swapped for pretzels or mini marshmallows for a different texture and flavor profile.
- Flavor Boost: Vanilla extract can be omitted or swapped with almond extract for a different aromatic punch.
Equipment & Tools
- 9×9 inch baking dish: Holds the mixture while setting.
- Microwave-safe bowl: Melts the chocolate evenly.
- Spatula: Stirs and spreads the mixture.
- Parchment paper: Prevents sticking and makes removal easier.
- Sharp knife: Cuts the set bars into portions.
Step-by-step guide to crunch bars
- Gather all your ingredients: a 9×9 inch baking dish, microwave-safe bowl, spatula, parchment paper, and a fridge-safe container for cooling.
- Break the chocolate into small pieces. Microwave in 30-second bursts, stirring between each, until melted and smooth. (Approx. 1-2 minutes total).
- In a large bowl, pour the crispy cereal. Drizzle the melted chocolate over the cereal, then add honey and a pinch of salt. Mix gently but thoroughly until evenly coated.
- If you’re adding nuts or dried fruits, fold them in now. Make sure everything is coated well with chocolate.
- Transfer the mixture into your prepared baking dish. Use a spatula or the back of a spoon to press it evenly into the corners and flatten the top.
- Place the dish in the fridge. Chill for at least 2 hours, until firm and set. The mixture should be glossy and hold together when pressed.
- Once chilled, remove from fridge and lift out the entire block using the edges of the parchment paper. Cut into bars or squares with a sharp knife.
- Plate the bars on a pretty platter or individual plates. Serve immediately or store for later.
Chill the bars in the fridge until firm, about 2 hours. Remove and cut into squares. Serve immediately or store in an airtight container in the fridge for up to a week.
How to Know It’s Done
- Chocolate is fully melted and smooth before mixing.
- Mixture is evenly coated and glossy after combining.
- Bars are firm and hold their shape after chilling.
No-Bake Chocolate Crunch Bars
Ingredients
Equipment
Method
- Break the chocolate into small pieces and place them in a microwave-safe bowl. Microwave in 30-second bursts, stirring each time, until the chocolate is smooth and melted, with a rich aroma filling the air.
- In a large mixing bowl, pour in the crispy rice cereal. Drizzle the melted chocolate over the cereal and add honey, melted butter, and vanilla extract if using.
- Gently fold everything together with a spatula until the cereal is fully coated and the mixture is glossy and sticky, releasing a sweet chocolate scent.
- Transfer the mixture into your prepared baking dish lined with parchment paper. Use the back of the spatula or a clean hand to press it evenly into the corners and flatten the top with a firm, smooth motion.
- Sprinkle chopped nuts or dried fruit over the top if desired, pressing them lightly into the surface to ensure they stick.
- Place the dish in the fridge and chill for at least 2 hours, or until the mixture is firm, glossy, and holds its shape when gently pressed.
- Once set, lift the entire block out of the dish using the parchment paper edges and transfer to a cutting board.
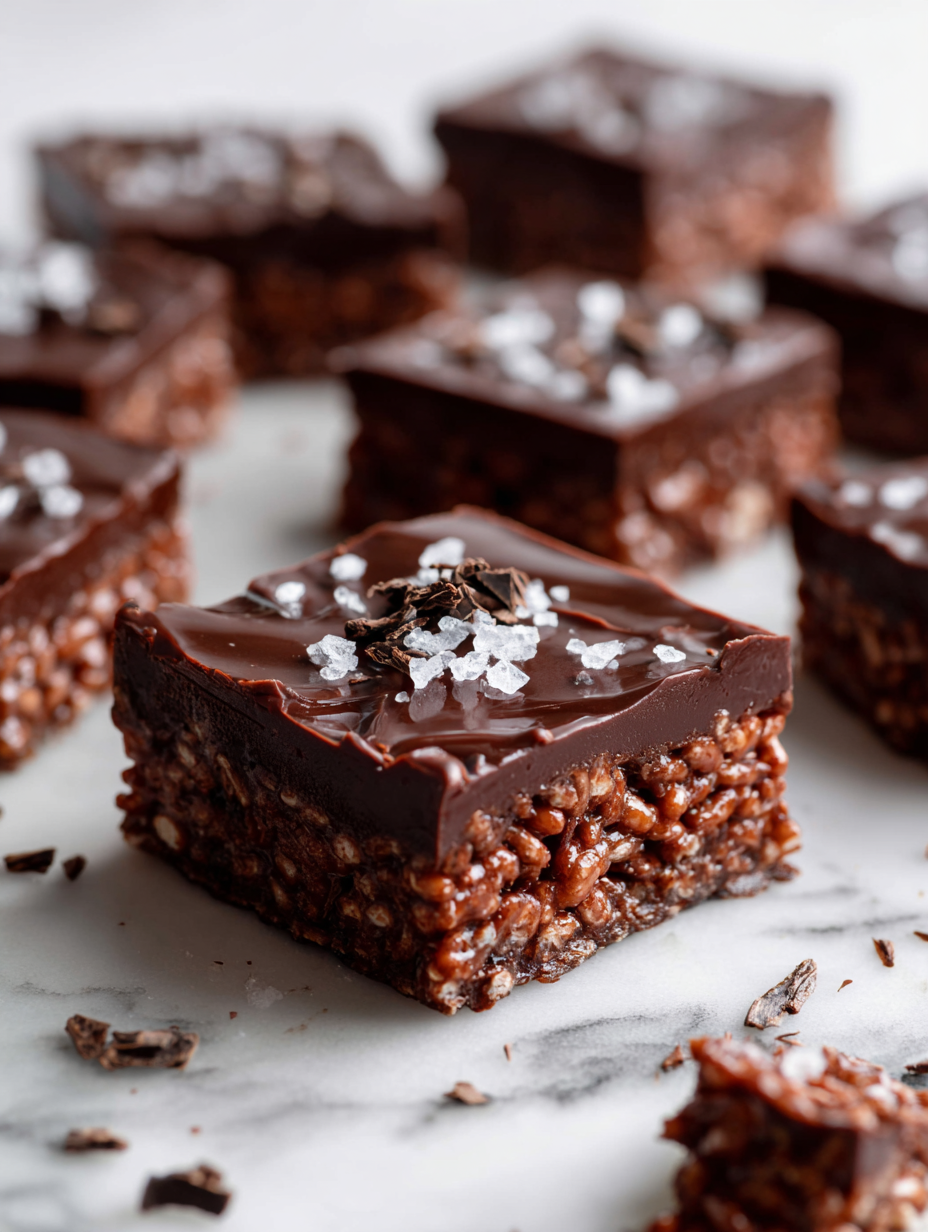
- Use a sharp knife to cut the block into even squares or bars, revealing a crunchy, chocolatey interior with a shiny finish.
- Arrange the bars on a plate or store them in an airtight container in the fridge for up to a week—perfect for quick, satisfying bites anytime.
Pro tips for perfect crunch bars
- Bolded mini-head: Use a low microwave power setting → Melts the chocolate evenly without burning, keep an eye on it.
- Bolded mini-head: Add cereal gradually → Incorporate cereal in parts to prevent crushing, and maintain crunch.
- Bolded mini-head: Press firmly when spreading → Use the back of a spatula to ensure an even, compact layer.
- Bolded mini-head: Chill in a flat, even layer → Keeps the bars uniform and helps them set properly without cracking.
- Bolded mini-head: Handle with parchment edges → Eases removal without breaking, especially when cutting into neat squares.
- Bolded mini-head: Check for gloss and firmness → Bars should be shiny and firm to the touch before slicing, about 2 hours in fridge.
- Bolded mini-head: Store in airtight container → Keeps them fresh and crispy for up to a week, avoid moisture!
Common mistakes and how to fix them
- FORGOT to check chocolate melting point → Do low-power microwave bursts, stir often.
- DUMPED too much butter → Use just enough to coat cereal without greasiness.
- OVER-TORCHED chocolate → Remove early if smell dark and burnt; stir immediately.
- MISSED chilling time → Let set at least 2 hours until firm and glossy.
Quick fixes and pantry swaps
- When chocolate seizes, splash in a teaspoon of vegetable oil and stir until smooth.
- If the bars don’t set, increase fridge time by 30 minutes and check for even pressing.
- Dumped too much cereal? Add a bit more melted chocolate to balance texture before chilling.
- Overheated chocolate? Patch with a teaspoon of coconut oil and stir gently.
- When mixture is too sticky, chill for 10 minutes or sprinkle a little more cereal for crunch.
Prep, store, and reheat tips
- Prepare the mixture and melt the chocolate ahead of time; store in an airtight container in the fridge for up to 24 hours. The chocolate may thicken slightly but can be gently reheated.
- Line the baking dish with parchment paper in advance for easy removal later. Keep ready on the counter for quick assembly.
- Chill the assembled bars in the fridge for at least 2 hours, or overnight, to ensure they set properly and develop a firm texture.
- Store finished bars in an airtight container in the fridge for up to a week. They will stay crispy and chocolatey, with flavor deepening slightly over time.
- Reheat slightly in the microwave at low power (10-15 seconds) if you prefer softer bars; watch for melting and aroma of warm chocolate.
Top questions about no bake chocolate crunch bars
1. Can I melt chocolate on the stove instead?
Yes, using a microwave makes melting chocolate quick and easy, but watch carefully to prevent burning.
2. Can I make these bars vegan or dairy-free?
Absolutely. You can swap in vegan chocolate or dairy-free alternatives, but check for proper melting consistency.
3. Can I use other cereals or grains?
Using crispy rice cereal is best; softer cereals like bran flakes will make the bars less crunchy.
4. How long should I chill the bars?
Chilling for at least 2 hours ensures the bars are firm, glossy, and hold their shape well.
5. Can I add nuts or dried fruit?
Yes, adding nuts or dried fruit is a great way to customize flavor and texture — just fold them in before setting.
6. My mixture is too sticky to press, what do I do?
To prevent the mixture from being too sticky, lightly coat your hands or spatula with butter or oil when pressing into the pan.
7. How long do these bars last?
You can store the bars in an airtight container in the fridge for up to a week; for longer, freeze and thaw as needed.
8. What if my melted chocolate hardens or seizes?
If your chocolate seizes or gets clumpy, add a teaspoon of vegetable oil and stir until smooth again.
9. Which type of chocolate should I use?
For a more intense chocolate flavor, opt for dark chocolate with at least 70% cocoa content; it melts smoothly and adds depth.
10. How can I soften the bars after chilling?
If you prefer softer bars, reheat them gently in the microwave for a few seconds, just until they soften enough to bite.
These bars are a reminder that sometimes, simplicity wins. They come together fast, with just a few ingredients, but the crunch and chocolate richness feel indulgent enough for a special treat. I find myself craving that satisfying snap and the deep cocoa aroma more often than I’d admit.
Whenever I make a batch, it’s like pressing pause for a moment of honest comfort. No matter the season or reason, these bars quietly become my go-to for a quick, honest bite—no fuss, just good, crunchy chocolate.

Hi, I’m Grace Morgan, and welcome to my kitchen. This is a space shaped by family meals, curious hands reaching for snacks, paws under the table, and recipes that come together in the middle of real life. I’m a food blogger, a mother, and a passionate pet keeper. Most days, I’m cooking with one eye on the stove and the other on someone who needs me, whether that’s a child asking for a taste or a dog hoping something might fall.


