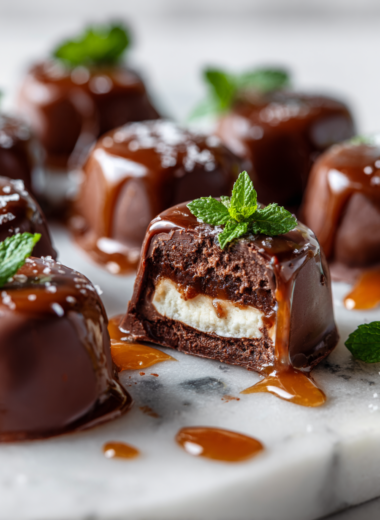
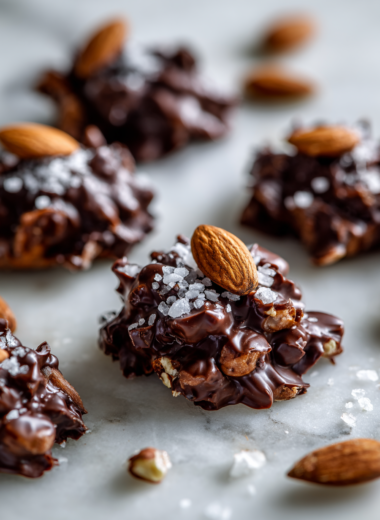
Author: GraceMorgan

  • Halloween Cake Pops: A Spooky Twist on a Classic Treat

    Halloween Cake Pops: A Spooky Twist on a Classic Treat

    Cake pops are a staple for any celebration, but Halloween makes them feel extra special. It’s the perfect blend of sweet, spooky, and fun—an edible craft project that’s almost as satisfying as eating it. Plus, they’re versatile—turn them into tiny monsters, ghosts, or witches with just a few tweaks.

    Why These Cake Pops Keep Calling My Name

    They’re unpredictable—every batch has its own personality. There’s chaos in the melting chocolate, pride in the tiny faces, and relief when everything turns out adorable. Plus, they’re a no-fuss way to bring a little joy and spooky charm to any gathering, especially in October. No matter how many times I make them, each one feels like a small, delicious victory.

    Inside the Candy-Coated World

    • Cake (store-bought or homemade): The base that’s soft, moist, and perfect for crumbling into tiny bits.
    • Cream cheese or buttercream: Adds richness and helps bind the crumbs without making the mixture greasy.
    • Chocolate melts or candy coating: Gives that glossy, firm shell—smooth, sweet, and a little nostalgic.
    • Lollipop sticks or skewers: Hold your pops steady while you dip and decorate.
    • Food coloring and decorating gels: Turn your pops into ghosts, pumpkins, or monsters—whatever screams Halloween.
    • Sprinkles, edible glitter, or candy eyes: Finish with fun, spooky details that make each pop unique.

    Tools of the Spooky Trade

    • Baking sheet with parchment paper: To lay out the cake balls for chilling and setting.
    • Candy or chocolate melts: To coat and decorate the cake pops with a smooth, glossy finish.
    • Lollipop sticks or skewers: To hold the cake pops and make dipping easier.
    • Small bowls for melting chocolate: To melt and hold coating for easy dipping.
    • Decorating tools or toothpicks: For adding spooky details and finishing touches.

    Crafting Your Creepy-Cute Cake Pops

    Step 1: Start by gathering all your ingredients and tools. Preheat your oven to 180°C (350°F).

    Step 2: Bake your cake as usual, then let it cool completely. Crumble it into fine crumbs in a large bowl.

    Step 3: Mix in a generous spoonful of cream cheese or buttercream to bind the crumbs without making the mixture sticky.

    Step 4: Shape the mixture into small, even balls—about the size of a walnut—and chill them in the fridge for at least 30 minutes.

    Cooking Tips and Trick Checks

    • Ensure the cake crumbs are moist but not sticky; if too dry, add a splash of milk.
    • When dipping in chocolate, lift and rotate slowly to avoid cracks.
    • If the chocolate cools too quickly, add a little vegetable oil to loosen it.
    • Watch for the coating to set; if it’s sticky, chill the pops again before decorating.

    Avoid These Common Cake Pop Pitfalls

    • Thick, lumpy chocolate coating.? DUMPED too much chocolate; add a little vegetable oil to loosen coating.
    • Cake balls falling off sticks while dipping.? FORGOT to chill the cake balls; pop them back in the fridge for 15 minutes.
    • Chocolate burned and smoky.? OVER-TORCHED the chocolate; lower heat or switch to microwave in short bursts.
    • Bare, unadorned cake pops.? NOT enough decorating; keep extra chocolate and supplies handy.

    Halloween Cake Pops

    These Halloween cake pops are bite-sized treats made by crumbling baked cake and mixing it with cream cheese or buttercream, then shaping into balls and coating with glossy chocolate melts. Decorated with spooky colors and fun details, they have a soft interior and a crisp, sweet shell—perfect for adding a festive touch to any celebration.
    Prep Time 30 minutes
    Cook Time 30 minutes
    Total Time 1 hour
    Servings: 12
    Course: Main Course
    Cuisine: Halloween
    Calories: 150

    Ingredients
      

    • 1 package store-bought or homemade cake baked and cooled
    • 4 oz cream cheese or buttercream softened for mixing
    • 12 oz chocolate melts or candy coating for coating and decorating
    • 12 pieces lollipop sticks or skewers
    • assorted food coloring and decorating gels for spooky decorations
    • as needed sprinkles, edible glitter, or candy eyes for finishing touches

    Equipment

    • Baking sheet with parchment paper
    • Small bowls for melting chocolate
    • Lollipop sticks or skewers
    • Mixing bowls
    • Spatula or spoon
    • Decorating tools or toothpicks

    Method
     

    1. Crumble the cooled cake into fine crumbs in a large bowl, creating a soft, sandy texture that smells sweet and inviting.
    2. Mix in the softened cream cheese or buttercream until well combined, forming a moist dough that holds together when pressed.
    3. Shape the mixture into small, even balls about the size of a walnut, then place them on a parchment-lined baking sheet and chill for at least 30 minutes until firm.
    4. Melt the chocolate melts in a small bowl over low heat or in short bursts in the microwave, stirring until smooth and glossy, with a gentle bubbling sound.
    5. Insert a lollipop stick into each chilled cake ball, pressing it about halfway through to make a sturdy handle, and return to the fridge if needed.
    6. Dip each cake pop into the melted chocolate, slowly rotating to fully coat, then gently tap off excess coating for a smooth, shiny shell.
    7. Decorate the coated pops with spooky colors, sprinkles, or edible details using gels and decorating tools, adding eyes or glitter for fun effects.
    8. Place the decorated cake pops upright on a parchment-lined tray to set completely, which takes about 15-20 minutes.
    9. Once set, enjoy these adorable, festive treats that feature a soft interior and a crisp, chocolate coating—perfect for spooky celebrations!
    These cake pops are more than just a festive project; they’re a chance to get a little messy, a little creative, and a lot proud. Tweak the colors, faces, or add edible glitter to match your spooky vibe. No matter how they turn out, they’re bound to be a hit—partly because of the effort, partly because they taste damn good. Just have fun with it and enjoy every playful bite.

  • Halloween Cake Pops: A Spooky Twist on a Classic Treat

    Halloween Cake Pops: A Spooky Twist on a Classic Treat

    Cake pops are a staple for any celebration, but Halloween makes them feel extra special. It’s the perfect blend of sweet, spooky, and fun—an edible craft project that’s almost as satisfying as eating it. Plus, they’re versatile—turn them into tiny monsters, ghosts, or witches with just a few tweaks.

    Why These Cake Pops Keep Calling My Name

    They’re unpredictable—every batch has its own personality. There’s chaos in the melting chocolate, pride in the tiny faces, and relief when everything turns out adorable. Plus, they’re a no-fuss way to bring a little joy and spooky charm to any gathering, especially in October. No matter how many times I make them, each one feels like a small, delicious victory.

    Inside the Candy-Coated World

    • Cake (store-bought or homemade): The base that’s soft, moist, and perfect for crumbling into tiny bits.
    • Cream cheese or buttercream: Adds richness and helps bind the crumbs without making the mixture greasy.
    • Chocolate melts or candy coating: Gives that glossy, firm shell—smooth, sweet, and a little nostalgic.
    • Lollipop sticks or skewers: Hold your pops steady while you dip and decorate.
    • Food coloring and decorating gels: Turn your pops into ghosts, pumpkins, or monsters—whatever screams Halloween.
    • Sprinkles, edible glitter, or candy eyes: Finish with fun, spooky details that make each pop unique.

    Tools of the Spooky Trade

    • Baking sheet with parchment paper: To lay out the cake balls for chilling and setting.
    • Candy or chocolate melts: To coat and decorate the cake pops with a smooth, glossy finish.
    • Lollipop sticks or skewers: To hold the cake pops and make dipping easier.
    • Small bowls for melting chocolate: To melt and hold coating for easy dipping.
    • Decorating tools or toothpicks: For adding spooky details and finishing touches.

    Crafting Your Creepy-Cute Cake Pops

    Step 1: Start by gathering all your ingredients and tools. Preheat your oven to 180°C (350°F).

    Step 2: Bake your cake as usual, then let it cool completely. Crumble it into fine crumbs in a large bowl.

    Step 3: Mix in a generous spoonful of cream cheese or buttercream to bind the crumbs without making the mixture sticky.

    Step 4: Shape the mixture into small, even balls—about the size of a walnut—and chill them in the fridge for at least 30 minutes.

    Cooking Tips and Trick Checks

    • Ensure the cake crumbs are moist but not sticky; if too dry, add a splash of milk.
    • When dipping in chocolate, lift and rotate slowly to avoid cracks.
    • If the chocolate cools too quickly, add a little vegetable oil to loosen it.
    • Watch for the coating to set; if it’s sticky, chill the pops again before decorating.

    Avoid These Common Cake Pop Pitfalls

    • Thick, lumpy chocolate coating.? DUMPED too much chocolate; add a little vegetable oil to loosen coating.
    • Cake balls falling off sticks while dipping.? FORGOT to chill the cake balls; pop them back in the fridge for 15 minutes.
    • Chocolate burned and smoky.? OVER-TORCHED the chocolate; lower heat or switch to microwave in short bursts.
    • Bare, unadorned cake pops.? NOT enough decorating; keep extra chocolate and supplies handy.

    Halloween Cake Pops

    Halloween cake pops are bite-sized confections crafted by forming cake crumbs mixed with cream cheese into small balls, then coating them in glossy chocolate melts. They have a fun, festive appearance with a smooth exterior and playful decorations, perfect for spooky celebrations. The process involves baking, crumbling, shaping, chilling, and decorating to create adorable, edible treats.
    Prep Time 30 minutes
    Cook Time 30 minutes
    Total Time 1 hour
    Servings: 20
    Course: Main Course
    Cuisine: American
    Calories: 150

    Ingredients
      

    • 1 box store-bought or homemade cake cooled and crumbled
    • 8 oz cream cheese or buttercream softened for mixing
    • 2 cups chocolate melts or candy coating for coating and decorating
    • 20 pieces lollipop sticks or skewers for holding the cake pops
    • optional food coloring and decorating gels to create spooky effects
    • optional sprinkles, edible glitter, or candy eyes for finishing touches

    Equipment

    • Oven
    • Mixing bowls
    • Baking sheet with parchment paper
    • Cooling rack
    • Small bowls for melting chocolate
    • Lollipop sticks or skewers
    • Decorating tools or toothpicks

    Method
     

    1. Preheat your oven to 180°C (350°F). Bake your cake until golden and cooked through, then let it cool completely on a wire rack.
    2. Use your hands or a fork to crumble the cooled cake into fine crumbs in a large mixing bowl. The mixture should resemble moist, uniform soil.
    3. Add the softened cream cheese or buttercream to the crumbs and mix thoroughly until the mixture is cohesive and easy to shape.
    4. Using your hands, shape the mixture into small balls about the size of a walnut. Place each ball on a baking sheet lined with parchment paper.
    5. Insert a lollipop stick or skewer into each cake ball, then chill them in the refrigerator for at least 30 minutes to firm up.
    6. While they chill, melt the chocolate in small bowls over low heat or in short bursts in the microwave, stirring until smooth and glossy.
    7. Once chilled, dip each cake pop into the melted chocolate, rotating gently to coat evenly. Tap off excess chocolate and return to the parchment-lined sheet.
    8. Decorate the coated cake pops with sprinkles, edible glitter, or candy eyes while the coating is still wet for a festive look.
    9. Allow the chocolate coating to set completely at room temperature or in the fridge for quicker drying.
    10. Enjoy your spooky, adorable Halloween cake pops, perfect for any celebration or party!
    These cake pops are more than just a festive project; they’re a chance to get a little messy, a little creative, and a lot proud. Tweak the colors, faces, or add edible glitter to match your spooky vibe. No matter how they turn out, they’re bound to be a hit—partly because of the effort, partly because they taste damn good. Just have fun with it and enjoy every playful bite.

  • Halloween Cake Pops: A Spooky Twist on a Classic Treat

    Halloween Cake Pops: A Spooky Twist on a Classic Treat

    Cake pops are a staple for any celebration, but Halloween makes them feel extra special. It’s the perfect blend of sweet, spooky, and fun—an edible craft project that’s almost as satisfying as eating it. Plus, they’re versatile—turn them into tiny monsters, ghosts, or witches with just a few tweaks.

    Why These Cake Pops Keep Calling My Name

    They’re unpredictable—every batch has its own personality. There’s chaos in the melting chocolate, pride in the tiny faces, and relief when everything turns out adorable. Plus, they’re a no-fuss way to bring a little joy and spooky charm to any gathering, especially in October. No matter how many times I make them, each one feels like a small, delicious victory.

    Inside the Candy-Coated World

    • Cake (store-bought or homemade): The base that’s soft, moist, and perfect for crumbling into tiny bits.
    • Cream cheese or buttercream: Adds richness and helps bind the crumbs without making the mixture greasy.
    • Chocolate melts or candy coating: Gives that glossy, firm shell—smooth, sweet, and a little nostalgic.
    • Lollipop sticks or skewers: Hold your pops steady while you dip and decorate.
    • Food coloring and decorating gels: Turn your pops into ghosts, pumpkins, or monsters—whatever screams Halloween.
    • Sprinkles, edible glitter, or candy eyes: Finish with fun, spooky details that make each pop unique.

    Tools of the Spooky Trade

    • Baking sheet with parchment paper: To lay out the cake balls for chilling and setting.
    • Candy or chocolate melts: To coat and decorate the cake pops with a smooth, glossy finish.
    • Lollipop sticks or skewers: To hold the cake pops and make dipping easier.
    • Small bowls for melting chocolate: To melt and hold coating for easy dipping.
    • Decorating tools or toothpicks: For adding spooky details and finishing touches.

    Crafting Your Creepy-Cute Cake Pops

    Step 1: Start by gathering all your ingredients and tools. Preheat your oven to 180°C (350°F).

    Step 2: Bake your cake as usual, then let it cool completely. Crumble it into fine crumbs in a large bowl.

    Step 3: Mix in a generous spoonful of cream cheese or buttercream to bind the crumbs without making the mixture sticky.

    Step 4: Shape the mixture into small, even balls—about the size of a walnut—and chill them in the fridge for at least 30 minutes.

    Cooking Tips and Trick Checks

    • Ensure the cake crumbs are moist but not sticky; if too dry, add a splash of milk.
    • When dipping in chocolate, lift and rotate slowly to avoid cracks.
    • If the chocolate cools too quickly, add a little vegetable oil to loosen it.
    • Watch for the coating to set; if it’s sticky, chill the pops again before decorating.

    Avoid These Common Cake Pop Pitfalls

    • Thick, lumpy chocolate coating.? DUMPED too much chocolate; add a little vegetable oil to loosen coating.
    • Cake balls falling off sticks while dipping.? FORGOT to chill the cake balls; pop them back in the fridge for 15 minutes.
    • Chocolate burned and smoky.? OVER-TORCHED the chocolate; lower heat or switch to microwave in short bursts.
    • Bare, unadorned cake pops.? NOT enough decorating; keep extra chocolate and supplies handy.

    Halloween Cake Pops

    These festive cake pops are an irresistibly fun treat for any celebration, especially Halloween. They feature moist cake crumbs coated in glossy chocolate, shaped into small balls, and decorated with spooky details to create a playful, bite-sized dessert with a smooth exterior and soft interior. Perfect for crafting spooky faces or monsters, they combine simple techniques with creative decorating for a delightful result.
    Prep Time 45 minutes
    Cook Time 30 minutes
    Total Time 1 hour 15 minutes
    Servings: 20
    Course: Main Course
    Cuisine: American
    Calories: 150

    Ingredients
      

    • 1 package store-bought or homemade cake preferably plain or vanilla flavor
    • 8 oz cream cheese or buttercream softened
    • 12 oz chocolate melts or candy coating for coating
    • 20 pieces lollipop sticks or skewers for holding the cake pops
    • food coloring and decorating gels food coloring and decorating gels for spooky decorations
    • sprinkles, edible glitter, or candy eyes sprinkles, edible glitter, or candy eyes for finishing touches

    Equipment

    • Baking sheet with parchment paper
    • Small bowls for melting chocolate
    • Lollipop sticks or skewers
    • Mixing bowls
    • Decorating tools or toothpicks

    Method
     

    1. Crumble the cooled cake into fine crumbs in a large mixing bowl, breaking it apart with your fingers or a fork until it resembles moist sand.
    2. Add the softened cream cheese or buttercream to the crumbs and mix thoroughly until the mixture is evenly coated and sticky enough to hold together when shaped.
    3. Using your hands, shape the mixture into small, even balls about the size of a walnut, then place them on a parchment-lined baking sheet.
    4. Insert a lollipop stick or skewer into each cake ball, then chill them in the refrigerator for at least 30 minutes to firm up.
    5. While the cake pops chill, melt the chocolate melts in small bowls over low heat or in the microwave, stirring until smooth and glossy.
    6. Once chilled, dip each cake pop into the melted chocolate, gently rotating to coat evenly, then lift and let excess drip off.
    7. Place the coated cake pops back on the parchment-lined sheet and decorate with sprinkles, edible glitter, candy eyes, or colored gels to create spooky faces or monsters.
    8. Allow the chocolate coating to set completely at room temperature or in the refrigerator until firm and glossy.
    9. Once set, serve your spooky cake pops on a platter and enjoy their adorable, festive charm!
    These cake pops are more than just a festive project; they’re a chance to get a little messy, a little creative, and a lot proud. Tweak the colors, faces, or add edible glitter to match your spooky vibe. No matter how they turn out, they’re bound to be a hit—partly because of the effort, partly because they taste damn good. Just have fun with it and enjoy every playful bite.

  • Pumpkin Mac and Cheese: A Cozy Twist for Fall Nights

    Pumpkin Mac and Cheese: A Cozy Twist for Fall Nights

    Pumpkin mac and cheese isn’t just about comfort; it’s about embracing the season’s bounty with a dish that feels both familiar and new. The sweetness of pumpkin adds a velvety texture and a subtle earthiness that balances the richness of cheese. It’s a warm bowl of nostalgia with a twist, perfect for chilly evenings or any time you need a little extra cozy.

    Why This Pumpkin Mac & Cheese Will Keep Calling You Back

    It’s the perfect way to celebrate fall, with familiar flavors turned into a creamy, cheesy hug. The pumpkin adds a layer of warmth and richness that feels like a cozy blanket. Plus, it’s simple enough to make on a weeknight but special enough to serve at gatherings. That balance of comfort and a little twist keeps me wanting it again and again.

    Inside the Ingredients of Pumpkin Mac & Cheese

    • Pumpkin purée: Adds sweetness and creaminess, balancing the savory cheese. Use canned or homemade; it should be smooth and vibrant orange.
    • Cheddar cheese: For that sharp, tangy flavor. Feel free to mix in some smoked Gouda for depth.
    • Gruyère cheese: Melts beautifully and adds a nutty, smoky note. Skip if you prefer a milder taste.
    • Cream or half-and-half: Helps achieve a silky sauce. Substitute with whole milk for a lighter version.
    • Breadcrumbs: Creates a crispy topping. Panko works best for crunch.
    • Diced onion: Brings gentle sweetness and depth. Sauté until translucent for best flavor.
    • Nutmeg: A pinch enhances the pumpkin’s earthiness. Fresh grated is preferable.

    Tools of the Trade for a Smooth Bake

    • Large pot: To cook the pasta evenly and efficiently.
    • Skillet or large saucepan: To make the pumpkin sauce and cheese mixture.
    • Whisk: To smoothly incorporate milk into the roux.
    • Baking dish: To hold the mac and cheese for baking until bubbly and golden.
    • Measuring cups and spoons: To keep ingredients precise, especially with spices and liquids.

    Step-by-Step to Silky Pumpkin Cheesy Goodness

    Step 1: Preheat your oven to 180°C (350°F).

    Step 2: Cook pasta in salted boiling water until just al dente, about 8 minutes.

    Step 3: In a large skillet, melt butter over medium heat. Add diced onion and cook until translucent, about 5 minutes.

    Step 4: Stir in pumpkin purée, a pinch of nutmeg, and a splash of cream. Let simmer until warmed through, about 3 minutes.

    Step 5: Meanwhile, make a roux with butter and flour in a separate pan. Gradually whisk in milk until smooth and thickened.

    Step 6: Combine the cheese (cheddar and Gruyère work well) with the pumpkin mixture. Mix in the cooked pasta.

    Step 7: Transfer everything to a baking dish, top with breadcrumbs, and bake for 20-25 minutes until golden and bubbling.

    Step 8: Let rest for 5 minutes before serving.

    Cooking Checks and Tips for Perfect Pumpkin Mac & Cheese

    • Pasta should be cooked al dente; it will finish cooking in the oven.
    • Cheese should melt smoothly without clumping; stir frequently.
    • The top should be golden and crispy, not burnt; watch closely in the last 5 minutes.
    • The sauce should be creamy and thick enough to coat the pasta, not watery.

    Common Pitfalls & How to Avoid Them

    • Cheese clumping or not melting smoothly.? Use high-quality cheese; cheap cheese doesn’t melt well.
    • Pasta becoming soggy in the bake.? Cook pasta just until al dente; overcooked pasta turns mushy.
    • Lumpy, uneven sauce.? Stir the sauce constantly while adding milk to avoid lumps.
    • Burnt top or uneven browning.? Keep an eye on the oven; cheese can burn quickly.

    Pumpkin Mac & Cheese

    Pumpkin mac and cheese combines the creamy, cheesy comfort of traditional mac and cheese with the sweet, velvety richness of pureed pumpkin. The dish features tender pasta coated in a smooth, cheesy pumpkin sauce, topped with crispy breadcrumbs for added texture. It’s a warm, inviting dish perfect for crisp fall evenings or anytime you crave cozy flavors.
    Prep Time 10 minutes
    Cook Time 30 minutes
    Total Time 40 minutes
    Servings: 4
    Course: Main Course
    Cuisine: American
    Calories: 550

    Ingredients
      

    • 8 oz pasta (penne or macaroni) cooked until al dente
    • 2 tablespoons butter for sautéing and sauce
    • 1 small diced onion adds sweetness and depth
    • 1 cup pumpkin purée smooth and vibrant orange
    • 1/2 cup cream or half-and-half for a silky sauce
    • 1 1/2 cups cheddar cheese sharp and tangy
    • 1/2 cup Gruyère cheese adds nuttiness and meltability
    • 1 teaspoon nutmeg fresh grated preferred
    • 1/2 cup panko breadcrumbs for crispy topping
    • 2 tablespoons olive oil to toast breadcrumbs

    Equipment

    • Large pot
    • Skillet or large saucepan
    • Whisk
    • Baking dish
    • Measuring cups and spoons

    Method
     

    1. Preheat your oven to 180°C (350°F) and set a baking dish aside.
    2. Cook the pasta in salted boiling water until just al dente, about 8 minutes. Drain and set aside.
    3. Melt the butter in a large skillet over medium heat, then add diced onion. Sauté until translucent and fragrant, about 5 minutes, until the onion is soft and slightly golden.
    4. Stir in the pumpkin purée and a pinch of nutmeg, then pour in the cream. Let simmer gently for about 3 minutes, stirring occasionally, until warmed through and slightly thickened.
    5. Meanwhile, prepare the cheese sauce by gradually whisking the milk into melted butter and flour in a separate pan to create a roux. Cook until thickened and smooth, about 3-4 minutes.
    6. Whisk the cheeses into the pumpkin mixture, stirring until melted and fully incorporated. Season with additional nutmeg if desired.
    7. Add the cooked pasta into the cheese and pumpkin sauce, stirring gently to coat evenly. Transfer the mixture into your prepared baking dish.
    8. In a small bowl, toss the panko breadcrumbs with olive oil. Sprinkle evenly over the top of the pasta mixture.
    9. Bake in the preheated oven for 20-25 minutes until the top is golden brown and bubbling around the edges.
    10. Remove from the oven and let sit for 5 minutes to set, then serve hot, enjoying the creamy pumpkin flavor with crispy topping.
    This dish is a gentle nudge into fall, blending the sweet earthiness of pumpkin with gooey cheese comfort. It’s a reminder that simple ingredients can be turned into something cozy and satisfying, especially when the days get shorter. Feel free to tweak the cheese or spice levels to make it your own—this is a dish that invites improvisation, not strict rules. Enjoy it with a simple green salad or just by itself, because sometimes less is more.

  • Pumpkin Mac and Cheese: A Cozy Twist for Fall Nights

    Pumpkin Mac and Cheese: A Cozy Twist for Fall Nights

    Pumpkin mac and cheese isn’t just about comfort; it’s about embracing the season’s bounty with a dish that feels both familiar and new. The sweetness of pumpkin adds a velvety texture and a subtle earthiness that balances the richness of cheese. It’s a warm bowl of nostalgia with a twist, perfect for chilly evenings or any time you need a little extra cozy.

    Why This Pumpkin Mac & Cheese Will Keep Calling You Back

    It’s the perfect way to celebrate fall, with familiar flavors turned into a creamy, cheesy hug. The pumpkin adds a layer of warmth and richness that feels like a cozy blanket. Plus, it’s simple enough to make on a weeknight but special enough to serve at gatherings. That balance of comfort and a little twist keeps me wanting it again and again.

    Inside the Ingredients of Pumpkin Mac & Cheese

    • Pumpkin purée: Adds sweetness and creaminess, balancing the savory cheese. Use canned or homemade; it should be smooth and vibrant orange.
    • Cheddar cheese: For that sharp, tangy flavor. Feel free to mix in some smoked Gouda for depth.
    • Gruyère cheese: Melts beautifully and adds a nutty, smoky note. Skip if you prefer a milder taste.
    • Cream or half-and-half: Helps achieve a silky sauce. Substitute with whole milk for a lighter version.
    • Breadcrumbs: Creates a crispy topping. Panko works best for crunch.
    • Diced onion: Brings gentle sweetness and depth. Sauté until translucent for best flavor.
    • Nutmeg: A pinch enhances the pumpkin’s earthiness. Fresh grated is preferable.

    Tools of the Trade for a Smooth Bake

    • Large pot: To cook the pasta evenly and efficiently.
    • Skillet or large saucepan: To make the pumpkin sauce and cheese mixture.
    • Whisk: To smoothly incorporate milk into the roux.
    • Baking dish: To hold the mac and cheese for baking until bubbly and golden.
    • Measuring cups and spoons: To keep ingredients precise, especially with spices and liquids.

    Step-by-Step to Silky Pumpkin Cheesy Goodness

    Step 1: Preheat your oven to 180°C (350°F).

    Step 2: Cook pasta in salted boiling water until just al dente, about 8 minutes.

    Step 3: In a large skillet, melt butter over medium heat. Add diced onion and cook until translucent, about 5 minutes.

    Step 4: Stir in pumpkin purée, a pinch of nutmeg, and a splash of cream. Let simmer until warmed through, about 3 minutes.

    Step 5: Meanwhile, make a roux with butter and flour in a separate pan. Gradually whisk in milk until smooth and thickened.

    Step 6: Combine the cheese (cheddar and Gruyère work well) with the pumpkin mixture. Mix in the cooked pasta.

    Step 7: Transfer everything to a baking dish, top with breadcrumbs, and bake for 20-25 minutes until golden and bubbling.

    Step 8: Let rest for 5 minutes before serving.

    Cooking Checks and Tips for Perfect Pumpkin Mac & Cheese

    • Pasta should be cooked al dente; it will finish cooking in the oven.
    • Cheese should melt smoothly without clumping; stir frequently.
    • The top should be golden and crispy, not burnt; watch closely in the last 5 minutes.
    • The sauce should be creamy and thick enough to coat the pasta, not watery.

    Common Pitfalls & How to Avoid Them

    • Cheese clumping or not melting smoothly.? Use high-quality cheese; cheap cheese doesn’t melt well.
    • Pasta becoming soggy in the bake.? Cook pasta just until al dente; overcooked pasta turns mushy.
    • Lumpy, uneven sauce.? Stir the sauce constantly while adding milk to avoid lumps.
    • Burnt top or uneven browning.? Keep an eye on the oven; cheese can burn quickly.

    Pumpkin Mac & Cheese

    Pumpkin mac and cheese combines creamy, cheesy goodness with the subtle sweetness and velvety texture of pumpkin. The dish is prepared by cooking pasta and making a savory pumpkin cheese sauce, then baking it until bubbly and golden, resulting in a comforting and visually appealing casserole with a rich, smooth finish.
    Prep Time 15 minutes
    Cook Time 30 minutes
    Total Time 45 minutes
    Servings: 4
    Course: Main Course
    Cuisine: American
    Calories: 450

    Ingredients
      

    • 12 oz pasta (penne or shells)
    • 2 cups pumpkin purée canned or homemade
    • 1 cup cheddar cheese shredded
    • 0.5 cup Gruyère cheese shredded
    • 1 cup cream or half-and-half
    • 0.5 cup breadcrumb Panko preferred
    • 1 small diced onion about 1 cup diced
    • 1/4 teaspoon nutmeg fresh grated if possible
    • 2 tablespoons butter
    • 2 tablespoons flour

    Equipment

    • Large pot
    • Skillet or large saucepan
    • Whisk
    • Baking dish
    • Measuring cups and spoons

    Method
     

    1. Preheat your oven to 180°C (350°F) and cook the pasta in salted boiling water until just al dente, about 8 minutes. Drain and set aside.
    2. In a large skillet, melt butter over medium heat. Add the diced onion and cook until translucent and fragrant, about 5 minutes.
    3. Stir in the pumpkin purée and a pinch of nutmeg. Let it simmer gently until warmed through and combined, about 3 minutes, filling the kitchen with a cozy aroma.
    4. In a separate pan, make a roux by melting the remaining butter, then whisking in flour until smooth and slightly bubbly. Gradually pour in the cream, whisking constantly until the sauce thickens and becomes silky.
    5. Add the shredded cheddar and Gruyère cheeses to the pumpkin mixture, stirring until melted and creamy. Pour this cheese sauce into the skillet with the onion and pumpkin, stirring well to combine.
    6. Fold in the cooked pasta, ensuring each piece is coated with the cheesy pumpkin sauce.
    7. Transfer everything into a baking dish and sprinkle the breadcrumbs evenly over the top.
    8. Bake in the preheated oven for 20-25 minutes, until the top is golden brown and bubbling around the edges.
    9. Remove from oven and let rest for about 5 minutes, allowing the sauce to set slightly and flavors to meld.
    10. Scoop into bowls, serve hot, and enjoy the comforting blend of cheesy pumpkin goodness with a crispy topping.
    This dish is a gentle nudge into fall, blending the sweet earthiness of pumpkin with gooey cheese comfort. It’s a reminder that simple ingredients can be turned into something cozy and satisfying, especially when the days get shorter. Feel free to tweak the cheese or spice levels to make it your own—this is a dish that invites improvisation, not strict rules. Enjoy it with a simple green salad or just by itself, because sometimes less is more.

  • Pumpkin Mac and Cheese: A Cozy Twist for Fall Nights

    Pumpkin Mac and Cheese: A Cozy Twist for Fall Nights

    Pumpkin mac and cheese isn’t just about comfort; it’s about embracing the season’s bounty with a dish that feels both familiar and new. The sweetness of pumpkin adds a velvety texture and a subtle earthiness that balances the richness of cheese. It’s a warm bowl of nostalgia with a twist, perfect for chilly evenings or any time you need a little extra cozy.

    Why This Pumpkin Mac & Cheese Will Keep Calling You Back

    It’s the perfect way to celebrate fall, with familiar flavors turned into a creamy, cheesy hug. The pumpkin adds a layer of warmth and richness that feels like a cozy blanket. Plus, it’s simple enough to make on a weeknight but special enough to serve at gatherings. That balance of comfort and a little twist keeps me wanting it again and again.

    Inside the Ingredients of Pumpkin Mac & Cheese

    • Pumpkin purée: Adds sweetness and creaminess, balancing the savory cheese. Use canned or homemade; it should be smooth and vibrant orange.
    • Cheddar cheese: For that sharp, tangy flavor. Feel free to mix in some smoked Gouda for depth.
    • Gruyère cheese: Melts beautifully and adds a nutty, smoky note. Skip if you prefer a milder taste.
    • Cream or half-and-half: Helps achieve a silky sauce. Substitute with whole milk for a lighter version.
    • Breadcrumbs: Creates a crispy topping. Panko works best for crunch.
    • Diced onion: Brings gentle sweetness and depth. Sauté until translucent for best flavor.
    • Nutmeg: A pinch enhances the pumpkin’s earthiness. Fresh grated is preferable.

    Tools of the Trade for a Smooth Bake

    • Large pot: To cook the pasta evenly and efficiently.
    • Skillet or large saucepan: To make the pumpkin sauce and cheese mixture.
    • Whisk: To smoothly incorporate milk into the roux.
    • Baking dish: To hold the mac and cheese for baking until bubbly and golden.
    • Measuring cups and spoons: To keep ingredients precise, especially with spices and liquids.

    Step-by-Step to Silky Pumpkin Cheesy Goodness

    Step 1: Preheat your oven to 180°C (350°F).

    Step 2: Cook pasta in salted boiling water until just al dente, about 8 minutes.

    Step 3: In a large skillet, melt butter over medium heat. Add diced onion and cook until translucent, about 5 minutes.

    Step 4: Stir in pumpkin purée, a pinch of nutmeg, and a splash of cream. Let simmer until warmed through, about 3 minutes.

    Step 5: Meanwhile, make a roux with butter and flour in a separate pan. Gradually whisk in milk until smooth and thickened.

    Step 6: Combine the cheese (cheddar and Gruyère work well) with the pumpkin mixture. Mix in the cooked pasta.

    Step 7: Transfer everything to a baking dish, top with breadcrumbs, and bake for 20-25 minutes until golden and bubbling.

    Step 8: Let rest for 5 minutes before serving.

    Cooking Checks and Tips for Perfect Pumpkin Mac & Cheese

    • Pasta should be cooked al dente; it will finish cooking in the oven.
    • Cheese should melt smoothly without clumping; stir frequently.
    • The top should be golden and crispy, not burnt; watch closely in the last 5 minutes.
    • The sauce should be creamy and thick enough to coat the pasta, not watery.

    Common Pitfalls & How to Avoid Them

    • Cheese clumping or not melting smoothly.? Use high-quality cheese; cheap cheese doesn’t melt well.
    • Pasta becoming soggy in the bake.? Cook pasta just until al dente; overcooked pasta turns mushy.
    • Lumpy, uneven sauce.? Stir the sauce constantly while adding milk to avoid lumps.
    • Burnt top or uneven browning.? Keep an eye on the oven; cheese can burn quickly.

    Pumpkin Mac and Cheese

    This creamy pumpkin mac and cheese combines tender pasta with a velvety sauce made from pumpkin purée, cheeses, and a hint of nutmeg. Topped with crispy breadcrumbs, it bakes to a golden perfection, offering a comforting, seasonal twist on a classic dish with a smooth, cheesy texture and a warm, inviting appearance.
    Prep Time 15 minutes
    Cook Time 30 minutes
    Total Time 45 minutes
    Servings: 4
    Course: Main Course
    Cuisine: American
    Calories: 480

    Ingredients
      

    • 8 oz pasta (such as elbow macaroni or shells) cooked until al dente
    • 2 tablespoons butter for sautéing and roux
    • 1 small diced onion adds sweetness and depth
    • 1 cup pumpkin purée smooth and vibrant orange
    • 1/2 cup cream or half-and-half for a silky sauce
    • 1 1/2 cups cheddar cheese shredded, for sharp flavor
    • 1/2 cup Gruyère cheese adds nuttiness and melts well
    • 1 tablespoon nutmeg fresh grated preferred
    • 1/2 cup breadcrumbs panko for crunch

    Equipment

    • Large pot
    • Skillet or large saucepan
    • Whisk
    • Baking dish
    • Measuring cups and spoons

    Method
     

    1. Preheat your oven to 180°C (350°F).
    2. Cook the pasta in a large pot of salted boiling water until just al dente, about 8 minutes. Drain and set aside.
    3. In a large skillet, melt the butter over medium heat and add the diced onion. Sauté until translucent and fragrant, about 5 minutes.
    4. Stir in the pumpkin purée, a pinch of freshly grated nutmeg, and the cream. Let simmer gently until warmed through and slightly thickened, about 3 minutes.
    5. Meanwhile, in a separate pan, make a roux by melting a little butter and stirring in flour if desired, then gradually whisk in the cream until smooth and the sauce thickens.
    6. Add the shredded cheddar and Gruyère cheeses to the pumpkin sauce, stirring until melted and smooth.
    7. Fold the cooked pasta into the cheese and pumpkin mixture, ensuring every piece is coated evenly.
    8. Transfer the mixture into a baking dish and sprinkle the breadcrumbs evenly over the top.
    9. Bake in the preheated oven for 20-25 minutes until bubbling and golden on top.
    10. Remove from the oven and let rest for 5 minutes to set before serving hot.

    Notes

    For extra flavor, mix in a few smoked Gouda pieces or sprinkle with fresh herbs before serving.
    This dish is a gentle nudge into fall, blending the sweet earthiness of pumpkin with gooey cheese comfort. It’s a reminder that simple ingredients can be turned into something cozy and satisfying, especially when the days get shorter. Feel free to tweak the cheese or spice levels to make it your own—this is a dish that invites improvisation, not strict rules. Enjoy it with a simple green salad or just by itself, because sometimes less is more.

  • Pumpkin Whoopie Pies: A Cozy Fall Concoction with a Twist

    Pumpkin Whoopie Pies: A Cozy Fall Concoction with a Twist

    Pumpkin whoopie pies are a little nostalgic, a little playful. I love how the pumpkin adds moisture and a subtle sweetness that’s unlike any other cookie. They’re perfect for pumpkin season, when everything feels a little more cozy and intentional. Plus, making the filling from scratch transforms these from simple cookies to a real treat.

    Why These Pumpkin Whoopie Pies Are a Staple

    They’re a warm hug in pastry form, perfect for chilly afternoons. Baking these feels like a ritual, a slow savoring of fall’s quiet charm. Plus, they’re endlessly customizable—more spice, less sugar, a drizzle of dark chocolate. Every batch reminds me that simple ingredients, combined with care, make the sweetest memories.

    Breaking Down the Pumpkin Pie Magic

    • Canned pumpkin: The star ingredient — adds moisture and a gentle sweetness. Use the plain variety, not spiced.
    • Brown sugar: Gives warmth and a molasses note, balancing the spices.
    • Cinnamon: The warm backbone, but feel free to add a pinch of nutmeg or ginger for depth.
    • Butter: Creamy, rich, helps the filling stay smooth. Swap with coconut oil for a dairy-free version.
    • Egg: Provides structure and stability to the cookie dough.
    • All-purpose flour: Keeps the cookies tender but sturdy enough to hold the filling.
    • Baking soda: Leavening agent that helps cookies rise just enough, giving a slight chew.

    Tools of the Pumpkin Pie Trail

    • Mixing bowls: To combine dry and wet ingredients separately.
    • Electric mixer or whisk: To beat butter and sugar until fluffy.
    • Cookie scoop: To portion dough evenly.
    • Baking sheets: To hold the cookies during baking.
    • Wire rack: To cool cookies evenly.

    Crafting the Perfect Pumpkin Whoopie Pie

    Step 1: Preheat your oven to 180°C (350°F). Line two baking sheets with parchment paper.

    Step 2: In a large bowl, whisk together 1 1/2 cups of all-purpose flour, 1 tsp baking soda, 1/2 tsp salt, and 1 tsp cinnamon.

    Step 3: In another bowl, beat 1/2 cup softened butter with 1 cup brown sugar until creamy. Add 1 cup pureed pumpkin and 1 large egg, mix well.

    Step 4: Gradually add dry ingredients to wet, stirring just until combined. The batter will be thick but scoopable.

    Step 5: Using a tablespoon or cookie scoop, dollop rounds onto prepared baking sheets, leaving space to spread.

    Step 6: Bake for 12-15 minutes, edges should turn golden and a toothpick inserted in the center comes out clean.

    Step 7: Cool the cookies on a wire rack for at least 15 minutes before filling.

    Cooking Cues & Tips for Pumpkin Whoopie Pies

    • The cookies should be golden around the edges but soft inside.
    • If they spread too thin, chill the dough for 10 minutes before baking.
    • The filling should be smooth and spreadable, not runny.
    • Listen for a slight crackle when the cookies are done.

    Troubleshooting Pumpkin Whoopie Pie Mishaps

    • Dough is too wet and spread excessively.? Incorporate a little more flour if the dough is too sticky.
    • Cookies spread into thin disks.? Chill dough for 10 minutes if cookies spread too much.
    • Over-baked or burnt edges.? Reduce oven temperature slightly if edges brown too fast.
    • Filling melts or slides off.? Let cookies cool completely before filling.

    Pumpkin Whoopie Pies

    Pumpkin whoopie pies are soft, moist cookies filled with a creamy pumpkin-flavored filling, perfect for cozy fall afternoons. The cookies are made with pumpkin puree, warm spices, and a touch of molasses-like sweetness, resulting in a tender, cake-like texture. Once assembled, they resemble mini sandwiches with a luscious, smooth filling that complements the pumpkin’s subtle sweetness.
    Prep Time 20 minutes
    Cook Time 15 minutes
    Total Time 35 minutes
    Servings: 12
    Course: Main Course
    Cuisine: American
    Calories: 180

    Ingredients
      

    • 1 1/2 cups all-purpose flour
    • 1 tsp baking soda
    • 1/2 tsp salt
    • 1 tsp cinnamon
    • 1/2 cup unsalted butter softened
    • 1 cup brown sugar
    • 1 cup canned pumpkin puree plain, not spiced
    • 1 large egg

    Equipment

    • Mixing bowls
    • electric mixer or whisk
    • Cookie scoop
    • Baking sheets
    • Parchment paper
    • Wire rack

    Method
     

    1. Preheat your oven to 180°C (350°F) and line two baking sheets with parchment paper to prepare for baking.
    2. In a large bowl, whisk together the flour, baking soda, salt, and cinnamon until well combined. This ensures even distribution of the spices and leavening agents.
    3. In another bowl, beat the softened butter and brown sugar together using an electric mixer or whisk until the mixture is light, fluffy, and fragrant, about 2-3 minutes.
    4. Add the canned pumpkin and egg to the butter mixture and beat until smooth and well incorporated, filling the bowl with a warm, pumpkin-scented aroma.
    5. Gradually fold the dry ingredients into the wet mixture using a spatula or mixer on low speed, just until combined. The dough will be thick and scoopable, with a rich pumpkin hue.
    6. Using a tablespoon or cookie scoop, portion the dough onto the prepared baking sheets, spacing each dollop about 2 inches apart to allow for spreading.
    7. Bake the cookies in the preheated oven for 12-15 minutes, or until the edges turn a light golden brown and the centers are set but still soft. You might hear a gentle crackle when they are done.
    8. Remove the baking sheets from the oven and transfer the cookies to a wire rack to cool completely—this helps them set and prevents sogginess.
    9. Once cooled, gently spread a generous layer of pumpkin-flavored filling or cream between two cookies to assemble the whoopie pies, pressing lightly to sandwich them together.
    10. Repeat with the remaining cookies and filling, then serve these cozy pumpkin treats and enjoy their soft texture and warm spice aroma.

    Notes

    For added flavor, sprinkle a little cinnamon sugar on top before baking or drizzle with dark chocolate for an extra indulgence. These can be stored in an airtight container for up to 3 days for maximum freshness.
    These pumpkin whoopie pies are best enjoyed slightly chilled, with that soft, chewy cookie melting into a sweet, spiced filling. They’re a reminder that baking can be a quiet act of kindness, especially when the air turns crisp and the leaves start to fall. Feel free to tweak the spices or add a touch of ginger or nutmeg—make it your own. Nothing beats biting into one of these with a cup of tea, feeling that warm spice hit your tongue.

  • Pumpkin Whoopie Pies: A Cozy Fall Concoction with a Twist

    Pumpkin Whoopie Pies: A Cozy Fall Concoction with a Twist

    Pumpkin whoopie pies are a little nostalgic, a little playful. I love how the pumpkin adds moisture and a subtle sweetness that’s unlike any other cookie. They’re perfect for pumpkin season, when everything feels a little more cozy and intentional. Plus, making the filling from scratch transforms these from simple cookies to a real treat.

    Why These Pumpkin Whoopie Pies Are a Staple

    They’re a warm hug in pastry form, perfect for chilly afternoons. Baking these feels like a ritual, a slow savoring of fall’s quiet charm. Plus, they’re endlessly customizable—more spice, less sugar, a drizzle of dark chocolate. Every batch reminds me that simple ingredients, combined with care, make the sweetest memories.

    Breaking Down the Pumpkin Pie Magic

    • Canned pumpkin: The star ingredient — adds moisture and a gentle sweetness. Use the plain variety, not spiced.
    • Brown sugar: Gives warmth and a molasses note, balancing the spices.
    • Cinnamon: The warm backbone, but feel free to add a pinch of nutmeg or ginger for depth.
    • Butter: Creamy, rich, helps the filling stay smooth. Swap with coconut oil for a dairy-free version.
    • Egg: Provides structure and stability to the cookie dough.
    • All-purpose flour: Keeps the cookies tender but sturdy enough to hold the filling.
    • Baking soda: Leavening agent that helps cookies rise just enough, giving a slight chew.

    Tools of the Pumpkin Pie Trail

    • Mixing bowls: To combine dry and wet ingredients separately.
    • Electric mixer or whisk: To beat butter and sugar until fluffy.
    • Cookie scoop: To portion dough evenly.
    • Baking sheets: To hold the cookies during baking.
    • Wire rack: To cool cookies evenly.

    Crafting the Perfect Pumpkin Whoopie Pie

    Step 1: Preheat your oven to 180°C (350°F). Line two baking sheets with parchment paper.

    Step 2: In a large bowl, whisk together 1 1/2 cups of all-purpose flour, 1 tsp baking soda, 1/2 tsp salt, and 1 tsp cinnamon.

    Step 3: In another bowl, beat 1/2 cup softened butter with 1 cup brown sugar until creamy. Add 1 cup pureed pumpkin and 1 large egg, mix well.

    Step 4: Gradually add dry ingredients to wet, stirring just until combined. The batter will be thick but scoopable.

    Step 5: Using a tablespoon or cookie scoop, dollop rounds onto prepared baking sheets, leaving space to spread.

    Step 6: Bake for 12-15 minutes, edges should turn golden and a toothpick inserted in the center comes out clean.

    Step 7: Cool the cookies on a wire rack for at least 15 minutes before filling.

    Cooking Cues & Tips for Pumpkin Whoopie Pies

    • The cookies should be golden around the edges but soft inside.
    • If they spread too thin, chill the dough for 10 minutes before baking.
    • The filling should be smooth and spreadable, not runny.
    • Listen for a slight crackle when the cookies are done.

    Troubleshooting Pumpkin Whoopie Pie Mishaps

    • Dough is too wet and spread excessively.? Incorporate a little more flour if the dough is too sticky.
    • Cookies spread into thin disks.? Chill dough for 10 minutes if cookies spread too much.
    • Over-baked or burnt edges.? Reduce oven temperature slightly if edges brown too fast.
    • Filling melts or slides off.? Let cookies cool completely before filling.

    Pumpkin Whoopie Pies

    Pumpkin whoopie pies are soft, moist cookies filled with a creamy pumpkin-flavored filling. The cookies are made with pumpkin puree, warm spices, and a hint of molasses, resulting in a tender, slightly chewy texture. Once assembled, they resemble small sandwiches, perfect for cozy fall afternoons.
    Prep Time 15 minutes
    Cook Time 15 minutes
    Total Time 30 minutes
    Servings: 12
    Course: Main Course
    Cuisine: American
    Calories: 180

    Ingredients
      

    • 1 1/2 cups all-purpose flour
    • 1 tsp baking soda
    • 1/2 tsp salt
    • 1 tsp cinnamon
    • 1/2 cup butter softened
    • 1 cup brown sugar
    • 1 cup pureed pumpkin plain, not spiced
    • 1 large egg
    • 1 cup unsalted butter for filling
    • 2 cups powdered sugar for filling
    • 1/2 tsp cinnamon for filling
    • 1/4 tsp nutmeg optional, for filling

    Equipment

    • Mixing bowls
    • electric mixer or whisk
    • Cookie scoop
    • Baking sheets
    • Parchment paper
    • Wire rack

    Method
     

    1. Preheat your oven to 180°C (350°F) and line two baking sheets with parchment paper.
    2. In a large bowl, whisk together the flour, baking soda, salt, and cinnamon until well combined. This helps evenly distribute the spices and leavening agents.
    3. In another bowl, beat the softened butter and brown sugar with an electric mixer until the mixture is fluffy, light, and creamy, about 2-3 minutes. The sugar should be slightly dissolved, and the mixture should smell warm and inviting.
    4. Add the pureed pumpkin and egg to the butter mixture, beating until the ingredients are thoroughly combined and the mixture looks smooth and slightly thickened.
    5. Gradually add the dry ingredients to the wet mixture, mixing just until the flour is incorporated. The dough will be thick and slightly sticky, but scoopable.
    6. Using a cookie scoop or tablespoon, portion the dough onto the prepared baking sheets, leaving about 2 inches between each dollop to allow for spreading.
    7. Bake in the preheated oven for 12-15 minutes, until the edges turn golden and the tops are set. You’ll hear a gentle crackle when they are done.
    8. Remove the cookies from the oven and let them cool on the baking sheets for 5 minutes before transferring them to a wire rack to cool completely. This prevents them from breaking apart while still warm.
    9. While the cookies cool, prepare the filling by beating softened butter, powdered sugar, cinnamon, and nutmeg until smooth and fluffy. The filling should be creamy and easy to spread.
    10. Once the cookies are completely cooled, spread a generous dollop of filling on the flat side of one cookie, then sandwich with a second cookie to form a small sandwich.
    11. Repeat with the remaining cookies and filling. Serve these tender, flavorful pumpkin whoopie pies at room temperature and enjoy the cozy fall flavors.

    Notes

    Chill the dough for 10 minutes if the cookies spread too much during baking. For a dairy-free version, substitute coconut oil for butter in the dough and filling.
    These pumpkin whoopie pies are best enjoyed slightly chilled, with that soft, chewy cookie melting into a sweet, spiced filling. They’re a reminder that baking can be a quiet act of kindness, especially when the air turns crisp and the leaves start to fall. Feel free to tweak the spices or add a touch of ginger or nutmeg—make it your own. Nothing beats biting into one of these with a cup of tea, feeling that warm spice hit your tongue.

  • Pumpkin Whoopie Pies: A Cozy Fall Concoction with a Twist

    Pumpkin Whoopie Pies: A Cozy Fall Concoction with a Twist

    Pumpkin whoopie pies are a little nostalgic, a little playful. I love how the pumpkin adds moisture and a subtle sweetness that’s unlike any other cookie. They’re perfect for pumpkin season, when everything feels a little more cozy and intentional. Plus, making the filling from scratch transforms these from simple cookies to a real treat.

    Why These Pumpkin Whoopie Pies Are a Staple

    They’re a warm hug in pastry form, perfect for chilly afternoons. Baking these feels like a ritual, a slow savoring of fall’s quiet charm. Plus, they’re endlessly customizable—more spice, less sugar, a drizzle of dark chocolate. Every batch reminds me that simple ingredients, combined with care, make the sweetest memories.

    Breaking Down the Pumpkin Pie Magic

    • Canned pumpkin: The star ingredient — adds moisture and a gentle sweetness. Use the plain variety, not spiced.
    • Brown sugar: Gives warmth and a molasses note, balancing the spices.
    • Cinnamon: The warm backbone, but feel free to add a pinch of nutmeg or ginger for depth.
    • Butter: Creamy, rich, helps the filling stay smooth. Swap with coconut oil for a dairy-free version.
    • Egg: Provides structure and stability to the cookie dough.
    • All-purpose flour: Keeps the cookies tender but sturdy enough to hold the filling.
    • Baking soda: Leavening agent that helps cookies rise just enough, giving a slight chew.

    Tools of the Pumpkin Pie Trail

    • Mixing bowls: To combine dry and wet ingredients separately.
    • Electric mixer or whisk: To beat butter and sugar until fluffy.
    • Cookie scoop: To portion dough evenly.
    • Baking sheets: To hold the cookies during baking.
    • Wire rack: To cool cookies evenly.

    Crafting the Perfect Pumpkin Whoopie Pie

    Step 1: Preheat your oven to 180°C (350°F). Line two baking sheets with parchment paper.

    Step 2: In a large bowl, whisk together 1 1/2 cups of all-purpose flour, 1 tsp baking soda, 1/2 tsp salt, and 1 tsp cinnamon.

    Step 3: In another bowl, beat 1/2 cup softened butter with 1 cup brown sugar until creamy. Add 1 cup pureed pumpkin and 1 large egg, mix well.

    Step 4: Gradually add dry ingredients to wet, stirring just until combined. The batter will be thick but scoopable.

    Step 5: Using a tablespoon or cookie scoop, dollop rounds onto prepared baking sheets, leaving space to spread.

    Step 6: Bake for 12-15 minutes, edges should turn golden and a toothpick inserted in the center comes out clean.

    Step 7: Cool the cookies on a wire rack for at least 15 minutes before filling.

    Cooking Cues & Tips for Pumpkin Whoopie Pies

    • The cookies should be golden around the edges but soft inside.
    • If they spread too thin, chill the dough for 10 minutes before baking.
    • The filling should be smooth and spreadable, not runny.
    • Listen for a slight crackle when the cookies are done.

    Troubleshooting Pumpkin Whoopie Pie Mishaps

    • Dough is too wet and spread excessively.? Incorporate a little more flour if the dough is too sticky.
    • Cookies spread into thin disks.? Chill dough for 10 minutes if cookies spread too much.
    • Over-baked or burnt edges.? Reduce oven temperature slightly if edges brown too fast.
    • Filling melts or slides off.? Let cookies cool completely before filling.

    Pumpkin Whoopie Pies

    Pumpkin whoopie pies are soft, moist cookies filled with a creamy pumpkin-flavored filling, perfect for cozy fall afternoons. The cookies are made with pumpkin puree, warm spices, and a tender crumb, while the filling is smooth and flavorful. Their charming, sandwich-like appearance makes them as delightful to look at as they are to enjoy.
    Prep Time 20 minutes
    Cook Time 15 minutes
    Total Time 35 minutes
    Servings: 12
    Course: Main Course
    Cuisine: American
    Calories: 220

    Ingredients
      

    • 1 1/2 cups all-purpose flour
    • 1 tsp baking soda
    • 1/2 tsp salt
    • 1 tsp cinnamon
    • 1/2 cup unsalted butter softened
    • 1 cup brown sugar
    • 1 cup pureed pumpkin plain, not spiced
    • 1 large egg

    Equipment

    • Mixing bowls
    • electric mixer or whisk
    • Cookie scoop
    • Baking sheets
    • Parchment paper
    • Wire rack

    Method
     

    1. Preheat your oven to 180°C (350°F) and line two baking sheets with parchment paper to prevent sticking.
    2. In a large mixing bowl, whisk together the flour, baking soda, salt, and cinnamon until evenly combined. This creates a flavorful dry base for the cookies.
    3. In a separate bowl, beat the softened butter and brown sugar together using an electric mixer or whisk until the mixture is light, fluffy, and creamy, about 2-3 minutes. The sound should be a gentle whir, and the texture airy.
    4. Add the pureed pumpkin to the butter mixture and beat until well incorporated, then mix in the egg until the batter is smooth and slightly thickened.
    5. Gradually fold the dry ingredients into the wet mixture, stirring just until combined. The dough will be thick and sticky, resembling a soft cookie dough.
    6. Scoop tablespoon-sized portions of dough onto the prepared baking sheets, spacing them about 2 inches apart to allow for spreading. Use a cookie scoop for even size and shape.
    7. Bake the cookies in the preheated oven for 12-15 minutes, until the edges turn golden and the centers look set but still soft. You’ll hear a slight crackle when they’re ready.
    8. Remove the baking sheets from the oven and let the cookies cool on a wire rack for at least 15 minutes. This helps them set and makes handling easier.
    9. Once cooled, gently spread a generous layer of pumpkin-flavored filling between pairs of cookies to assemble the whoopie pies.
    10. Press the cookies together gently to create a sandwich, ensuring the filling reaches the edges for a perfect look.
    11. Serve the pumpkin whoopie pies at room temperature, enjoying their soft texture and warm spices with every bite.
    These pumpkin whoopie pies are best enjoyed slightly chilled, with that soft, chewy cookie melting into a sweet, spiced filling. They’re a reminder that baking can be a quiet act of kindness, especially when the air turns crisp and the leaves start to fall. Feel free to tweak the spices or add a touch of ginger or nutmeg—make it your own. Nothing beats biting into one of these with a cup of tea, feeling that warm spice hit your tongue.

  • Pumpkin Whoopie Pies: A Cozy Fall Concoction with a Twist

    Pumpkin Whoopie Pies: A Cozy Fall Concoction with a Twist

    Pumpkin whoopie pies are a little nostalgic, a little playful. I love how the pumpkin adds moisture and a subtle sweetness that’s unlike any other cookie. They’re perfect for pumpkin season, when everything feels a little more cozy and intentional. Plus, making the filling from scratch transforms these from simple cookies to a real treat.

    Why These Pumpkin Whoopie Pies Are a Staple

    They’re a warm hug in pastry form, perfect for chilly afternoons. Baking these feels like a ritual, a slow savoring of fall’s quiet charm. Plus, they’re endlessly customizable—more spice, less sugar, a drizzle of dark chocolate. Every batch reminds me that simple ingredients, combined with care, make the sweetest memories.

    Breaking Down the Pumpkin Pie Magic

    • Canned pumpkin: The star ingredient — adds moisture and a gentle sweetness. Use the plain variety, not spiced.
    • Brown sugar: Gives warmth and a molasses note, balancing the spices.
    • Cinnamon: The warm backbone, but feel free to add a pinch of nutmeg or ginger for depth.
    • Butter: Creamy, rich, helps the filling stay smooth. Swap with coconut oil for a dairy-free version.
    • Egg: Provides structure and stability to the cookie dough.
    • All-purpose flour: Keeps the cookies tender but sturdy enough to hold the filling.
    • Baking soda: Leavening agent that helps cookies rise just enough, giving a slight chew.

    Tools of the Pumpkin Pie Trail

    • Mixing bowls: To combine dry and wet ingredients separately.
    • Electric mixer or whisk: To beat butter and sugar until fluffy.
    • Cookie scoop: To portion dough evenly.
    • Baking sheets: To hold the cookies during baking.
    • Wire rack: To cool cookies evenly.

    Crafting the Perfect Pumpkin Whoopie Pie

    Step 1: Preheat your oven to 180°C (350°F). Line two baking sheets with parchment paper.

    Step 2: In a large bowl, whisk together 1 1/2 cups of all-purpose flour, 1 tsp baking soda, 1/2 tsp salt, and 1 tsp cinnamon.

    Step 3: In another bowl, beat 1/2 cup softened butter with 1 cup brown sugar until creamy. Add 1 cup pureed pumpkin and 1 large egg, mix well.

    Step 4: Gradually add dry ingredients to wet, stirring just until combined. The batter will be thick but scoopable.

    Step 5: Using a tablespoon or cookie scoop, dollop rounds onto prepared baking sheets, leaving space to spread.

    Step 6: Bake for 12-15 minutes, edges should turn golden and a toothpick inserted in the center comes out clean.

    Step 7: Cool the cookies on a wire rack for at least 15 minutes before filling.

    Cooking Cues & Tips for Pumpkin Whoopie Pies

    • The cookies should be golden around the edges but soft inside.
    • If they spread too thin, chill the dough for 10 minutes before baking.
    • The filling should be smooth and spreadable, not runny.
    • Listen for a slight crackle when the cookies are done.

    Troubleshooting Pumpkin Whoopie Pie Mishaps

    • Dough is too wet and spread excessively.? Incorporate a little more flour if the dough is too sticky.
    • Cookies spread into thin disks.? Chill dough for 10 minutes if cookies spread too much.
    • Over-baked or burnt edges.? Reduce oven temperature slightly if edges brown too fast.
    • Filling melts or slides off.? Let cookies cool completely before filling.

    Pumpkin Whoopie Pies

    Pumpkin whoopie pies are soft, moist cookies filled with a creamy pumpkin-flavored filling, perfect for cozy fall afternoons. The cookies are made with pumpkin puree, spices, and a touch of molasses-like richness, while the filling is smooth and luscious. Their tender texture and warm spices make them a delightful seasonal treat.
    Prep Time 20 minutes
    Cook Time 15 minutes
    Total Time 35 minutes
    Servings: 12
    Course: Main Course
    Cuisine: American
    Calories: 250

    Ingredients
      

    • 1 1/2 cups all-purpose flour
    • 1 tsp baking soda
    • 1/2 tsp salt
    • 1 tsp cinnamon
    • 1/2 cup unsalted butter, softened
    • 1 cup brown sugar
    • 1 cup canned pumpkin puree plain, not spiced
    • 1 large egg
    • 1 1/2 cups powdered sugar for filling
    • 4 oz cream cheese softened
    • 1 tsp vanilla extract

    Equipment

    • Mixing bowls
    • electric mixer or whisk
    • Cookie scoop
    • Baking sheets
    • Parchment paper
    • Wire rack

    Method
     

    1. Preheat your oven to 180°C (350°F) and line two baking sheets with parchment paper. Gather your ingredients and prepare to mix.
    2. In a large bowl, whisk together the flour, baking soda, salt, and cinnamon until evenly combined. This creates your dry mixture.
    3. In another bowl, beat the softened butter and brown sugar with an electric mixer until the mixture is light, fluffy, and fragrant—about 2-3 minutes.
    4. Add the pumpkin puree and egg to the butter mixture, beating until well incorporated and smooth.
    5. Gradually add the dry ingredients to the wet, mixing on low speed or folding until just combined. The dough will be thick and slightly sticky.
    6. Using a cookie scoop or tablespoon, portion the dough onto the prepared baking sheets, spacing them about 2 inches apart to allow for spreading.
    7. Bake in the preheated oven for 12-15 minutes, or until the edges turn golden and a toothpick inserted into the center comes out clean. The cookies will feel firm but slightly soft when pressed.
    8. Remove the cookies from the oven and let them cool on the baking sheets for 5 minutes, then transfer them to a wire rack to cool completely. The cookies should be tender and moist, with a slight bounce when pressed.
    9. While the cookies cool, prepare the filling by beating the softened cream cheese, powdered sugar, and vanilla together until smooth and creamy, about 2 minutes.
    10. Once the cookies are fully cooled, spread a generous dollop of the pumpkin cream filling onto the flat side of one cookie and top with another to form a sandwich. Repeat with remaining cookies.
    11. Serve your pumpkin whoopie pies immediately or refrigerate them for an hour to set the filling. Enjoy these soft, moist, and warmly spiced treats!

    Notes

    For an extra touch, drizzle melted dark chocolate over the assembled pies or dust with a little cinnamon before serving.
    These pumpkin whoopie pies are best enjoyed slightly chilled, with that soft, chewy cookie melting into a sweet, spiced filling. They’re a reminder that baking can be a quiet act of kindness, especially when the air turns crisp and the leaves start to fall. Feel free to tweak the spices or add a touch of ginger or nutmeg—make it your own. Nothing beats biting into one of these with a cup of tea, feeling that warm spice hit your tongue.