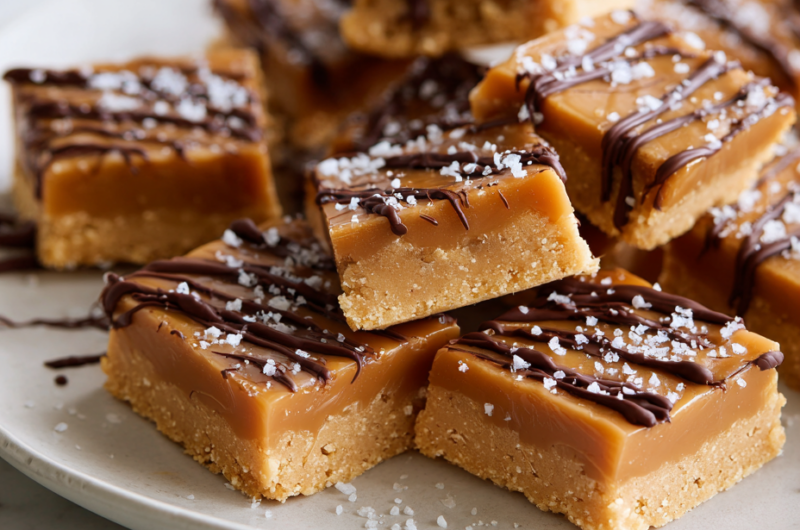
During holiday season, my kitchen turns into a whirlwind of chaos, and I often find myself craving simple, satisfying treats that come together fast. These no bake caramel bars are my secret weapon—no oven, no fuss, just rich, gooey caramel layered over a buttery crust. They’re perfect for when time’s tight but I still want something sweet, homemade, and deeply comforting.
What I love about this recipe is how it captures that messy, joyful energy of holiday baking marathons without the stress. It’s a bit like a culinary hug—sweet, salty, and a little bit nostalgic. Plus, they make for a fantastic last-minute gift or a quick crowd-pleaser when friends drop by unexpectedly. It’s honest, straightforward baking that keeps the chaos fun and the flavors real.
This recipe is inspired by the chaos of my kitchen during holiday baking marathons, where quick, no-fuss treats save the day and keep everyone happy.
Story Behind the Recipe
- This recipe came from a night when I needed something sweet, fast, and no-fuss after a long day. I was rummaging through my pantry, looking for ingredients that didn’t require oven time or complicated steps. The idea of a gooey, caramel layer on a crunchy base just felt right—comforting and effortless.
- I remember making a batch on a rainy afternoon, the smell of melting caramel filling the kitchen with a cozy warmth. Sharing these with friends became a spontaneous moment of joy—no utensils, no mess, just pure, sticky satisfaction.
- heading
- Story Behind the Recipe
Ingredient breakdown: key components
- Butter: I use unsalted butter for a clean, rich flavor that melts beautifully into the crust—skip the salt if you want a milder taste.
- Sweetened Condensed Milk: It’s the glue that makes everything gooey and smooth—look for a thick, shiny version, and don’t skimp on the stirring to avoid burning.
- Caramel Sauce: I prefer a deep, smoky caramel for that complex sweetness—try a homemade version if you’re feeling ambitious, but store-bought works just fine.
- Graham Cracker Crumbs: I like a fine, buttery crumb; if yours are chunky, pulse them a bit more—this keeps the crust from being gritty.
- Sea Salt Flakes: A sprinkle on top enhances the sweetness—use flaky sea salt for that satisfying crunch and burst of contrast.
- Chocolate (optional): If I add it, I melt dark chocolate until glossy—don’t overheat, or it’ll seize up and turn dull.
- Vanilla Extract: Just a splash deepens the caramel’s richness—skip it if you prefer a more straightforward, salty-sweet flavor.
Spotlight on key ingredients
Graham Cracker Crumbs:
- Sweetened Condensed Milk: I love how it transforms into a silky, gooey caramel when heated—smooth, rich, and impossibly easy to stir. It’s the glue that holds everything together, giving that decadent, melt-in-your-mouth texture.
- I prefer a fine, buttery crumb that presses into the crust seamlessly—if yours are chunky, pulse them more. They should feel like damp sand, giving a crisp, tender base that’s just the right amount of crumbly and crunchy.
Caramel Sauce:
- I aim for a deep, smoky caramel that’s rich and complex—look for a sauce that’s thick and oozes with a glossy sheen. The smell should be sweet with a hint of toasted darkness, adding a layer of sophistication to the sweetness.
- Sea Salt Flakes: I sprinkle flaky sea salt on top for that satisfying crunch and burst of salty contrast—don’t skip it. It enhances the caramel’s depth and balances the sweetness with a subtle shimmer of saltiness that makes every bite pop.
Notes for ingredient swaps
- Dairy-Free: Replace unsalted butter with coconut oil or dairy-free margarine. Expect a slightly different richness and a hint of coconut aroma.
- Vegan Caramel: Use coconut condensed milk or a homemade coconut caramel sauce. It’ll be a bit lighter and add a tropical note.
- Gluten-Free: Swap graham cracker crumbs for crushed gluten-free cookies or digestive biscuits. Keep an eye on texture, they might be a tad grittier.
- Sweetener Variations: Use honey or maple syrup instead of condensed milk for a different sweetness profile—expect more floral or earthy notes.
- Chocolate Topping: Substitute dark chocolate with white chocolate or milk chocolate, changing the flavor and sweetness level.
- Salt Flakes: Use fine sea salt if flaky isn’t available—less crunchy but still enhances the caramel’s depth.
- Crunch Base: Try crushed pretzels or toasted oats instead of graham crackers for a different crunch and saltiness.
Equipment & Tools
- 20×20 cm (8×8 inch) square pan: Holds the layered bars and makes slicing easier
- Saucepan: Melts the caramel and heats the ingredients evenly
- Spatula: Spreads caramel and presses crust into the pan
- Mixing bowl: Combines crust ingredients thoroughly
- Knife (warmed): Slices the bars cleanly
Step-by-step guide to no bake caramel bars
- Gather your equipment: a 20×20 cm (8×8 inch) square pan, a saucepan, a spatula, and a mixing bowl. The pan will hold your bars, the saucepan melts the caramel, the spatula spreads, and the bowl mixes your crust ingredients.
- Make the crust: In the mixing bowl, combine 1 1/2 cups of graham cracker crumbs, 1/4 cup of sugar, and 1/2 cup of melted unsalted butter. Mix until crumbs are evenly coated and resemble wet sand. Press this mixture firmly into the bottom of your pan, smoothing out with the back of a spoon or a flat-bottomed glass. Chill in the fridge for 15 minutes to set.
- Prepare the caramel layer: In the saucepan, melt 1 can (14 oz) of sweetened condensed milk over low heat. Stir constantly to prevent burning. When it thickens slightly and turns a light golden color, about 5-7 minutes, remove from heat. Add 1/2 teaspoon of vanilla extract and 1/4 teaspoon of sea salt, stir well.
- Pour the warm caramel over the chilled crust, spreading evenly with a spatula. Return the pan to the fridge and let set for at least 2 hours, or until the caramel is firm and slightly jiggly but not sticky to touch.
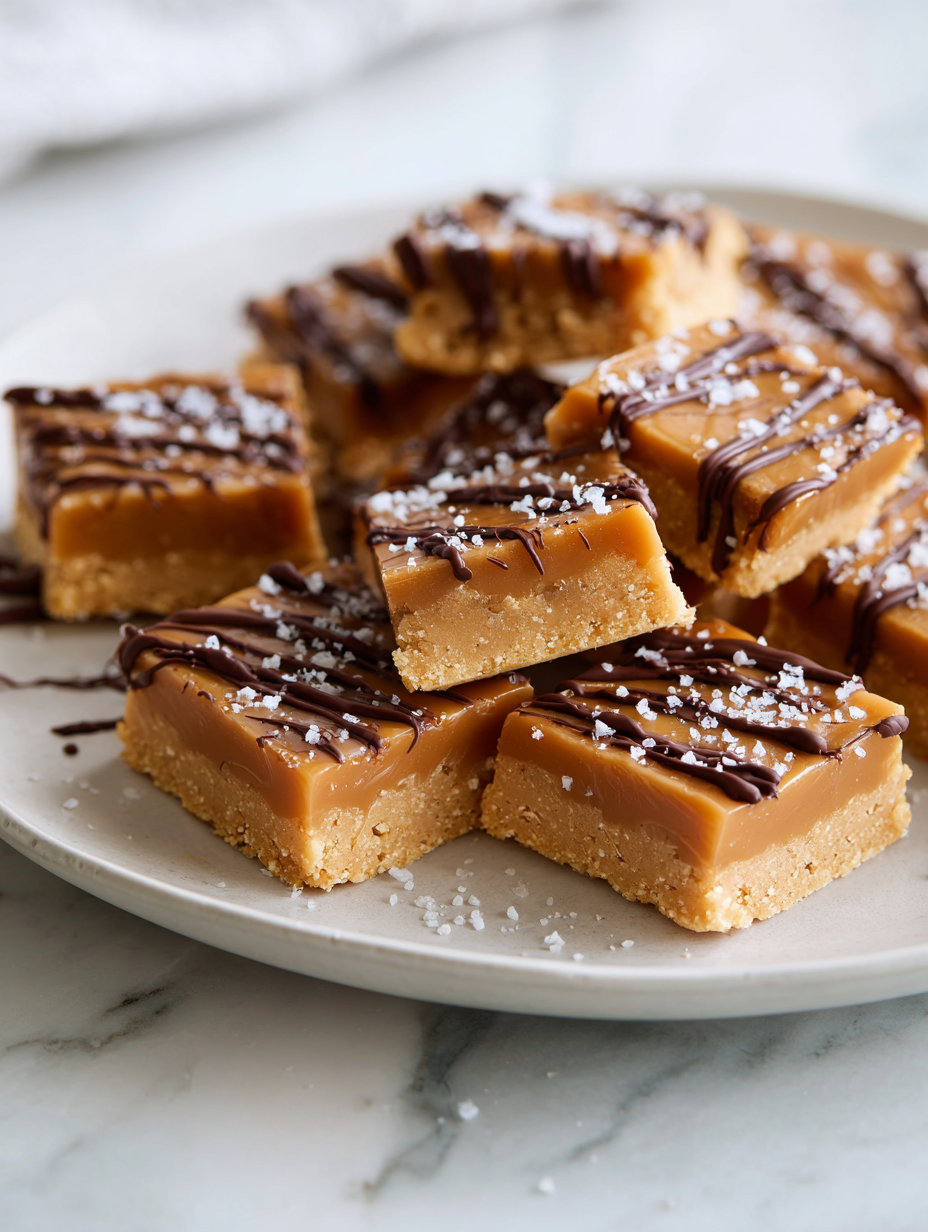
- Finish with optional toppings: Melt 1/2 cup of dark chocolate and drizzle over the set caramel layer for a glossy finish. Sprinkle flaky sea salt on top for contrast. Chill again for 15-20 minutes to set the chocolate.
- Remove from fridge: Let sit at room temperature for about 10 minutes before slicing. Use a sharp knife warmed under hot water for clean cuts. Cut into small squares or bars, depending on your preference.
- Serve and enjoy: These bars are best enjoyed slightly chilled but not cold, with a chewy, caramel-y bite and a buttery crust. Keep leftovers in an airtight container in the fridge for up to a week.
Chill the assembled bars for at least 2 hours, or until set. Bring to room temperature for 10 minutes before slicing. Serve directly from the pan or transfer to a platter for presentation.
How to Know It’s Done
- Crust is firm and holds shape when pressed
- Caramel layer is smooth, glossy, and jiggles slightly but doesn’t stick to touch
- Chocolate drizzle is shiny and set, not tacky or dull
No-Bake Caramel Bars
Ingredients
Equipment
Method
- Combine graham cracker crumbs, sugar, and melted butter in a mixing bowl, stirring until evenly coated and resembling damp sand.
- Press this crumb mixture firmly into the bottom of your square pan, smoothing the surface with the back of a spoon or a flat-bottomed glass. Chill in the fridge for 15 minutes to set.
- In a saucepan over low heat, melt the sweetened condensed milk, stirring constantly until it thickens slightly and turns a light golden color, about 5-7 minutes. The smell should be sweet with a toasted note.
- Remove the caramel from heat and stir in vanilla extract and sea salt flakes, blending until smooth and glossy.
- Pour the warm caramel evenly over the chilled crust, spreading gently with a spatula to create a smooth, uniform layer.
- Return the pan to the fridge and chill for at least 2 hours, or until the caramel layer is firm and slightly jiggly but not sticky to touch.
- Melt the dark chocolate in short bursts in the microwave until glossy, then drizzle it over the set caramel layer for a beautiful finish.
- Sprinkle flaky sea salt flakes over the chocolate for a satisfying crunch and contrast.
- Refrigerate for another 15-20 minutes until the chocolate drizzle sets completely.
- Remove from the fridge and let sit at room temperature for about 10 minutes. Use a warmed, sharp knife to cut into small squares or bars for serving.
- Enjoy these rich, chewy caramel bars with a crispy crust and a salty-sweet finish. Keep leftovers in an airtight container in the fridge for up to a week.
Pro tips for perfect bars
- Bolded Mini-Head: Use room temperature butter for a smoother crust—cold butter resists blending and leaves you with a gritty base.
- Bolded Mini-Head: Stir caramel constantly while heating—this prevents scorching and ensures a glossy, even layer.
- Bolded Mini-Head: Chill the crust before adding caramel—setting the base helps prevent sliding or mixing when spreading.
- Bolded Mini-Head: Wipe your knife in hot water before slicing—this gives clean, sharp cuts through sticky caramel.
- Bolded Mini-Head: Add a pinch of salt to caramel while cooking—enhances flavor and balances sweetness for a richer bite.
- Bolded Mini-Head: Use a spatula to evenly spread toppings—press gently but firmly for a smooth finish that sets well.
- Bolded Mini-Head: Don’t rush the chill time—patience ensures the caramel is firm and the bars hold shape when cut.
Common mistakes and how to fix them
- FORGOT to level the caramel layer → Use a spatula to smooth evenly.
- DUMPED caramel too hot → Let it cool slightly before pouring.
- OVER-TORCHED crust → Remove immediately to prevent bitterness.
- MISSED the chill time → Ensure at least 2 hours for proper setting.
Quick fixes and pantry swaps
- When caramel is too thick → Splash in a teaspoon of hot water and stir until smooth.
- If bars stick to the pan → Patch with a warm damp cloth around edges to loosen.
- When chocolate doesn’t set → Shield from humidity, refrigerate for 10 minutes and check again.
- If caramel cracks when sliced → Rest at room temperature for 10 minutes for softer cuts.
- Splash a bit of oil on your knife before slicing sticky bars to prevent sticking.
Prep, store, and reheat tips
- Prepare the crust and press into the pan up to 24 hours ahead; keep covered in the fridge to stay fresh.
- The caramel layer can be made a day in advance; store in an airtight container in the fridge, where it stays gooey and rich for up to 3 days.
- Once assembled and topped with chocolate, the bars will keep in the fridge for about a week; the caramel may firm slightly but remains delicious.
- Reheat slices briefly in the microwave (10-15 seconds) until the caramel is soft and gooey—watch for shiny, melty edges and a warm aroma.
- For best texture, serve at room temperature—let chilled bars sit out for 10 minutes before slicing to soften the caramel.
Top questions about no bake caramel bars
1. Can I make these dairy-free?
Yes, you can use coconut condensed milk for a dairy-free version. It’s slightly lighter but still rich.
2. How long do the bars last?
Store leftovers in an airtight container in the fridge for up to a week. They stay chewy and flavorful.
3. Can I add chocolate toppings?
Yes, melting chocolate in short bursts in the microwave until glossy works best. Don’t overheat it.
4. How long should I chill the bars?
Chill the bars for at least 2 hours until the caramel is firm. The more time, the better the set.
5. What if the caramel is too thick to spread?
If the caramel is too thick, add a teaspoon of hot water and stir until smooth. It should be oozy.
6. How do I cut the bars neatly?
Use a warmed, sharp knife for clean slices. Wiping the blade in hot water helps cut through sticky caramel.
7. Can I change the crust texture?
For a crunchier crust, pulse the graham crackers more finely. For a softer one, leave some small crumbs.
8. Can I make parts of this ahead of time?
Yes, you can prepare the crust and caramel a day ahead. Keep them covered and chilled until assembling.
9. Why isn’t my chocolate setting properly?
When the chocolate drizzle is dull or tacky, refrigerate for 10 minutes. It’ll firm up shiny and crisp.
10. Bars are sticking to the pan—what now?
If the bars stick to the pan, run a warm damp cloth around edges to loosen them gently.
These no bake caramel bars are my go-to when I need something sweet in a flash, especially during busy weekends. The combination of buttery crust and rich caramel hits that perfect spot of indulgence without the fuss of baking. They’re imperfect, messy, and utterly satisfying—just like a good homemade treat should be.
Sharing these with friends or family always feels like a small victory—simple, honest, and deeply nostalgic. Sometimes, the best desserts are the ones that come together quickly but leave a lasting impression. They’re a reminder that a little chaos in the kitchen can lead to the sweetest moments.

Hi, I’m Grace Morgan, and welcome to my kitchen. This is a space shaped by family meals, curious hands reaching for snacks, paws under the table, and recipes that come together in the middle of real life. I’m a food blogger, a mother, and a passionate pet keeper. Most days, I’m cooking with one eye on the stove and the other on someone who needs me, whether that’s a child asking for a taste or a dog hoping something might fall.


