This recipe is my secret weapon for quick, satisfying treats when unexpected guests arrive or I need a sweet fix without turning on the oven. It’s about comfort and spontaneity—having a stash of these caramel bites that come together in minutes, yet taste indulgent and homemade, no fuss involved.
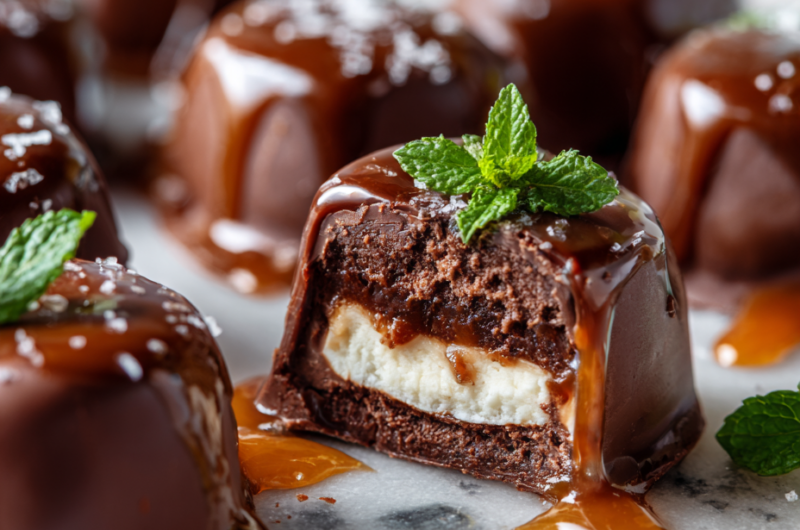
There’s something satisfying about how these no-bake caramel bites feel like a tiny, chewy treasure in your mouth. The blend of buttery, gooey caramel coated in smooth chocolate makes every bite a little moment of indulgence, perfect for busy days or lazy afternoons. Plus, they keep well in the fridge, so I often make a batch on a weekend and just grab them when cravings hit.
This recipe is my secret weapon for quick, satisfying treats when unexpected guests arrive or I need a sweet fix without turning on the oven. It’s about comfort and spontaneity—having a stash of these caramel bites that come together in minutes, yet taste indulgent and homemade, no fuss involved.
Spontaneous Sweetness
- I love how these bites come together so quickly, perfect for last-minute cravings.
- There’s a nostalgic joy in the gooey caramel melting in my mouth, reminding me of childhood treats.
- Making these is a chaotic joy—messy but so worth it for that sweet, buttery aroma filling the kitchen.
- I’m proud of how simple ingredients can turn into something so indulgent, no oven required.
- Every time I stash these in the fridge, I feel a little victorious—ready for spontaneous sweet moments.
Spontaneous Sweetness
- This recipe actually came about on a rainy afternoon when I was low on time but desperately craving something sweet and chewy. I grabbed whatever I had in the pantry—caramel bits, a bit of chocolate, and some crushed cookies—and just started mixing. The magic was in how fast it came together, and how satisfying those little bites turned out to be.
- I find that these caramel bites remind me of lazy weekends at my grandma’s house, where she’d keep a jar of homemade candies that I’d sneak bites from during visits. They’re imperfect, a little messy, but that’s exactly what makes them so comforting. Now, they’re my go-to when I want something sweet without the fuss or heat, especially during hectic weeks.
- heading
- story_type
Historical and Cultural Roots
- These no-bake caramel bites originated in small home kitchens where quick, satisfying treats were essential for busy lives.
- They gained popularity in the 1970s when instant caramel and chocolate ingredients became widely available, making homemade candies easier than ever.
- Many cultures have variations of chewy, caramel-like confections, but the simplicity of this recipe makes it a modern, accessible favorite.
- The combination of caramel and chocolate in bite-sized form taps into a long-standing tradition of indulgent, portable sweets.
Ingredient breakdown: key components
- Sweetened condensed milk: I love how it makes the caramel irresistibly gooey and rich—just watch out for the sweetness overload, so maybe add a pinch of salt next time.
- Brown sugar: Adds depth and that warm, molasses note I adore—if you want a darker, more intense caramel, brown sugar is your friend.
- Butter: I use unsalted, but salted works too if you like a little extra flavor punch; melts smoothly and smells like comfort as it heats.
- Chocolate chips: I prefer semi-sweet for balance, but dark or milk chocolate can change the vibe entirely—look for shiny, smooth chips for easy melting.
- Vanilla extract: A splash brightens the caramel and chocolate, making everything feel more layered—skip it if you’re feeling minimalist.
- Sea salt: Just a pinch on top makes all the flavors pop, like a little treasure in every bite—don’t skip it if you can help it.
- Optional add-ins: chopped nuts or flaky sea salt can elevate these bites—try them for texture and a surprise burst of flavor.
Spotlight on key ingredients
Sweetened condensed milk:
- I love how it makes the caramel irresistibly gooey and rich—just watch out for the sweetness overload, so maybe add a pinch of salt next time.
- Brown sugar: Adds depth and that warm, molasses note I adore—if you want a darker, more intense caramel, brown sugar is your friend.
- Butter: I use unsalted, but salted works too if you like a little extra flavor punch; melts smoothly and smells like comfort as it heats.
Chocolate chips:
- I prefer semi-sweet for balance, but dark or milk chocolate can change the vibe entirely—look for shiny, smooth chips for easy melting.
- Sea salt: Just a pinch on top makes all the flavors pop, like a little treasure in every bite—don’t skip it if you can help it.
Notes for ingredient swaps
- Dairy-Free: Use coconut condensed milk for gooey caramel with a tropical twist, but expect a slightly different texture and flavor depth.
- Vegan Chocolate: Swap in dairy-free dark chocolate or cocoa nibs for a richer, more intense cacao flavor without dairy.
- Sugar Alternatives: Try coconut sugar or maple syrup in place of brown sugar—these will alter the caramel’s sweetness and aroma, adding subtle flavor nuances.
- Butter: Replace with coconut oil for a dairy-free option that still melts well but adds a faint coconut scent and slightly different mouthfeel.
- Sea Salt: Use flaky sea salt or Himalayan pink salt for a more mineral-rich, textured finish that enhances caramel’s richness.
- Add-ins: Incorporate chopped nuts, dried fruit, or crispy rice for extra texture—these can change the bite but add delightful crunch or chewiness.
- Chocolate: Switch to white chocolate or milk chocolate for a different sweetness level and flavor profile that can shift the overall balance.
Equipment & Tools
- Square baking dish: To hold and shape the caramel mixture.
- Parchment paper: To prevent sticking and for easy removal.
- Spatula: To spread and smooth the caramel.
- Microwave-safe bowl: To melt caramel and chocolate evenly.
- Microwave or double boiler: To gently melt chocolate without burning.
- Knife or pizza cutter: To cut the caramel into squares.
- Fork or skewer: To dip and coat the caramel in chocolate.
Step-by-step guide to caramel bites
- Equip your workspace: a square baking dish (20x20cm), parchment paper, a spatula, a microwave-safe bowl, and a microwave or double boiler setup.
- Line the baking dish with parchment, leaving overhang for easy removal. Set aside.
- In the microwave-safe bowl, combine 1 cup of caramel bits and 2 tablespoons of butter. Microwave on 50% power for 30 seconds, then stir. Repeat until smooth, about 1-2 minutes total.
- Pour the caramel mixture into the prepared dish, spreading evenly with a spatula. Chill in the fridge for 15 minutes until slightly firm but still pliable.
- While the caramel chills, melt 1 cup of chocolate chips. Use the microwave in 20-second bursts, stirring each time, until smooth and glossy.
- Remove the caramel from the fridge. Using the overhang, lift it out of the dish and place on a cutting board.
- Cut the caramel into 1-inch squares. If the caramel is too sticky, briefly chill again or lightly dust with powdered sugar.
- Dip each square into melted chocolate, using a fork or skewer, then place on a parchment-lined tray. Drizzle remaining chocolate over the top if desired.
- Sprinkle a pinch of sea salt over the chocolate-coated bites for flavor contrast.
- Let the bites set at room temperature for 20 minutes or in the fridge for 10 minutes until the chocolate is firm.
- Once set, transfer to an airtight container. Store in the fridge for up to a week, or freeze for longer storage.
Allow the chocolate to fully set at room temperature or in the fridge. Store in an airtight container, layered with parchment to prevent sticking. Serve straight from the fridge for a firm bite or at room temp for softer texture.
How to Know It’s Done
- Chocolate coating is shiny and firm to touch.
- Caramel bites are firm but slightly chewy when pressed.
- Chocolate is fully set without streaks or melting when touched.
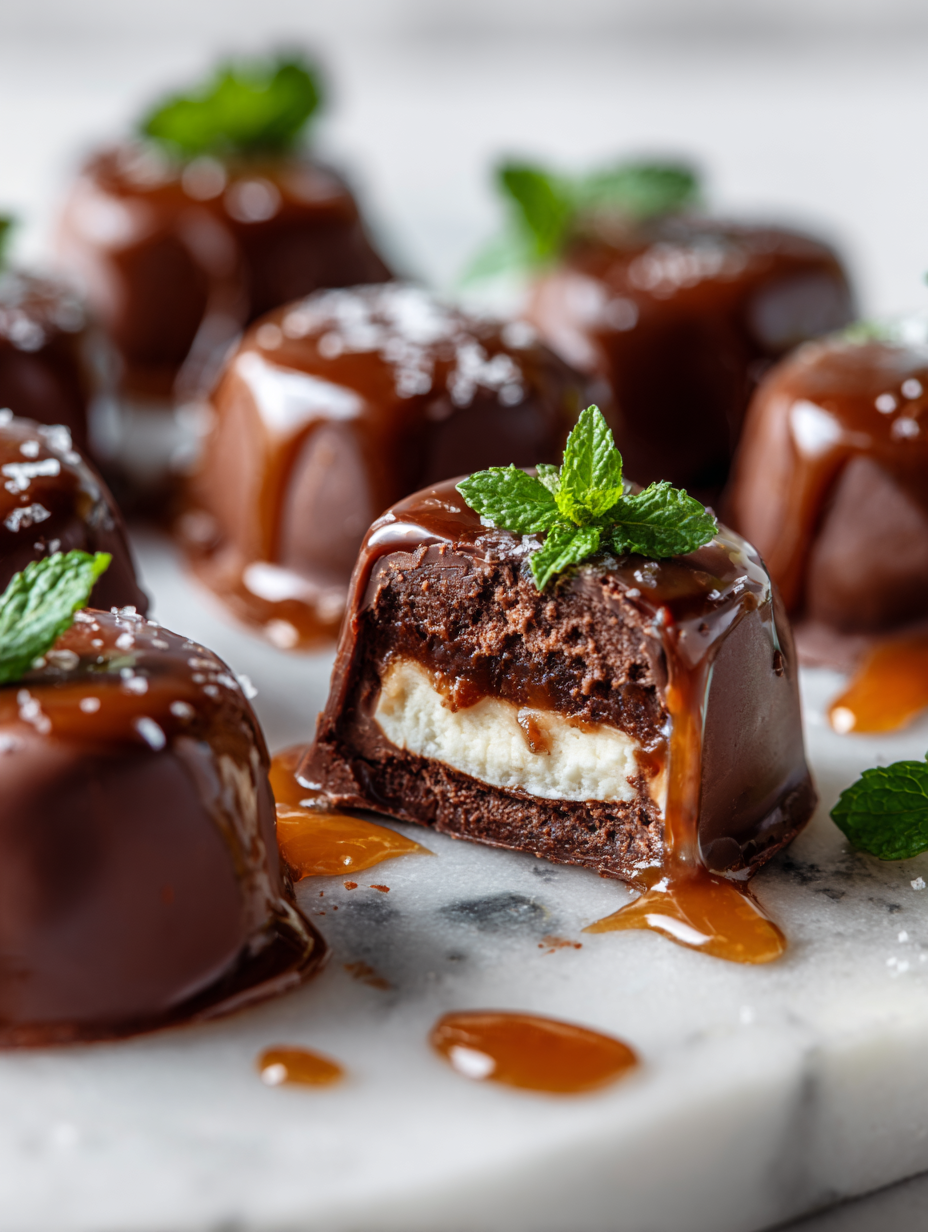
No-Bake Caramel Chocolate Bites
Ingredients
Equipment
Method
- Line your square baking dish with parchment paper, leaving overhang for easy removal.
- Combine caramel bits and butter in a microwave-safe bowl. Microwave in 50% power for 30 seconds, then stir. Repeat in 15-second bursts until the mixture is smooth and melted.
- Pour the melted caramel mixture into the prepared dish and spread evenly with a spatula. Chill in the fridge for about 15 minutes until slightly firm.
- Meanwhile, melt the chocolate chips in a separate microwave-safe bowl using short bursts, stirring in between, until smooth and glossy.
- Remove the caramel from the fridge. Using the parchment overhang, lift it out of the dish and place on a cutting board.
- Cut the caramel into 1-inch squares using a sharp knife dipped in hot water for clean cuts.
- Dip each caramel square into the melted chocolate, using a fork or skewer to coat evenly, then place on a parchment-lined tray.
- Sprinkle a tiny pinch of sea salt over the chocolate-coated bites for added flavor contrast.
- Allow the chocolate to set by letting the bites sit at room temperature for 20 minutes or refrigerate for 10 minutes until firm.
- Once set, transfer the bites to an airtight container, layering with parchment paper to prevent sticking. Store in the fridge for up to a week.
- Enjoy these chewy, chocolate-coated caramel bites straight from the fridge or at room temperature for a softer texture.
Pro tips for perfect caramel bites
- Use room temperature chocolate for smoother melting and fewer streaks.
- Chill the caramel slightly before cutting to prevent sticking and mess.
- Stir the caramel mixture gently to avoid introducing air bubbles that can cause cracks.
- When melting chocolate, do short bursts to prevent overheating and separation.
- Sprinkle sea salt immediately after coating to ensure it sticks and enhances flavor.
- Use a sharp knife dipped in hot water to get clean, smooth cuts through the caramel.
- Work quickly when dipping to keep the chocolate glossy and prevent it from setting too thick.
Common mistakes and how to fix them
- FORGOT to level the caramel mixture → Use a spatula to smooth evenly.
- DUMPED too much salt → Add salt gradually, tasting as you go.
- OVER-TORCHED the chocolate → Remove from heat once shiny and smooth, avoid burning.
- MIXED ingredients too quickly → Fold gently to keep texture light and prevent cracking.
Quick fixes and pantry swaps
- If chocolate seizes, splash in a teaspoon of vegetable oil and stir until smooth.
- When caramel is too sticky, dip your knife in hot water for cleaner cuts.
- Patch a cracked caramel batch by reheating gently and pressing cracks together.
- Splash a tiny bit of salt on melted chocolate to enhance flavor if bland.
- Shield delicate bites from humidity by storing in an airtight container in the fridge.
Prep, store, and reheat tips
- You can prep the caramel mixture and melt the chocolate a day ahead. Keep each in airtight containers in the fridge. The caramel might firm up, but a quick microwave zap (10 seconds) makes it pliable again, with that sweet, buttery aroma filling your kitchen.
- Assemble and dip the bites just before serving for the best texture and shine. If making in advance, store the dipped bites in a single layer in an airtight container in the fridge for up to 5 days—chocolate might soften slightly but will still taste rich and satisfying.
- Refrigeration keeps the caramel and chocolate firm and fresh, but avoid freezing, as ice crystals can make texture grainy. When ready to serve, let the bites sit at room temperature for 10–15 minutes to soften slightly and bring out fuller flavors.
- For reheating, briefly warm in the microwave at 10-15 second intervals until just soft and shiny again—be careful not to overheat or the chocolate may bloom or seize. The sensory cue: a glossy sheen and a faint, warm chocolate smell will tell you they’re ready.
Top questions about caramel bites
1. Can I make these caramel bites dairy-free?
Yes, using coconut condensed milk can make it dairy-free, but it slightly alters the creamy texture.
2. Can I use different types of chocolate?
Absolutely! Dark chocolate adds bitterness, milk chocolate is sweeter, and white chocolate gives a creamy finish.
3. How do I keep the caramel from sticking when cutting?
Chill the mixture for about 15 minutes in the fridge to help it firm up before cutting.
4. My chocolate is seizing, what do I do?
If the chocolate doesn’t melt smoothly, gently reheat in short bursts and stir until shiny.
5. How long do caramel bites last in the fridge?
Store in an airtight container in the fridge for up to a week for best freshness and texture.
6. Can I reheat these bites?
Reheat briefly in the microwave for 10 seconds if the chocolate or caramel firms up too much.
7. How do I get neat edges when cutting?
Use a sharp, hot knife for clean cuts through the caramel to avoid tearing or squashing.
8. Should I add salt to the caramel?
Adding a pinch of sea salt enhances the caramel flavor and creates a delightful salty-sweet contrast.
9. Can I customize these with add-ins?
You can add chopped nuts or flaky sea salt on top for extra texture and flavor.
10. Can I prepare these in advance?
Yes, the mixture can be made ahead and stored in the fridge for up to 24 hours before dipping.
These no-bake caramel bites feel like a sweet little rebellion—quick, honest, and deeply satisfying. They’re perfect for those moments when a treat needs to happen fast, but you still want it to taste like you put some love into it. Honestly, they’re a reminder that sometimes, simplicity wins.
Whenever I stash a batch in the fridge, I know I’ve got a spontaneous moment of joy waiting. No matter the chaos outside, these bites bring a quiet, sticky happiness that’s hard to beat. It’s just good, honest comfort in a tiny, chewy package.

Hi, I’m Grace Morgan, and welcome to my kitchen. This is a space shaped by family meals, curious hands reaching for snacks, paws under the table, and recipes that come together in the middle of real life. I’m a food blogger, a mother, and a passionate pet keeper. Most days, I’m cooking with one eye on the stove and the other on someone who needs me, whether that’s a child asking for a taste or a dog hoping something might fall.


