This no-bake chocolate biscuit bars recipe is a perfect way to use up those leftover biscuits gathering dust in your jar. It’s a little messy, a little nostalgic, and honestly, kind of addictive. The best part? No oven required, just a bit of melting and mixing, which makes it feel more like a fun kitchen project than a serious bake.
I first stumbled on this recipe during a chaotic weekend when I needed something sweet, quick, and satisfying. The aroma of melting chocolate mixed with the crunch of broken biscuits always takes me right back to childhood teatime treats—only now, I add a pinch of sea salt and dark chocolate for that grown-up twist. It’s one of those recipes I keep coming back to when I want comfort and a bit of chaos in the kitchen.
This recipe taps into the nostalgic rush of childhood treats, but with a twist—using leftover biscuits and a dash of adult flavor with dark chocolate and sea salt. It’s a way to reclaim a messy, joyful moment and turn it into something sophisticated yet comforting.
The story behind this recipe
- I stumbled upon this recipe during a quiet Sunday afternoon, craving something sweet but without the fuss of baking. It was one of those moments where leftovers in the kitchen suddenly become magic ingredients.
- The crunch of biscuits, the richness of dark chocolate, and a sprinkle of sea salt all come together in my memory of childhood treats—only now, with a grown-up twist that makes me smile every time I make it.
- This recipe is my go-to when I want a quick fix that feels both nostalgic and indulgent. It’s imperfect, messy, and exactly what I need on a busy day or when friends drop by unexpectedly.
Ingredient breakdown
- Dark chocolate: I love using a good quality dark chocolate, it melts smoothly and gives a rich, slightly bitter kick that balances the sweetness. Feel free to swap for milk chocolate if you prefer milder flavor, but expect a softer texture.
- Biscuits: I usually grab plain digestives or graham crackers, depending on what’s in the pantry. Crushed into fine crumbs, they give the bars that satisfying crunch. For a nuttier twist, try adding crushed biscuits with seeds or nuts.
- Butter: I melt butter to help bind everything together and add a glossy finish. If you’re dairy-free, coconut oil works but makes the bars a bit firmer and coconutty—adjust the amount accordingly.
- Sweetener: Sometimes I add a touch of honey or golden syrup for extra chewiness and depth. If you want to keep it simple, just stick to the biscuits and chocolate, but a little sweetener enhances the flavor.
- Sea salt: A pinch of flaky sea salt on top makes all the difference, highlighting the chocolate’s richness. Skip if you prefer a purely sweet bar or use smoked sea salt for a subtle smoky note.
- Optional add-ins: I like tossing in toasted nuts or dried fruit for texture and surprise bites. Keep it light so the bars don’t become too dense or crumbly when pressed into the pan.
- Vanilla extract: A splash of vanilla rounds out the chocolate flavor with a warm note. If you don’t have vanilla, a pinch of cinnamon or a dash of espresso powder can add a lovely dimension.
Spotlight on key ingredients
Dark chocolate:
- I love using a good quality dark chocolate, it melts smoothly and gives a rich, slightly bitter kick that balances the sweetness. Feel free to swap for milk chocolate if you prefer milder flavor, but expect a softer texture.
- Biscuits: I usually grab plain digestives or graham crackers, depending on what’s in the pantry. Crushed into fine crumbs, they give the bars that satisfying crunch. For a nuttier twist, try adding crushed biscuits with seeds or nuts.
- Butter: I melt butter to help bind everything together and add a glossy finish. If you’re dairy-free, coconut oil works but makes the bars a bit firmer and coconutty—adjust the amount accordingly.
Biscuits:
- Crushed into uneven pieces, they give a delightful crunch and texture contrast. Aim for a mix of fine crumbs and larger chunks for the best bite.
- Chocolate: Melts into a glossy, smooth mixture that coats the biscuits evenly. It’s important to melt it gently to avoid scorching and bitterness.
- Sea salt: A sprinkle on top amplifies the chocolate’s richness and adds a subtle crunch, making each bite more layered and complex.
Notes for ingredient swaps
- Dairy-Free: Swap regular butter for coconut oil. It melts just as well but adds a subtle coconut aroma and makes the bars a bit firmer.
- Vegan Chocolate: Use dairy-free dark chocolate or quality vegan baking chocolate. Expect a slightly different melt and possibly less creaminess.
- Biscuits: Gluten-free biscuits or graham crackers work as substitutes. Keep in mind, the texture might be a tad more crumbly or dense.
- Sweetener: Honey or maple syrup can replace golden syrup for a different sweetness profile. They add a slight floral or caramel note.
- Sea Salt: Use smoked sea salt for a smoky kick or Himalayan pink salt for a milder, mineral-rich flavor. It enhances the chocolate’s depth.
- Nuts: Add toasted almonds, hazelnuts, or pecans for crunch. If nut allergies are a concern, skip or opt for seed mixes for texture.
- Vanilla: Vanilla extract can be replaced with a splash of almond extract or a pinch of cinnamon for added warmth and complexity.
Equipment & Tools
- 20cm square baking dish: to hold and shape the bars
- parchment paper: for easy removal and clean edges
- small saucepan: to melt butter and chocolate gently
- heatproof spatula: to stir and combine ingredients smoothly
Step-by-step guide to no-bake bars
- Gather your equipment: a 20cm square baking dish, a heatproof spatula, a small saucepan, and parchment paper for lining. Purpose: to melt, mix, and set the bars smoothly.
- Line the baking dish with parchment, leaving some overhang for easy removal. Purpose: prevents sticking and helps lift out the set mixture.
- Break the biscuits into small, uneven pieces. Aim for a mix of fine crumbs and some larger chunks for texture. Purpose: creates that satisfying crunch.
- In the saucepan, melt the butter over low heat (~45°C/113°F) until just melted, about 2 minutes. Purpose: to create a glossy, smooth binding agent.
- Add chopped dark chocolate to the melted butter. Stir gently until completely smooth and shiny, about 3-4 minutes. Purpose: to melt the chocolate evenly without scorching.
- Remove from heat, then stir in the crushed biscuits, ensuring they’re well coated. Purpose: to evenly distribute biscuits in the chocolate mixture.
- Pour the mixture into the prepared dish. Use the spatula to press it down firmly and evenly. Purpose: to create a compact, uniform bar base.
- Sprinkle a pinch of flaky sea salt on top for flavor contrast. Purpose: enhances chocolate richness and adds a bit of crunch.
- Place the dish in the fridge for at least 2 hours, or until firm. Purpose: to allow the bars to set and become sliceable.
- Once set, lift the bars out using the parchment overhang. Slice into bars or squares. Purpose: to serve clean, neat pieces.
- Serve immediately or store. For best texture, keep refrigerated until ready to eat.
Refrigerate the bars for at least 2 hours until firm. Slice into squares or rectangles using a sharp knife. Serve immediately or store in an airtight container in the fridge for up to a week. For softer texture, let sit at room temperature for 10 minutes before serving.
How to Know It’s Done
- Chocolate mixture is glossy and smooth before pouring.
- Bars feel firm but not brittle when pressed gently.
- Surface is matte and set after refrigeration, with no sticky spots.
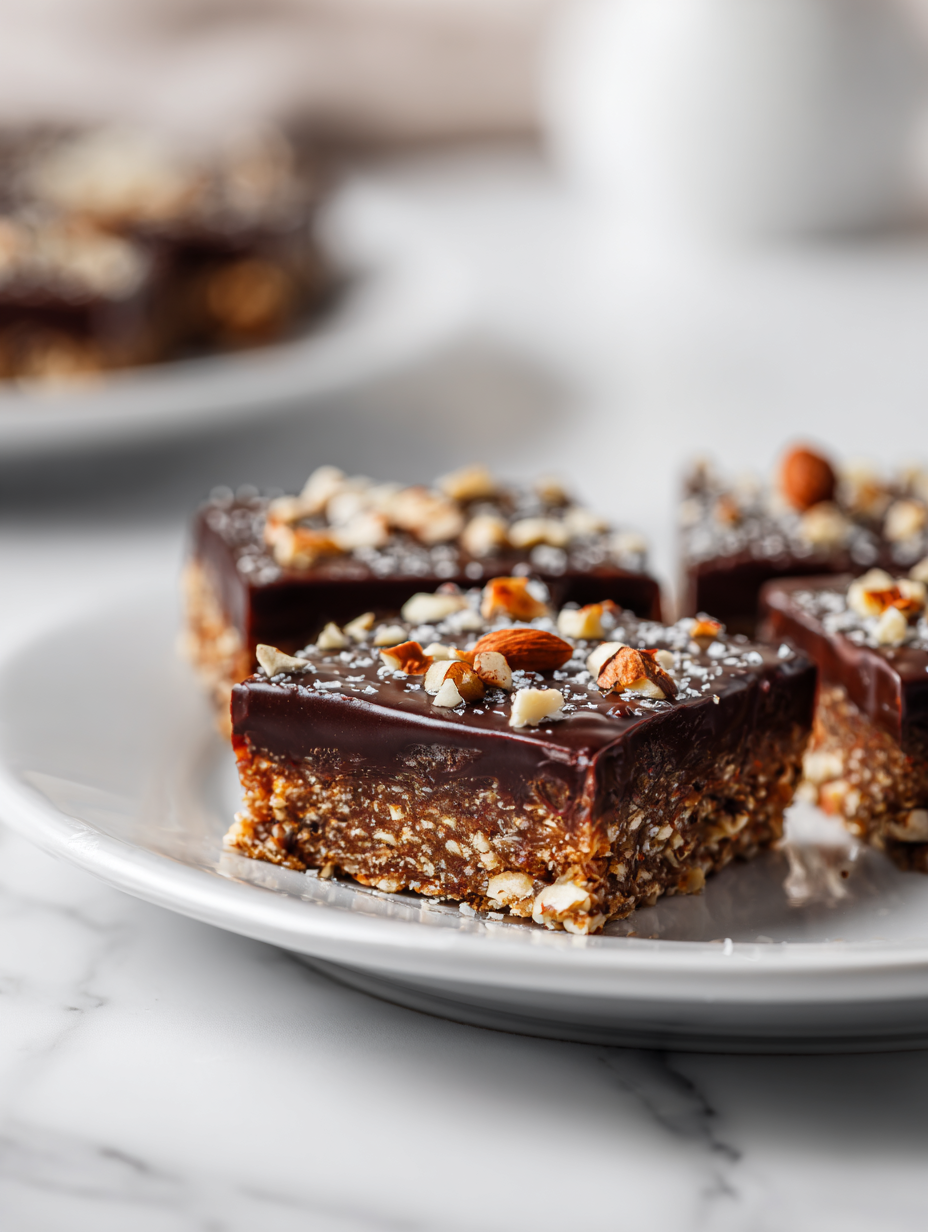
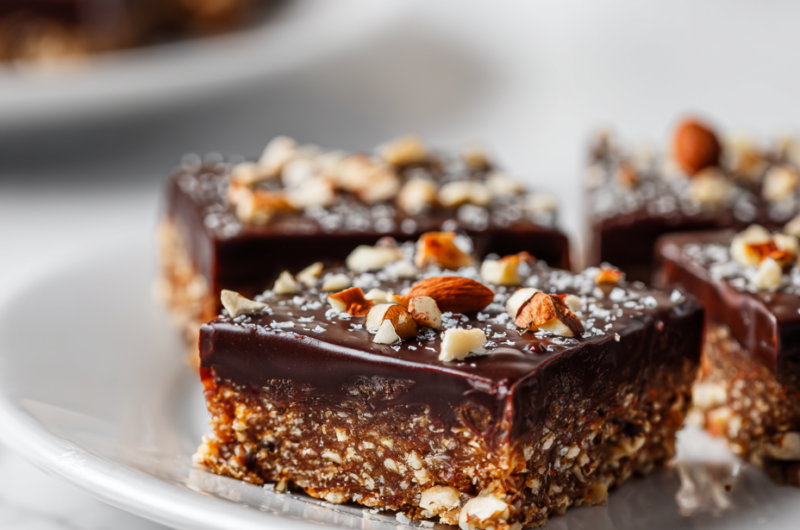
No-Bake Chocolate Biscuit Bars
Ingredients
Equipment
Method
- Line your baking dish with parchment paper, leaving some overhang for easy lifting, and set aside.
- Break the biscuits into uneven small pieces, aiming for a mix of fine crumbs and larger chunks for added crunch.
- In a small saucepan, gently melt the butter over low heat until just melted, about 2 minutes, and let the aroma develop as it becomes glossy.
- Add the chopped dark chocolate to the melted butter and stir gently with a spatula until completely smooth and shiny, about 3-4 minutes. The mixture should feel thick and luscious.
- Remove the saucepan from heat and fold in the crushed biscuits, ensuring they are evenly coated with the chocolate mixture. The mixture may look thick but sticky.
- Pour the mixture into your prepared dish, spreading it out evenly with the spatula. Press down firmly to create a compact, level surface.
- Sprinkle a pinch of sea salt over the top for a flavorful contrast, and gently press it into the surface.
- Place the dish in the fridge and chill for at least 2 hours, or until the mixture is firm and set.
- Once set, lift the bars out of the dish using the parchment overhang and transfer to a cutting board.
- Use a sharp knife to cut into squares or rectangles, cleaning the blade between cuts for neat slices.
- Serve immediately or store in an airtight container in the fridge for up to a week. For softer bars, let sit at room temperature for 10 minutes before enjoying.
Pro tips for perfect bars
- Boldly melt: Use low heat and stir frequently to keep the chocolate glossy and prevent scorching.
- Texture check: When pressing the mixture, it should feel firm but give slightly under pressure, like a soft set jelly.
- Salt sprinkle: Add sea salt just before refrigerating for a burst of flavor contrast without dissolving into the chocolate.
- Chill thoroughly: Let the bars rest for at least two hours in the fridge to achieve clean, neat slices.
- Avoid over-crushing: Keep some larger biscuit chunks for satisfying crunch, don’t turn everything into dust.
- Quick fix for soft bars: If they’re too soft, pop them back in the fridge for 30 minutes to firm up.
- Layer pressure: Press the mixture firmly into the pan to avoid air pockets and ensure even setting.
Common mistakes and how to fix them
- FORGOT to butter the pan → Use parchment to prevent sticking.
- DUMPED too much chocolate → Melt gradually, stirring to avoid burning.
- OVER-TORCHED chocolate → Remove from heat immediately when shiny and smooth.
- MISSED refrigerating step → Chill at least 2 hours for proper setting.
Quick fixes and pantry swaps
- When chocolate seizes, splash in a teaspoon of hot water to smooth it out.
- If bars crumble, press them firmly and refrigerate longer to set properly.
- DUMPED too much salt? Rinse the surface quickly and sprinkle less next time.
- Splash a little warm milk if mixture is too stiff to spread smoothly.
- Patch a cracked bar by melting a bit more chocolate and sealing it over the break.
Prep, store, and reheat tips
- Prepare the mixture and press into the pan a day ahead; it firms up better after chilling overnight, making slicing easier and cleaner with a richer flavor.
- Store the bars in an airtight container in the fridge for up to a week; the cool temperature keeps them firm and the chocolate glossy.
- For longer storage, wrap tightly in plastic wrap and freeze for up to a month; let thaw in the fridge for a few hours before serving, maintaining that decadent bite.
- Reheat slightly in the microwave for 10-15 seconds if you prefer a softer, melty chocolate experience; the aroma of cocoa will shimmer and draw you in.
Top questions about no bake chocolate biscuit bars
1. How do I know when the chocolate is melted enough?
Look for a glossy, smooth chocolate mixture that feels thick but spreadable. It should hold together when pressed.
2. How long should I refrigerate the bars?
The bars are ready when they feel firm and set, usually after at least 2 hours in the fridge. They should be firm to the touch and not sticky.
3. How do I get clean slices?
Use a sharp knife to cut clean slices. Wipe the blade between cuts for neat edges. For softer bars, let them sit at room temperature for 10 minutes first.
4. My bars are too soft, what should I do?
If the mixture feels too soft, pop it back in the fridge for 30 minutes. This helps it firm up and prevents crumbling.
5. Can I make these dairy-free?
Dairy-free? Coconut oil is a good swap. It melts well but adds a slight coconut aroma and makes the bars firmer.
6. Are vegan options possible?
Use vegan chocolate or dark chocolate with no dairy. Expect a slightly different melt and maybe less creaminess, but still delicious.
7. Can I substitute different biscuits?
Crushed digestives or graham crackers work well. For extra crunch, add toasted nuts or seeds, but keep the mixture balanced.
8. Should I add salt?
Add a pinch of sea salt just before chilling. It enhances the chocolate’s richness and creates a nice contrast in flavor.
9. How should I store leftovers?
Store in an airtight container in the fridge for up to a week. For longer, freeze wrapped bars for up to a month and thaw in the fridge.
10. My chocolate mixture is grainy, what now?
If the chocolate seizes, add a teaspoon of hot water and stir until smooth. It can rescue a stubborn batch and save the day.
Making these no-bake chocolate biscuit bars is a small act of reclaiming chaos in the kitchen. They’re imperfect, messy, and totally satisfying, especially when you need a quick sweet fix. Sometimes the best recipes are the ones that remind us to keep it simple and enjoy the process, even if it’s a bit sticky and imperfect.
In the end, it’s about those moments—biting into a crunchy, glossy piece of chocolate that’s been whipped up in no time. No matter how your bars turn out, they carry a little bit of nostalgia and a lot of flavor, making them a go-to whenever the craving hits or friends pop by unexpectedly.

Hi, I’m Grace Morgan, and welcome to my kitchen. This is a space shaped by family meals, curious hands reaching for snacks, paws under the table, and recipes that come together in the middle of real life. I’m a food blogger, a mother, and a passionate pet keeper. Most days, I’m cooking with one eye on the stove and the other on someone who needs me, whether that’s a child asking for a taste or a dog hoping something might fall.


