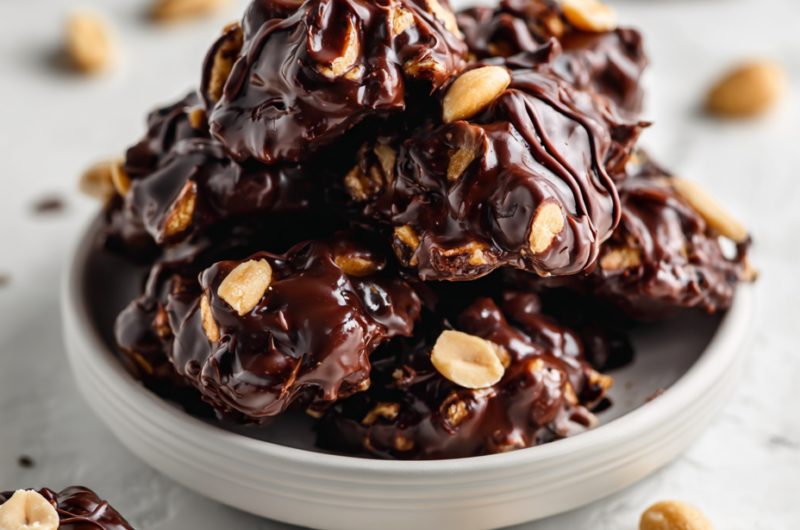
This no-bake chocolate peanut cluster recipe is a quiet rebellion against the fuss of traditional baking. It’s about reclaiming childhood memories—those sneaky bites of peanut butter and chocolate—without any of the mess or waiting. The crunch from toasted peanuts, paired with that glossy, fudgy chocolate coating, feels like a little secret you can whip up in minutes, yet tastes like you spent hours perfecting it.
I love how this recipe feels like a small act of kindness for myself. It’s simple, honest, and forgiving—no oven required. Plus, it’s the kind of treat that’s perfect for when you want something sweet but don’t want to fuss with complicated steps or ingredients. Just good, honest flavors that remind you of lazy afternoons and childhood joy, brought to life with a little grown-up polish.
This recipe is about reclaiming childhood memories of sneaking bites of peanut butter and chocolate, but with grown-up finesse—minimal fuss, maximum flavor, and that satisfying crunch that makes you forget you’re not baking.
A nostalgic crunch with grown-up flair
- Making these clusters takes me back to lazy childhood afternoons, the smell of melting chocolate filling the kitchen, and that perfect crunch from roasted peanuts.
- I feel a quiet pride whenever I pull these out of the fridge—simple, honest, and wildly satisfying in their messy, imperfect way.
- There’s a little thrill in customizing the mix—adding a dash of sea salt or a sprinkle of flaky sea salt on top makes it feel just right.
- These clusters are my go-to when I need comfort food that’s quick to whip up and tastes like a homemade hug.
A nostalgic crunch with grown-up flair
This recipe came from a moment of needing a quick, satisfying treat that didn’t require turning on the oven. I was cleaning out my pantry and found a bag of peanuts that I’d roasted months ago—still crunchy, still flavorful. That, combined with a stash of good quality chocolate, sparked the idea to just melt, mix, and let it set. It’s become my go-to when I want something sweet but don’t want the fuss of baking or complicated ingredients.
Historical quirks of chocolate peanut clusters
- These clusters trace back to pantry-rummaging days during wartime, when quick, no-fuss sweets were essential.
- The combo of chocolate and peanuts was popularized in the early 20th century, becoming a staple in American snack culture.
- Originally, these treats were a way to use up leftover chocolate and nuts, turning simple ingredients into something special.
- In some regions, variations include adding a pinch of chili powder or cinnamon, giving a spicy kick to the classic duo.
Key Ingredients Breakdown
- Peanuts: I love using roasted, salted peanuts—they bring a deep, smoky crunch that’s hard to beat. If you prefer less salt, opt for unsalted and add a pinch of sea salt on top after setting.
- Chocolate: I swear by good quality semi-sweet or dark chocolate—it melts smoothly and coats the peanuts with a glossy finish. Want a richer flavor? Mix in a teaspoon of espresso powder for depth.
- Honey or Maple Syrup: I add just a touch for a hint of sweetness and to help everything stick together. If you want a less sweet result, cut back a bit—just enough to keep it cohesive.
- Butter: I use unsalted butter for richness and a velvety texture. For a dairy-free version, coconut oil works but can make the clusters a bit more crumbly, so tweak the amount.
- Sea Salt: I sprinkle flaky sea salt on top after pouring to enhance the chocolate and peanut flavor. For a spicy kick, try a dash of chili salt—just a little goes a long way.
- Extras (optional): Sometimes I toss in a handful of dried cranberries or a sprinkle of toasted coconut for extra texture and flavor. Keep it simple, or make it your own with what’s in your pantry.
Spotlight on key ingredients
Peanuts:
- I love using roasted, salted peanuts—they bring a deep, smoky crunch that’s hard to beat. If you prefer less salt, opt for unsalted and add a pinch of sea salt on top after setting.
- Chocolate: I swear by good quality semi-sweet or dark chocolate—it melts smoothly and coats the peanuts with a glossy finish. Want a richer flavor? Mix in a teaspoon of espresso powder for depth.
Chocolate:
- I swear by good quality semi-sweet or dark chocolate—it melts smoothly and coats the peanuts with a glossy finish. Want a richer flavor? Mix in a teaspoon of espresso powder for depth.
- Honey or Maple Syrup: I add just a touch for a hint of sweetness and to help everything stick together. If you want a less sweet result, cut back a bit—just enough to keep it cohesive.
Notes for ingredient swaps
- Dairy-Free: Coconut oil or vegan chocolate chips substitute well, but expect a slightly different melt and less creamy finish.
- Nut Variations: Almonds or cashews can replace peanuts for a different crunch and flavor profile—less salty, more buttery or smoky.
- Sweetener: Maple syrup or agave can replace honey—each adds a unique flavor twist, with maple offering a richer, more caramel note.
- Chocolate Type: Dark chocolate can be swapped for bittersweet or milk chocolate—altering sweetness and richness to taste.
- Salt: Flaky sea salt is ideal, but if unavailable, fine sea salt or kosher salt works; sprinkle sparingly to avoid overpowering.
- Add-ins: Dried cranberries or toasted coconut flakes can be mixed in for extra texture—keep it simple or go wild with flavors.
- Sweet & Sticky: Marshmallow bits or caramel bits can add extra gooeyness, but may require adjustments for consistency.
Equipment & Tools
- medium mixing bowl: to melt and mix the chocolate and peanuts.
- microwave-safe bowl: for melting chocolate evenly in short bursts.
- spatula: to stir and fold ingredients smoothly.
- baking sheet with parchment: to hold and chill clusters without sticking.
Step-by-step guide to no-bake clusters
- Gather your equipment: a medium mixing bowl, a microwave-safe bowl, a spatula, and a baking sheet lined with parchment paper.
- Roughly chop 2 cups of good quality semi-sweet or dark chocolate. Place it in the microwave-safe bowl.
- Microwave the chocolate in 30-second bursts, stirring after each, until smooth and glossy. This takes about 1-2 minutes total.
- In the same bowl, fold in 1 cup of roasted, salted peanuts. Mix until evenly coated and sticky enough to hold together.
- Use a small cookie scoop or tablespoon to portion out clusters onto the prepared baking sheet, about 1 tablespoon each.
- If you like, sprinkle a pinch of flaky sea salt or chili salt on top of each cluster for an extra flavor kick.
- Place the tray in the fridge for at least 30 minutes, or until the clusters are firm and set.
- Once hardened, gently peel the clusters off the parchment and transfer to a plate or storage container.
- Store in an airtight container in the fridge for up to a week. For longer storage, freeze for up to a month.
Chill the clusters until firm, then serve or store in an airtight container. No additional finishing needed—just enjoy the crunch and glossy chocolate. Keep refrigerated if not served immediately.
How to Know It’s Done
- Chocolate is fully melted and glossy, with no lumps.
- Clusters hold together when gently pressed but are not too sticky or crumbly.
- Chocolate coating appears shiny and set after refrigeration.
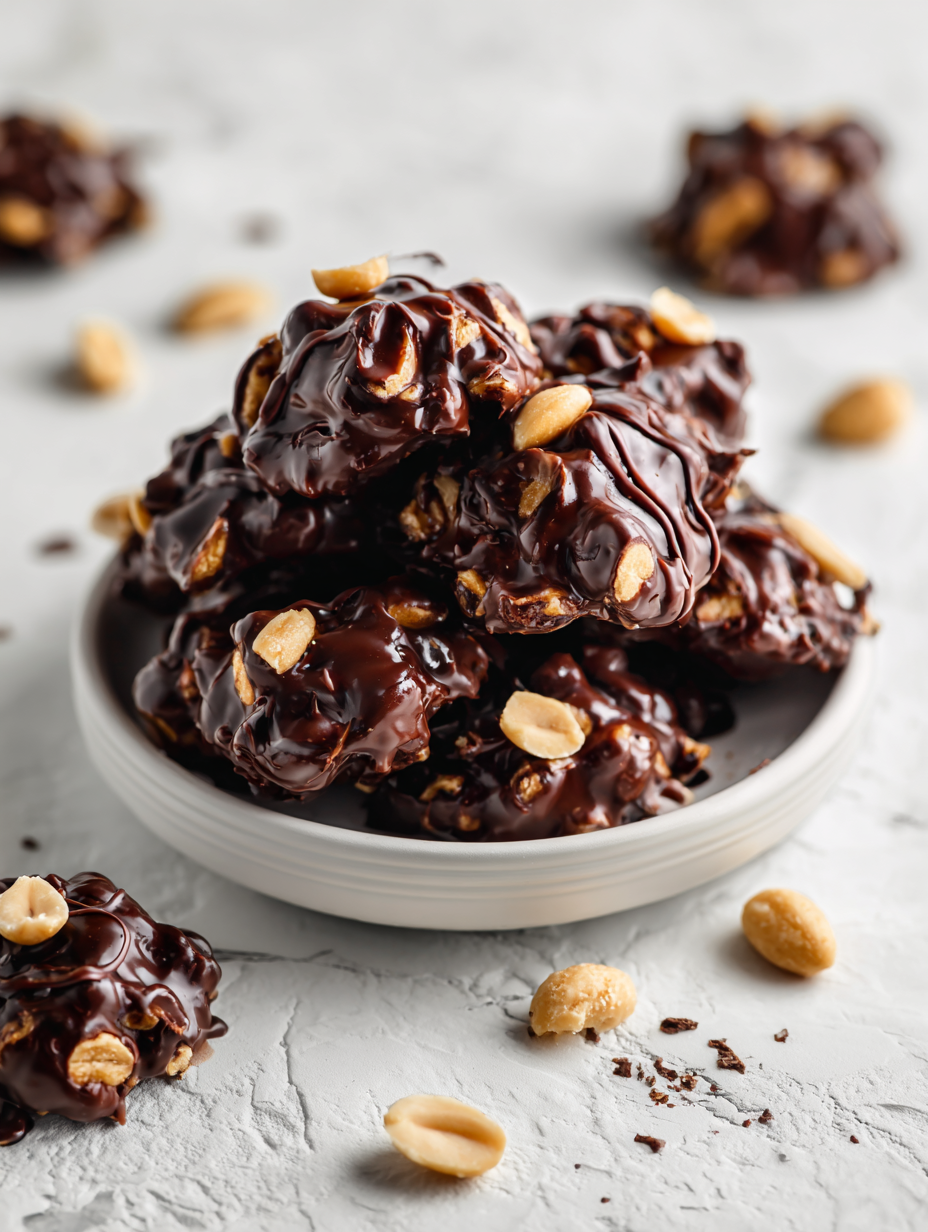
No-Bake Chocolate Peanut Clusters
Ingredients
Equipment
Method
- Place the chopped chocolate into a microwave-safe bowl. Microwave in 30-second bursts, stirring after each, until the chocolate is completely melted and glossy—about 1 to 2 minutes total.
- Add the honey or maple syrup and butter into the melted chocolate. Stir until the mixture is smooth, shiny, and well combined. The aroma should be sweet and chocolatey, with a gentle sizzle as the ingredients meld.
- Fold in the roasted peanuts, using your spatula to coat them evenly in the chocolate mixture. The peanuts should become glossy and stick together slightly, creating a sticky, textured mass.
- Using a tablespoon or small cookie scoop, portion out small clusters onto your prepared parchment-lined baking sheet. Leave space between each to prevent sticking as they set.
- Sprinkle a tiny pinch of flaky sea salt on top of each cluster for an extra flavor boost, if desired. The salt will enhance the chocolate and peanut flavors beautifully.
- Place the tray in the refrigerator for at least 30 minutes, or until the clusters are firm and set. You should hear a satisfying crunch when gently pressed, and the chocolate will appear shiny and smooth.
- Once hardened, gently peel the clusters off the parchment paper. They should hold together nicely with a glossy coating, ready to be enjoyed or stored in an airtight container.
- Store the clusters in an airtight container in the fridge for up to a week, or freeze for up to a month for longer preservation. Serve chilled for the best texture and flavor.
Pro tips for perfect clusters
- Chop finely: Use a sharp knife for smooth, even melting of chocolate with minimal lumps.
- Microwave in bursts: 30-second intervals keep the chocolate glossy and prevent burning.
- Fold carefully: Gently combine peanuts to keep the coating shiny and avoid breaking the clusters.
- Chill thoroughly: Let the clusters set in the fridge for at least 30 minutes until firm and shiny.
- Sprinkle salt: Flaky sea salt on top before chilling enhances flavor contrast and adds a delicate crunch.
- Avoid overmixing: Too much agitation can cause the chocolate to seize or become grainy during melting.
- Use parchment: Lining your tray prevents sticking and makes cleanup quick and easy.
Common mistakes and how to fix them
- FORGOT to stir chocolate thoroughly → Stir well for smooth melting.
- DUMPED mixture directly into fridge → Chill in a single layer for even setting.
- OVER-TORCHED chocolate → Remove from heat immediately; add a bit of hot water to loosen.
- MISSED to sprinkle salt on top → Add sea salt before chilling for flavor contrast.
Quick fixes and pantry swaps
- If chocolate seizes, splash in a teaspoon of hot water and stir gently.
- When clusters fall apart, refrigerate longer—5 more minutes often firms them up.
- Dumped mixture too sticky? Patch with a little more chopped peanuts or cacao nibs.
- Over-torched chocolate? Shield with a few teaspoons of coconut oil for gloss.
- Splash a pinch of salt if you forgot to sprinkle before chilling—brings out flavor.
Prep, store, and reheat tips
- You can prepare the clusters up to 24 hours ahead; keep them in an airtight container in the fridge for best freshness.
- Store in a cool, dry place if eaten within 2 days; the chocolate may soften slightly in warm environments.
- For longer storage, freeze the clusters for up to a month; wrap tightly to prevent freezer burn and flavor transfer.
- Refrigerate before serving to re-harden the chocolate coating; let sit at room temperature for 5 minutes for optimal texture.
- Over time, the flavors meld and intensify, especially the salt and peanut aroma, but the texture may become less crisp after a few days.
Top questions about peanut clusters
1. Can I use natural peanut butter?
Yes, using natural peanut butter can work, but it might make the mixture less sticky. Adjust with a tiny bit more honey if needed.
2. Can I substitute other nuts?
Absolutely. You can swap in almonds, cashews, or even pumpkin seeds for variety, but keep an eye on the roasting times for added crunch.
3. Can I melt chocolate on the stove?
Yes, melting chocolate can be done over a double boiler if you prefer. Just make sure the bowl doesn’t touch the simmering water.
4. How should I store these clusters?
Storing in the fridge helps the clusters set faster and keeps them fresh. Keep in an airtight container for up to a week.
5. My chocolate isn’t glossy, what do I do?
If your chocolate isn’t glossy, it might be over-melted or cooled too quickly. Gently rewarm or add a small splash of oil to loosen it up.
6. Can I add spices or other flavors?
You can add a pinch of chili powder or cinnamon for a spicy or warm flavor twist. Just sprinkle on top before chilling.
7. Can I add dried fruits or coconut?
Yes, you can mix in dried fruits or coconut flakes before setting. Just fold gently to avoid breaking the clusters.
8. Should I use salted or unsalted peanuts?
Using unsalted peanuts helps control the saltiness. If you prefer more saltiness, sprinkle flaky sea salt on top after melting.
9. Can I prepare these in advance?
Yes, you can make these ahead and freeze them for up to a month. Just wrap tightly to keep them fresh.
10. They’re too soft or crumbly, what now?
If the clusters are too soft, pop them back in the fridge for a bit longer. If they’re too crumbly, remelt and add a tiny bit more honey.
These no-bake clusters are a reminder that simple ingredients can create something truly satisfying. They’re perfect for spontaneous sweet cravings or when you need a quick gift idea that feels personal.
Once you get the hang of the melting and mixing, it’s almost meditative—crunching peanuts, glossy chocolate, the smell of toasted nuts filling the kitchen. They might just become your go-to for easy, honest treats whenever the mood strikes.

Hi, I’m Grace Morgan, and welcome to my kitchen. This is a space shaped by family meals, curious hands reaching for snacks, paws under the table, and recipes that come together in the middle of real life. I’m a food blogger, a mother, and a passionate pet keeper. Most days, I’m cooking with one eye on the stove and the other on someone who needs me, whether that’s a child asking for a taste or a dog hoping something might fall.


