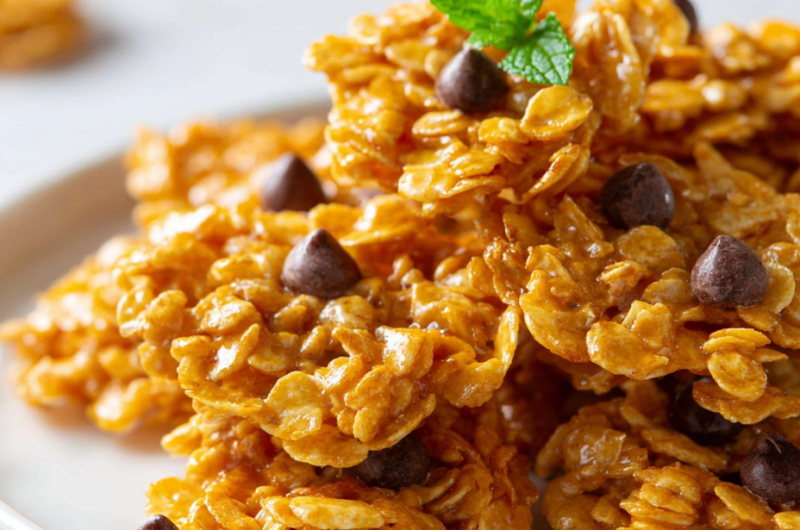
In the chaos of busy afternoons, I find myself craving something sweet but don’t want to spend time heating up the stove. These no-bake cornflake cookies are my go-to—quick, honest, and surprisingly satisfying. They’re like a tiny, crunchy hug that you can whip up with just a handful of pantry staples, no fuss involved.
Making these cookies feels a bit like reclaiming childhood comfort in a hectic moment. I love the way the butter and chocolate meld into that glossy, gooey mixture, coating each crunchy cornflake perfectly. It’s a reminder that sometimes, simple ingredients can come together to give you a moment of calm and a little sweet escape, even on the busiest days.
Focusing on how this simple, nostalgic treat can be a quick, comforting fix during hectic days, emphasizing the satisfaction of making something sweet with just a few pantry staples, without turning on the stove.
A Nostalgic Pantry Rescue
- This recipe takes me back to lazy childhood afternoons, where a plate of these was my secret treat.
- Honestly, I love how forgiving it is—no oven, no fuss, just quick satisfaction on a hectic day.
- There’s a strange pride in mixing up a batch that’s both simple and so nostalgic, it feels like a warm hug from the past.
The story behind this recipe
- This recipe was born out of a need for a quick, no-fuss treat that I could whip up during busy weekends when I didn’t want to turn on the oven. I remember the first time I made it, how the smell of melting butter and chocolate filled the kitchen, instantly calming a chaotic morning. It’s one of those recipes that feels like a little secret—simple but endlessly satisfying.
- Over the years, these cookies have become my go-to for impromptu gatherings or a quick sweet fix when pantry ingredients are all I have. They remind me that sometimes, the best things in life are short, sweet, and made with just a handful of staples. Plus, there’s always a nostalgic rush in sharing them with someone new, watching their eyes light up at that crunchy, gooey bite.
- heading:
Historical and Cultural Tidbits
- These cookies date back to early 20th-century American kitchens, where quick, no-oven treats became popular during wartime shortages.
- Cornflakes used in this recipe were originally designed as a health food, but home cooks quickly adopted them for their crunch and versatility.
- The simple combination of chocolate and cereal was a way to make a filling snack using pantry staples, especially during the Great Depression.
- In some regions, these cookies are called ‘Frog Eye Cookies’ because of their chewy, glossy appearance, though recipes vary widely.
Ingredient breakdown: key components
- Butter: I use unsalted butter for a clean, creamy flavor that melts smoothly—no surprises. You can swap with coconut oil for a slightly nuttier note, but watch out for coconut’s distinct scent.
- Chocolate: Semi-sweet chips are my go-to, offering a balanced sweetness and rich gloss. Dark chocolate chunks work too if you want a more intense cocoa hit, but reduce sugar slightly.
- Cornflakes: The crunch factor—no substitute matches their crispy snap, but toasted rice cereal is a decent stand-in if you want a lighter texture.
- Sweetened Condensed Milk: It binds everything together with a sweet, sticky richness that’s hard to replicate. For a dairy-free version, try coconut condensed milk, which adds a hint of tropical aroma.
- Vanilla Extract: Just a splash brightens everything up with a warm, aromatic note. If you don’t have vanilla, a little almond extract adds a different, nutty depth.
- Optional Add-ins: Nuts or dried fruit can give these a personal twist. I like chopped pecans—they add a buttery crunch, but skip if you’re aiming for pure simplicity.
- Sprinkles or Sea Salt: A pinch on top heightens the chocolate flavor and adds a little unexpected contrast. Use flaky sea salt for a subtle shimmer and burst of saltiness.
Spotlight on key ingredients
Cornflakes:
- I love their crispy snap and toasted aroma, which stays intact even after coating. They sometimes lose crunch if left too long, so work quickly.
- Chocolate: The glossy, melting richness of semi-sweet chips makes the mixture silky. They melt smoothly, giving a shiny coat, but can seize if overcooked or if moisture gets in.
Chocolate:
- Butter: It melts into a silky base that coats everything evenly. If you overheat, it browns quickly, so low and slow is best. It’s the backbone of that rich, comforting smell.
- Sweetened Condensed Milk: Sticky, sweet, and thick, it binds the ingredients with a luscious, chewy texture. It’s also the reason these cookies hold together without baking—no fuss, just pure indulgence.
Notes for ingredient swaps
- Dairy-Free: Swap butter with coconut oil for a slightly nuttier flavor and firmer texture, especially good if you like a hint of tropical aroma.
- Chocolate: Use dark chocolate chunks instead of semi-sweet chips for a more intense cocoa flavor; reduce sugar slightly to balance bitterness.
- Cornflakes: Tosted rice cereal can be a lighter, equally crunchy substitute, but it may lack the same toasty aroma and snap.
- Sweetened Condensed Milk: Coconut condensed milk works well if you’re dairy-free; it adds a subtle coconut flavor and sticky richness.
- Vanilla Extract: Almond extract can add a different nutty note; skip if you want to keep it classic or use vanilla for warmth.
- Add-ins: Chopped pecans or dried cranberries give a personal touch; skip nuts for a pure, simple treat that’s crunchier and more uniform.
- Sprinkles or Sea Salt: Flaky sea salt on top enhances the chocolate and adds a pop of savory contrast; opt for coarse salt for texture.
Equipment & Tools
- Large mixing bowl: To combine ingredients if needed, optional for assembly.
- Saucepan: To melt butter and chocolate gently.
- Wooden spoon: For stirring melted chocolate and cereal.
- Parchment paper: To prevent sticking and for easy cleanup.
- Tablespoon or small scoop: To portion cookies evenly.
Step-by-step guide to no bake cookies
- Gather your equipment: a large mixing bowl, a saucepan, a wooden spoon, and a baking sheet lined with parchment. The bowl is for mixing, saucepan for melting, spoon for stirring, and parchment for setting.
- In the saucepan, melt 1/2 cup (115g) unsalted butter over low heat. Keep the heat gentle—just enough to melt without browning. Stir occasionally until smooth and glossy, about 2 minutes.
- Add 2 cups (12 oz) semi-sweet chocolate chips to the melted butter. Stir continuously until the chocolate is fully melted and the mixture is smooth. This should take about 2-3 minutes. Smell that rich, chocolatey aroma.
- Stir in 1 can (14 oz) sweetened condensed milk and 1 teaspoon vanilla extract. Mix until evenly combined and glossy. If you see streaks of milk or vanilla, keep stirring—you’re almost there.
- Remove from heat and quickly fold in 4 cups (about 150g) cornflakes. Gently toss until each flake is coated with the chocolate mixture. Be careful not to crush the cereal—look for a shiny, sticky coating on each flake.
- Using a tablespoon or small ice cream scoop, drop mounds of the mixture onto the prepared parchment-lined baking sheet. Leave about 2 inches between each. Press lightly if you want a flatter cookie.
- Let the cookies set at room temperature for about 30-60 minutes. For faster setting, refrigerate for 20 minutes. They should be firm but still chewy, with a glossy, crackly surface.
- Check the cookies: they should hold their shape, have a shiny top, and feel slightly tacky but not sticky. When gently pressed, they crackle and give a little under pressure.
- Once set, gently lift and transfer to a plate or container. Store in an airtight container at room temperature for up to 3 days, or refrigerate for up to a week. The flavor deepens after a day or two.
Let the cookies rest at room temperature or in the fridge until firm, about 30-60 minutes. Finish by gently peeling from parchment, then plate or store in airtight container.
How to Know It’s Done
- Chocolate coating is glossy and smooth before adding cereal.
- Cookies hold shape without spreading too much when dropped.
- Surface crackles slightly when pressed and has a shiny appearance.
No-Bake Cornflake Cookies
Ingredients
Equipment
Method
- Gather all your ingredients and line a baking sheet with parchment paper to prepare for setting the cookies.
- In a saucepan over low heat, melt the butter gently, stirring occasionally until it’s smooth and glossy, and you can smell the rich aroma of butter filling your kitchen.
- Add the semi-sweet chocolate chips to the melted butter. Stir continuously until the chocolate is fully melted and the mixture becomes silky and shiny, about 2-3 minutes.
- Stir in the sweetened condensed milk and vanilla extract, mixing well until everything is combined into a smooth, glossy sauce with a sweet aroma.
- Remove the pan from heat and gently fold in the cornflakes, tossing carefully to coat each flake evenly with the chocolate mixture, avoiding crushing the cereal.
- Using a tablespoon or small scoop, drop spoonfuls of the mixture onto the prepared parchment-lined baking sheet, leaving about two inches of space between each cookie.
- Let the cookies sit at room temperature for 30-60 minutes, allowing the chocolate to set and the cookies to become firm with a shiny, crackly surface.
- Once set, gently peel the cookies off the parchment paper and transfer them to a plate or container. Enjoy these crunchy, gooey treats that require no baking!
Pro tips for perfect cookies
- Bolded Mini-Head: Use gentle heat → Melt butter and chocolate slowly for a glossy, smooth mixture.
- Bolded Mini-Head: Avoid overmixing → Gently fold in cereal to keep it crunchy, not crushed.
- Bolded Mini-Head: Check consistency → Mixture should be shiny and slightly thick, not runny or stiff.
- Bolded Mini-Head: Portion quickly → Use a scoop or spoon to drop cookies before the mixture sets too much.
- Bolded Mini-Head: Let set at room temp → Gives a better crackle and shiny surface, prevents sogginess.
Common mistakes and how to fix them
- FORGOT to adjust for humidity → Keep cereal dry to prevent sogginess.
- DUMPED in too much chocolate → Use a measured amount for balanced flavor and texture.
- OVER-TORCHED the chocolate → Melt on low heat, stir constantly to prevent burning.
- MISSED the cooling time → Let the cookies set fully for proper shape and crunch.
Fast fixes for sticky situations
- When cookies are too soft → Splash cold water on your hands and gently mold them again.
- If mixture is too dry → Dampen your fingertips slightly and press the mixture together.
- When chocolate seizes → Remove from heat immediately and stir in a teaspoon of vegetable oil.
- Dumped in too much cereal → Add a bit more melted chocolate mixture to balance the crunch and stickiness.
- Overcooked chocolate → Lower heat or melt over a double boiler to prevent burning and ensure smoothness.
Prep, store, and reheat tips
- You can prepare the chocolate mixture a day in advance; keep it covered in the fridge to prevent a skin from forming, and bring it back to room temperature before mixing with the cereal.
- Cookies taste freshest when eaten within 2-3 days. Store them in an airtight container at room temperature, where they stay chewy and glossy for that time.
- Refrigerating can extend freshness up to a week, but expect the texture to become a little firmer and the chocolate less shiny. Let them sit at room temp for 10 minutes before serving to regain some softness.
- If you need to reheat, gently warm the cookies for a few seconds in the microwave to revive the melt-in-your-mouth feel, watching for the chocolate to loosen but not burn. The smell of warm chocolate is a bonus.
Top questions about no bake cookies
1. Can I substitute oats for cornflakes?
You can use rolled oats instead of cornflakes, but expect a softer, chewier texture.
2. Can I make these dairy-free?
Yes, using almond or soy milk instead of condensed milk will change the texture; they won’t be as sticky or firm.
3. How long should I chill them?
Refrigerate the cookies for at least 30 minutes to set properly and get that firm, crackly surface.
4. What if my mixture is too sticky or dry?
If the mixture is too sticky, add a little more cereal; if too dry, add a drop of warm water or milk.
5. How do I melt chocolate without burning it?
Use a double boiler or melt on very low heat to prevent burning the chocolate and butter.
6. How long do these cookies last?
Cookies are best enjoyed within 3 days at room temperature; store in an airtight container to keep crunch.
7. Can I add extras like nuts or fruit?
Yes, you can add chopped nuts or dried fruit before forming the cookies for extra flavor and texture.
8. How should I store these cookies?
Storing in a cool, dry place prevents melting or sogginess. Keep away from direct sunlight.
9. What if my chocolate seizes?
If the mixture seizes or becomes grainy, gently heat it again and add a teaspoon of oil to smooth it out.
10. Can I reheat these cookies?
Yes, you can reheat them briefly in the microwave to soften them if they get too firm in storage.
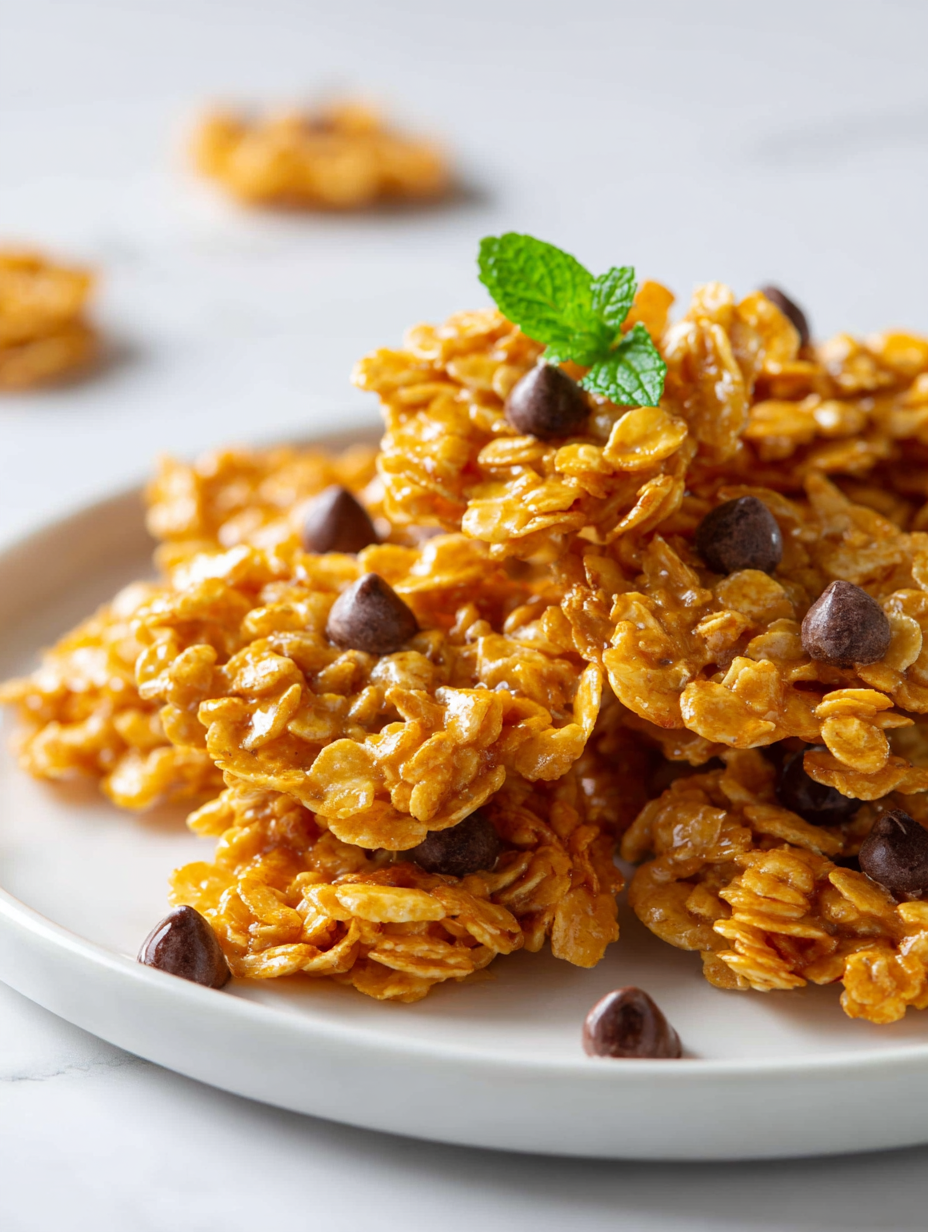
These cookies are a small, sweet reminder that sometimes the simplest treats hold the most comfort. They come together quick, no oven needed, and bring back those childhood moments of crunch and gooey chocolate. It’s a little ritual that’s easy to turn into a quick escape from a hectic day.
Once you get the hang of it, they’re almost too easy—always ready when you need a quick fix. Plus, they taste just right with a glass of cold milk or a quiet afternoon break. Sometimes, that’s all you need to keep going.

Hi, I’m Grace Morgan, and welcome to my kitchen. This is a space shaped by family meals, curious hands reaching for snacks, paws under the table, and recipes that come together in the middle of real life. I’m a food blogger, a mother, and a passionate pet keeper. Most days, I’m cooking with one eye on the stove and the other on someone who needs me, whether that’s a child asking for a taste or a dog hoping something might fall.


