In the rush of hectic mornings, I find myself reaching for these no-bake date balls more often than I’d like to admit. They’re a tiny ritual that brings a moment of calm, a quick fix of natural sweetness that doesn’t demand any oven time. There’s something about the sticky chewiness of dates paired with crunchy nuts that feels like a warm hug, even on the busiest days.
They’re not just about convenience; these little bites are a nostalgic reminder of simpler times when snacks were straightforward and honest. Making them takes no more than a few minutes, yet each bite feels like a small, satisfying accomplishment. It’s wild how something so basic can feel like a tiny act of kindness—something nourishing for body and soul, all at once.
Focusing on how no-bake date balls can be a quick, satisfying treat during hectic mornings when time is tight, yet craving something naturally sweet and nourishing. Emphasizing their simplicity and the comforting nostalgia they evoke, especially when you need a pick-me-up without turning on the oven.
A Quick, Nourishing Treat
- These date balls remind me of childhood snacks, simple and honest, yet somehow still special.
- Crushing the dates and nuts together feels oddly therapeutic after a long day, like a little moment of calm.
- I love how they’re perfect for sneaking a bit of natural sweetness into my hectic mornings.
- Every time I make a batch, I get a burst of pride—something so easy, yet so satisfying.
A Personal Touch
- I stumbled upon this recipe during a hectic week when I needed something quick, wholesome, and satisfying. It reminded me of my grandma’s no-fuss treats—simple ingredients, no oven needed, just a little patience to roll them out. That nostalgic comfort of sweet dates paired with crunchy nuts always feels like a small act of self-care, especially on busy days.
- Making these date balls became my go-to for when I crave a natural pick-me-up without the fuss. Each batch carries a bit of chaos—sticky fingers, extra nuts on the floor—but that’s part of the charm. They’re a reminder that sometimes, the simplest treats are the most meaningful.
- heading: ‘A Personal Touch’
Historical and Cultural Roots
- Dates have been a staple sweetener in Middle Eastern cultures for thousands of years, prized for their natural caramel-like flavor.
- No-bake treats like these date balls gained popularity during wartime rationing when oven access was limited, making simplicity a virtue.
- The combination of dates and nuts is a classic duo, often found in traditional Mediterranean and Middle Eastern desserts, adapted here for quick, modern snacking.
Ingredient breakdown: key components
- Dates: I love the chewy, caramel-like sweetness they bring; make sure they’re soft and pitted for easy blending. If dry, soak briefly in warm water—flesh should be oozy and sticky.
- Nuts: I usually use almonds or walnuts for crunch, but pecans work just as well. Toast them lightly beforehand—aromatic and smoky, adds depth to the flavor.
- Cocoa Powder: A splash of unsweetened cocoa adds richness; sift it to avoid lumps. If you want a nuttier flavor, try cacao nibs for a crunchy twist.
- Butter or Coconut Oil: I prefer a small amount to help bind and add richness—use softened butter or melted coconut oil. Skip if you want a firmer ball, but it helps with rolling.
- Sea Salt: Just a pinch enhances sweetness and balances flavors. I sprinkle a little on top for a salty contrast—think of it as a flavor wake-up call.
- Vanilla Extract: A splash adds warmth and complexity; if you don’t have it, a tiny dash of almond extract works. It’s subtle but makes everything feel more rounded.
- Optional Add-ins: Dried berries, shredded coconut, or chia seeds—mix in for texture or extra flavor. Just keep in mind they can change the chew or moisture level.
Spotlight on key ingredients
Dates:
- I love their chewy, caramel-like sweetness; make sure they’re soft and pitted for easy blending. If dry, soak briefly in warm water—flesh should be oozy and sticky.
- Nuts: I usually use almonds or walnuts for crunch, but pecans work just as well. Toast them lightly beforehand—aromatic and smoky, adds depth to the flavor.
Nuts and Cocoa Powder:
- Nuts: I usually use almonds or walnuts for crunch, but pecans work just as well. Toast them lightly beforehand—aromatic and smoky, adds depth to the flavor.
- Cocoa Powder: A splash of unsweetened cocoa adds richness; sift it to avoid lumps. If you want a nuttier flavor, try cacao nibs for a crunchy twist.
Notes for ingredient swaps
- Dairy-Free: Swap butter for coconut oil. It adds a subtle coconut aroma, but the texture stays similar.
- Nut-Free: Use sunflower or pumpkin seeds instead of nuts. Watch for slightly different crunch and flavor.
- Sweetener: Maple syrup or honey can replace dates for binding. Expect a richer, less caramel-y sweetness.
- Cocoa Powder: Carob powder is a mild, caffeine-free alternative. It’s a bit sweeter and less bitter.
- Add-ins: Dried cranberries or chopped dried apricots add tartness. Adjust the moisture level accordingly.
- Flavor Boost: A dash of cinnamon or cardamom can elevate the flavor without changing the base.
- Texture: Shredded coconut can replace nuts for a chewy, tropical twist. It’ll be softer and slightly sweeter.
Equipment & Tools
- Food processor: To pulse dates into a sticky paste.
- Mixing bowl: To combine ingredients.
- Tablespoon: To scoop and portion mixture.
- Parchment-lined baking sheet: To chill the formed balls without sticking.
- Skillet: To toast nuts for extra flavor.
Step-by-step guide to no bake date balls
- Equipment & Tools: Gather a food processor (for blending), a mixing bowl (for combining), a tablespoon (for scooping), and a baking sheet lined with parchment (for chilling).
- Chop the dates: Remove pits and roughly chop the dates. Place in the food processor. Pulse until they form a sticky paste, about 30 seconds. If they’re dry, soak briefly in warm water for 5 minutes, then drain and process again.
- Toast the nuts: Lightly toast nuts in a dry skillet over medium heat (about 160°C/320°F) for 3-4 minutes until fragrant. Let cool, then roughly chop.
- Combine ingredients: In a large bowl, mix the processed dates with chopped nuts, 1 tablespoon cocoa powder, a pinch of sea salt, and 1 teaspoon vanilla extract. Stir until well combined. If the mixture feels too sticky, add a handful of oats or shredded coconut.
- Form the balls: Using a tablespoon, scoop out portions and roll between your palms into about 1-inch diameter balls. If the mixture is too sticky, dampen your hands slightly. Place on the prepared baking sheet.
- Chill the bites: Refrigerate for at least 30 minutes. This helps them firm up and makes rolling easier if needed. If they soften too much, pop them back in the fridge.
- Final check: The date balls should be firm but slightly chewy. They should hold shape without crumbling. If crumbly, knead in a tiny bit of melted coconut oil and try again.
- Serve or store: Once chilled, enjoy immediately or store in an airtight container in the fridge for up to a week. For longer storage, freeze for up to a month.
Chill the date balls in the fridge for at least 30 minutes before serving. Plate directly from the fridge for best texture. Keep leftovers in an airtight container in the fridge or freezer, allowing to come to room temperature for a few minutes before eating if stored cold.
How to Know It’s Done
- Balls hold shape without cracking or crumbling when pressed.
- A slight sheen on surface indicates proper binding.
- A gentle squeeze reveals a chewy, sticky texture without excess moisture.
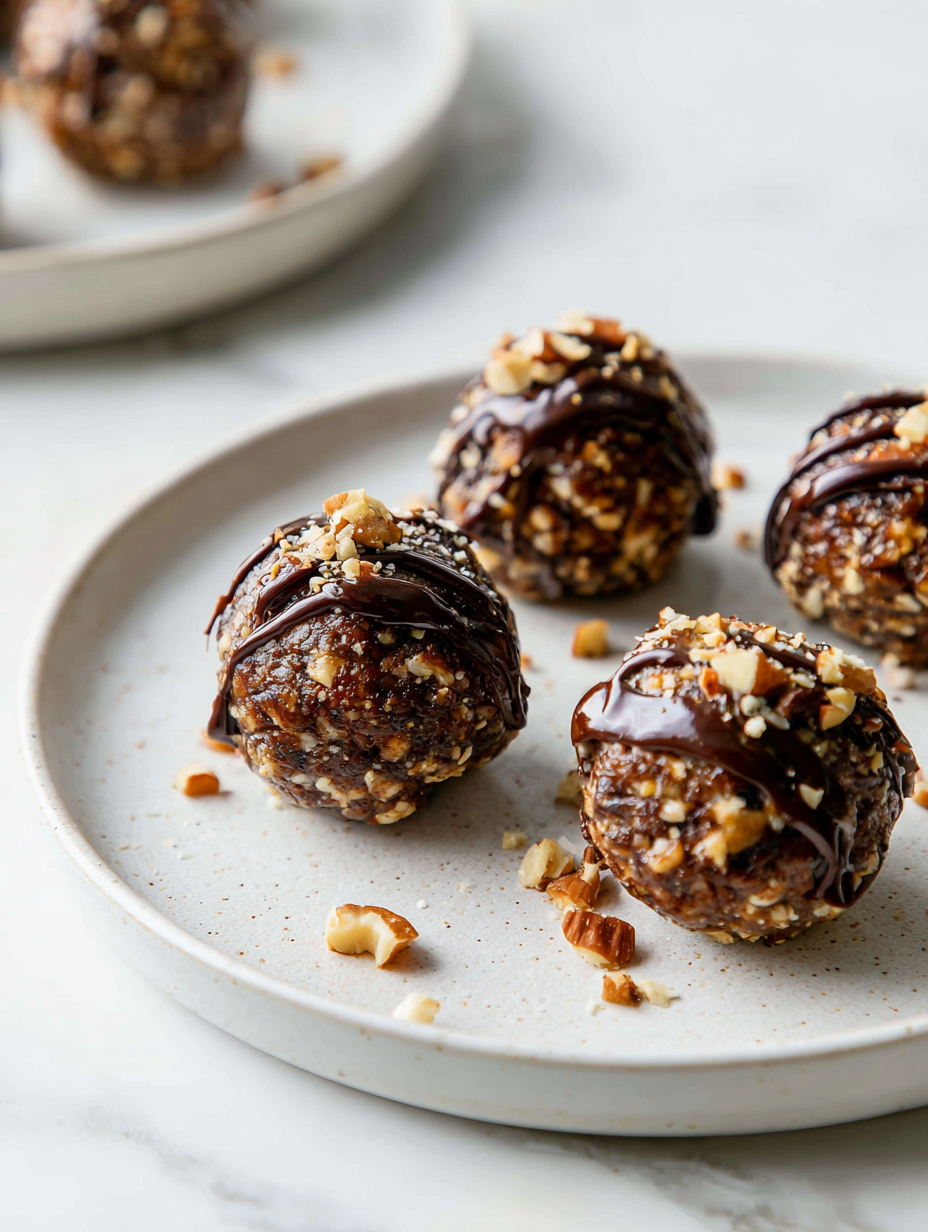
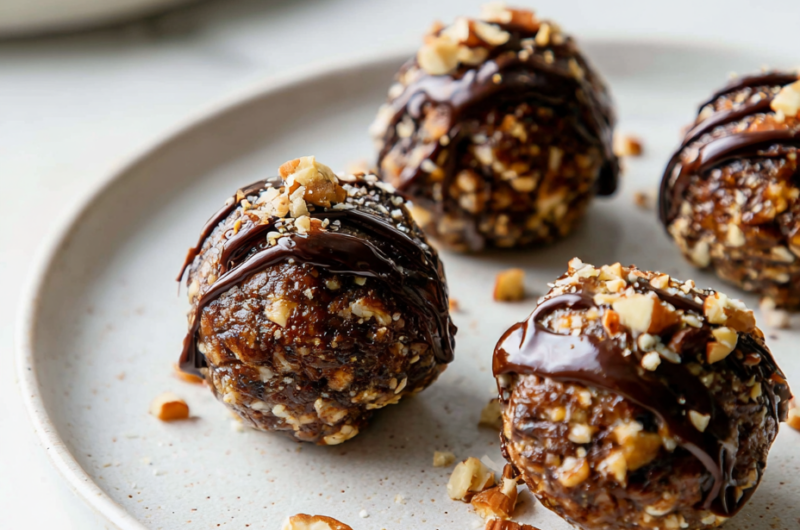
No-Bake Date Balls
Ingredients
Equipment
Method
- Place the pitted dates into a food processor and pulse until they break down into a sticky, slightly chunky paste. If your dates are dry, soak them in warm water for 5 minutes first, then drain and process.
- Toast the nuts in a dry skillet over medium heat for about 3-4 minutes until fragrant and lightly golden. Remove from heat and chop roughly.
- Transfer the date paste to a mixing bowl and add the chopped nuts, sifted cocoa powder, vanilla extract, and a pinch of sea salt. If using, add the coconut oil to help bind the mixture.
- Mix everything together thoroughly until well combined and sticky. If the mixture feels too wet, add a little more chopped nuts or oats; if too dry, add a tiny splash of coconut oil.
- Scoop about a tablespoon of the mixture and roll it between your palms into a compact ball. Place each ball on a parchment-lined baking sheet. Repeat until all the mixture is used.
- Refrigerate the assembled balls for at least 30 minutes to firm up. This makes them easier to handle and enhances their chewy texture.
- Once chilled, serve the date balls directly from the fridge. Store any leftovers in an airtight container in the fridge for up to a week or freeze for longer storage.
Notes
Pro tips for perfect date balls
- Bolded mini-head: Use slightly warm, sticky dates for easier blending—cold dates can be stubborn.
- Bolded mini-head: Toast nuts lightly to enhance flavor and add smoky depth—watch closely to prevent over-torching.
- Bolded mini-head: Sift cocoa powder to avoid lumps—clumpy cocoa can make the mixture uneven.
- Bolded mini-head: Keep your hands damp when rolling sticky mixture—prevents sticking and makes shaping easier.
- Bolded mini-head: Chill the mixture for at least 30 minutes—this firms up the balls and makes handling smoother.
- Bolded mini-head: Add a pinch of sea salt to heighten sweetness—don’t skip it, it balances the flavors beautifully.
- Bolded mini-head: If mixture feels too dry, a tiny splash of coconut oil helps it come together—don’t overdo it, just enough to bind.
Common mistakes and how to fix them
- FORGOT to soften dates: soak briefly in warm water, then drain before processing.
- DUMPED in too many nuts: measure carefully to avoid dry, crumbly balls.
- OVER-TORCHED nuts: toast at 160°C/320°F for 3-4 minutes, watch for smoky aroma.
- SKIPPED chilling step: refrigerate for at least 30 minutes for firm, manageable balls.
Quick fixes and pantry swaps
- If mixture is too sticky, splash a little water or honey to loosen it.
- When balls crack while rolling, chill the mixture for 10 minutes first.
- Splash a tiny bit of coconut oil if the mixture feels dry and won’t hold shape.
- Patch crumbly balls by pressing them tightly and chilling again before serving.
- Shield your hands with damp cloths when rolling sticky mixture for cleaner hands.
Prep, store, and reheat tips
- Prepare the date mixture ahead: pulse dates and nuts in the food processor the night before, then refrigerate overnight for easier rolling.
- Store the formed balls in an airtight container in the fridge for up to a week; they stay chewy and fresh, with a slightly intensified nutty aroma.
- Freeze the date balls for up to a month—wrap individually in plastic wrap for best freshness; thaw in the fridge, then enjoy with a soft, sticky texture.
- Reheat by letting them sit at room temperature for 5-10 minutes; they’ll soften slightly, releasing a warm, fragrant aroma that hints at caramelized dates.
Top questions about no bake date balls
1. How do I prepare the dates for blending?
Dates should be soft and sticky; soak dry ones in warm water for a few minutes before blending.
2. Can I use different nuts in my date balls?
Use any nuts you like—almonds, walnuts, pecans—all add crunch and flavor. Toast them lightly for extra aroma.
3. Should I chill the mixture before shaping?
Chill the mixture for at least 30 minutes to firm up, making it easier to roll into balls.
4. How long do no bake date balls last?
Yes, you can store them in an airtight container in the fridge for up to a week or freeze for longer.
5. Why add salt to my date balls?
Adding a pinch of sea salt enhances sweetness and balances flavors, making the dates taste even richer.
6. My mixture is too sticky to roll, what do I do?
If mixture feels too sticky, dampen your hands slightly or add a touch more oats or shredded coconut.
7. What are good substitutions for cocoa powder?
You can substitute cocoa powder with cacao nibs for a crunchier texture or use carob powder for a milder flavor.
8. Should I toast the nuts before adding?
Using toasted nuts adds a smoky, aromatic depth that contrasts nicely with the sweetness of the dates.
9. How do I avoid over-processing the ingredients?
Ensure the mixture is evenly combined; over-processing can make it too dry or pasty, so pulse carefully.
10. How do I know when they’re ready to eat?
Refrigerate the balls for 30 minutes or more to ensure they’re firm enough to eat without falling apart.
These no-bake date balls are a reminder that simple ingredients can create something unexpectedly satisfying. They’re quick to whip up and perfect for those moments when you need a little sweet boost without the fuss of baking. Making them feels like a small act of kindness—something nourishing and honest, right when you need it.
In a way, they’re more than just a treat—they’re a small, tangible moment of calm in a busy day. Whether stored in the fridge or kept in the freezer, these bites are ready whenever you need a quick, honest pick-me-up, no matter what chaos is happening around you.

Hi, I’m Grace Morgan, and welcome to my kitchen. This is a space shaped by family meals, curious hands reaching for snacks, paws under the table, and recipes that come together in the middle of real life. I’m a food blogger, a mother, and a passionate pet keeper. Most days, I’m cooking with one eye on the stove and the other on someone who needs me, whether that’s a child asking for a taste or a dog hoping something might fall.


