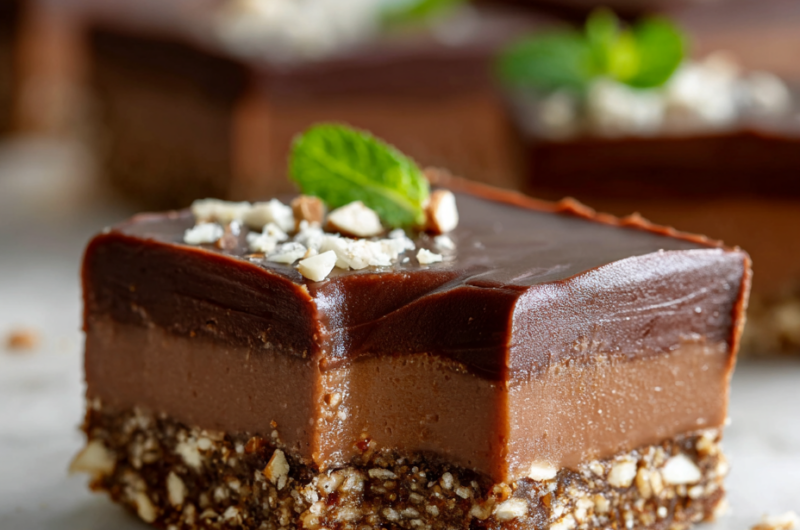
Sometimes, I just need a sweet fix that doesn’t involve turning on the oven or waiting for a dessert to chill for hours. These no bake fudge bars come together faster than I can say ‘chocolate,’ and they’re a godsend on hectic afternoons or when friends drop by unannounced.
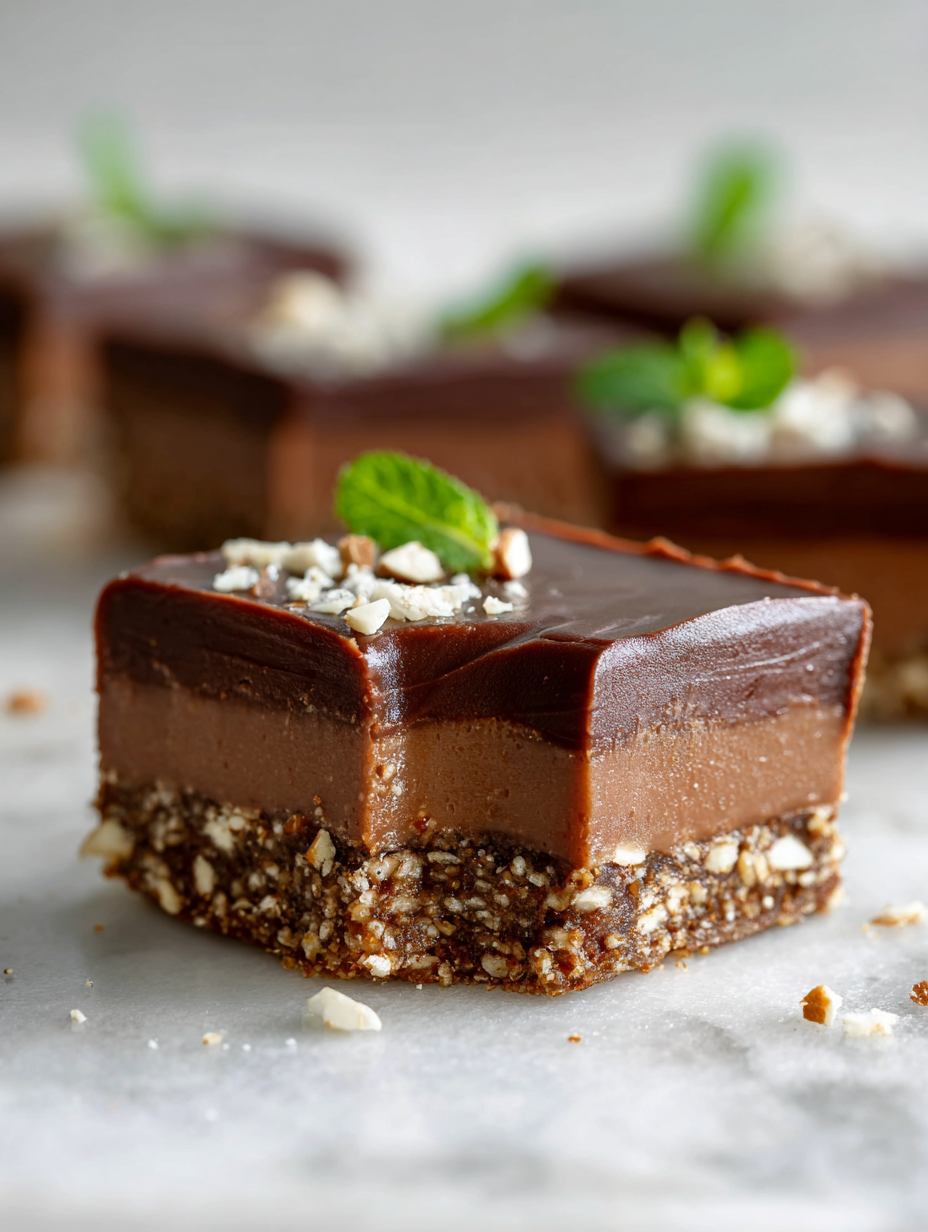
There’s something deeply satisfying about slicing into these rich, fudgy squares that set up perfectly in the fridge. It’s like a little secret weapon against my sweet tooth—creamy, velvety, and just sweet enough to hit the spot without feeling heavy.
Plus, I love how adaptable they are—swap the nuts, add a splash of espresso, or sprinkle a pinch of sea salt on top. It’s a recipe that feels almost like a blank canvas, but always delivers that decadent chocolate hit I crave.
Transforming a classic indulgence into a no-bake, hands-off treat that’s perfect for busy days and spontaneous cravings.
The story behind this recipe
This recipe was born out of a lazy weekend afternoon when I was craving something sweet but didn’t want to turn on the oven. I remembered a batch of leftover condensed milk in the fridge and a bag of chocolate chips that was begging to be used up. Mixing those simple ingredients into a quick, no-bake treat felt like a small act of rebellion against the usual baking routine. Over time, I tweaked the proportions and added a pinch of sea salt and a crunchy nut layer, making these fudge bars my go-to for both comfort and spontaneity.
Ingredient breakdown
- Butter: I use unsalted butter for control over salt; it gives the bars a rich, creamy base. You can swap with coconut oil for a dairy-free version, but the texture will be slightly softer.
- Chocolate chips: I love semi-sweet for balanced sweetness, but dark chocolate melts into a more intense, smoky flavor. Use white chocolate for a sweeter, milky taste.
- Sweetened condensed milk: It’s my go-to binder that turns everything velvety—skip or replace with coconut cream for a dairy-free twist, but expect a less gooey result.
- Nuts (optional): I prefer crunchy walnuts or hazelnuts, adding texture and a nutty aroma. For a saltier kick, sprinkle sea salt on top after spreading the mixture.
- Vanilla extract: I always add a splash for depth, but almond extract offers a different, slightly floral note—use sparingly to avoid overpowering.
- Sea salt (finishing touch): Just a pinch on top enhances the chocolate’s richness and adds contrast. Skip if you’re not a fan of salted sweets, but it’s a game changer.
- Optional add-ins: Dried fruits or a sprinkle of crushed cookies can personalize these bars; I like a dash of sea salt for that perfect sweet-salty combo.
Spotlight on key ingredients
Chocolate chips:
- I love semi-sweet for balanced sweetness, but dark chocolate melts into a more intense, smoky flavor. Use white chocolate for a sweeter, milky taste.
- Sweetened condensed milk: It’s my go-to binder that turns everything velvety—skip or replace with coconut cream for a dairy-free twist, but expect a less gooey result.
Butter:
- I use unsalted butter for control over salt; it gives the bars a rich, creamy base. You can swap with coconut oil for a dairy-free version, but the texture will be slightly softer.
- Sea salt: Just a pinch on top enhances the chocolate’s richness and adds contrast. Skip if you’re not a fan of salted sweets, but it’s a game changer.
Notes for ingredient swaps
- Dairy-Free: Swap butter with coconut oil for a subtle coconut aroma and softer set, or use vegan butter if you prefer.
- Chocolate: Dark chocolate chips give a smoky, intense flavor; white chocolate offers a sweeter, milky note; or try milk chocolate for a mild sweetness.
- Sweetened Condensed Milk: Coconut cream can replace it for a dairy-free, less sweet option, but the mixture might be slightly less gooey.
- Nuts: Use toasted pecans or macadamia nuts for buttery richness, or omit for a nut-free treat. Toasted nuts add aroma and crunch.
- Flavor Boost: Add a dash of espresso powder or a pinch of cinnamon to deepen the chocolate flavor, or skip for pure chocolate goodness.
- Salt: Use flavored sea salts like smoked or smoked paprika salt for an unexpected twist, or omit if avoiding salt.
- Add-ins: Mix in dried cranberries, chopped dried apricots, or crushed cookies instead of nuts for variety, but watch moisture levels to keep texture firm.
Equipment & Tools
- 20x20cm (8×8 inch) baking dish: Holds the fudge mixture as it sets.
- Saucepan: Melts the butter and chocolate evenly.
- Spatula: Stirs and spreads the mixture smoothly.
- Parchment paper: Eases removal and cleanup.
- Knife: Slices the set fudge into bars.
Step-by-step guide to fudge bars
- Gather your equipment: a 20x20cm (8×8 inch) baking dish, a saucepan, a spatula, and parchment paper for easy removal.
- Line the baking dish with parchment paper, leaving some overhang for easy lifting later.
- In the saucepan, melt 100g (1/2 cup) unsalted butter over low heat, just until it starts to shimmer, about 2 minutes.
- Add 200g (1 cup) semi-sweet chocolate chips to the melted butter. Stir constantly until smooth and glossy, about 3 minutes. The mixture should be fragrant and velvety.
- Remove from heat. Stir in 1 can (397g) sweetened condensed milk until fully integrated, about 1 minute. The mixture will be rich and thick.
- Pour the chocolate mixture into the prepared dish. Use a spatula to spread evenly, pressing down slightly to compact.
- Optional: sprinkle a handful of chopped nuts or sea salt on top for added texture and contrast.
- Place the dish in the refrigerator for at least 3 hours, or until firm and set. You can leave it overnight for best results.
- Once set, lift the fudge block out of the dish using the parchment overhang. Slice into 12-16 bars with a sharp knife.
- Serve immediately or store in an airtight container in the fridge for up to a week. Bring to room temperature before serving for softer bites.
Refrigerate until firm, then lift out using parchment. Slice with a sharp knife, wipe clean between cuts. Serve straight from the fridge or at room temperature for softer texture.
How to Know It’s Done
- The chocolate mixture is glossy and smooth after melting.
- The fudge feels firm when gently pressed, without sticky or greasy spots.
- Bars hold their shape well when sliced, with clean edges.
No-Bake Fudge Bars
Ingredients
Equipment
Method
- Line your baking dish with parchment paper, leaving some overhang for easy removal, and set it aside.
- In a saucepan over low heat, melt the butter gently, listening for a soft sizzle and watching for it to shimmer, about 2 minutes.
- Add the chocolate chips to the melted butter, stirring constantly with a spatula until the mixture is smooth, glossy, and fragrant, about 3 minutes.
- Remove the saucepan from heat and pour in the sweetened condensed milk, stirring quickly until the mixture is velvety and well combined.
- Pour the thick chocolate mixture into the prepared dish, spreading it evenly with a spatula and pressing down gently to create a smooth surface.
- If desired, sprinkle chopped nuts or a pinch of sea salt evenly over the top for added texture and flavor contrast.
- Place the dish in the refrigerator and chill for at least 3 hours, or until the fudge is firm and set.
- Once chilled, lift the fudge out of the dish using the parchment overhang and transfer to a cutting board.
- Slice into 12 evenly-sized squares with a sharp knife, wiping the blade clean between cuts for neat edges.
- Serve immediately or store in an airtight container in the fridge for up to a week, bringing to room temperature before enjoying for a softer bite.
Tips for perfect fudge bars
- Use high-quality chocolate chips for a richer, more velvety texture and deep cocoa flavor.
- Melt butter and chocolate slowly over low heat to prevent burning and achieve a glossy finish.
- Stir in condensed milk off the heat to avoid scorching and keep the mixture smooth and shiny.
- For a softer fudge, slightly warm the mixture before pouring into the pan—it helps with spreading and setting.
- Chill the bars at least 3 hours until fully firm; a longer chill enhances the fudge’s dense, melt-in-your-mouth feel.
- When slicing, run your knife under hot water first to get clean, precise cuts without cracking the fudge.
- Sprinkle sea salt on top just before chilling for a burst of flavor contrast that elevates the chocolate.
Common mistakes and how to fix them
- FORGOT to level the pan? Use a flat surface to ensure even fudge thickness.
- DUMPED too much salt? Rinse your hands before sprinkling to control the salt amount.
- OVER-TORCHED the chocolate? Remove from heat immediately when it melts; residual heat can burn.
- MISSED the chill time? Patience helps the fudge set properly, avoid rushing slicing.
Quick Fixes for Fudge Bars
- When mixture is too thick, splash in a teaspoon of warm milk to loosen it.
- If bars crumble, patch with a thin layer of melted chocolate on top.
- Splash a little water on the pan if chocolate seizes; gently warm to smooth out.
- When fudge isn’t setting, freeze for 30 minutes for quick firming.
- DUMPED too much salt? Rinse your hands before sprinkling to control the salt amount.
Prep, store, and reheat tips
- Prepare the fudge mixture and pour into the dish a day ahead; it firms up better after chilling overnight.
- Store the bars in an airtight container in the fridge for up to a week, maintaining their fudgy texture and shiny appearance.
- For longer storage, wrap the bars tightly and freeze for up to a month; thaw in the fridge before serving for best texture.
- Reheat slightly at room temperature or in short bursts in the microwave (10 seconds) to soften without melting completely; watch for shiny, gooey edges.
Top questions about no bake fudge bars
1. How do I get clean slices?
Use a sharp knife warmed under hot water for clean slices. It prevents sticking and cracking.
2. My fudge is too stiff to spread, what now?
If the mixture is too thick to spread, gently warm it over low heat or add a splash of milk.
3. How long should I chill the fudge?
Chill the bars for at least 3 hours, ideally overnight, to ensure they set firm and hold shape.
4. Can I freeze these fudge bars?
Store in an airtight container in the fridge for up to a week or freeze for longer storage.
5. Can I make these dairy-free?
Yes, substitute coconut oil or vegan butter for dairy-free options; expect slightly softer texture and different aroma.
6. Can I change the type of chocolate?
Use dark chocolate for a smoky, intense flavor, or white chocolate for extra sweetness. Adjust based on your preference.
7. Can I add toppings or mix-ins?
Add a pinch of sea salt on top before chilling to enhance the chocolate flavor and add contrast.
8. Why is my chocolate seizing or burning?
Ensure the chocolate melts smoothly by stirring constantly and removing from heat just as it melts completely.
9. My fudge is crumbly, how fix it?
If the fudge is crumbly, gently reheat and stir in a little more condensed milk or butter to loosen.
10. Does quality chocolate matter?
Use high-quality chocolate chips for a richer flavor and creamier texture—better melt and taste.
These no-bake fudge bars are a little treasure that I always keep in my fridge. They come together quickly, but that rich, velvety chocolate taste feels indulgent every time I bite in. It’s a simple treat that’s perfect for unexpected guests or when I need a quick pick-me-up.
In a way, they remind me that sometimes the easiest desserts are the most satisfying. No fuss, just good ingredients and a few moments of patience. They’re a small reminder that comfort can be homemade, effortless, and still totally delicious.

Hi, I’m Grace Morgan, and welcome to my kitchen. This is a space shaped by family meals, curious hands reaching for snacks, paws under the table, and recipes that come together in the middle of real life. I’m a food blogger, a mother, and a passionate pet keeper. Most days, I’m cooking with one eye on the stove and the other on someone who needs me, whether that’s a child asking for a taste or a dog hoping something might fall.


