Making no bake seed bars is rarely neat or tidy. It’s about messy hands, spontaneous tasting, and trusting your instincts more than strict measurements. I’ve learned to embrace the chaos — a spoonful of this, a handful of that, and a dash of patience while everything melds together.
What I love about these bars is how forgiving they are. Sometimes, the seeds stick together perfectly on the first try. Other times, I end up pressing the mixture into the pan a little more stubbornly, feeling like I’m sculpting a small, unpolished masterpiece. It’s honest, it’s real, and it’s always satisfying to see that sticky, nutty mass turn into something you can cut into squares.
These bars are a testament to kitchen spontaneity. They remind me that cooking doesn’t have to be pristine or perfect — just genuine, a little wild, and full of flavor. Every batch feels like a small adventure, especially when I find that perfect balance of crunch, chewiness, and a hint of sweetness from the natural ingredients.
Focusing on the unpolished, honest process of making no bake seed bars, emphasizing the messy, spontaneous moments in the kitchen that make the recipe feel real and accessible.
The story behind this recipe
This recipe came about during a particularly chaotic kitchen afternoon. I was toying with different seed combinations, trying to create something both nourishing and easy to grab on busy mornings. The no-bake aspect felt like a relief—no oven mess, no fuss. It’s become my go-to for those days when I want something wholesome without the whole cooking ritual, just messy hands and a bit of spontaneous joy.
Ingredient breakdown: key components
- Sunflower seeds: I love their nutty aroma and crunchy bite. If you prefer a milder taste, swap with pumpkin seeds but keep the crunch.
- Honey: It acts as the glue here, giving a sweet, sticky texture. For a less sweet version, try maple syrup but watch the consistency.
- Chia seeds: They swell and turn gel-like, helping everything stick together. If you don’t have them, ground flaxseed works but adds a different texture.
- Rolled oats: They provide a mild, chewy foundation. Use gluten-free oats if needed, but be aware it may alter the chewiness.
- Coconut flakes: I love their smoky sweetness and slight chewiness. Toast them lightly for more depth or skip for a softer bar.
- Sesame seeds: Their rich, nutty flavor adds complexity. Toast lightly to bring out the aroma, or skip if allergic but add more seeds for texture.
- Coconut oil: It melts into the mixture, making it silky and easy to press. Use a neutral oil for a subtler flavor or coconut butter for richness.
Spotlight on key ingredients
Sunflower seeds:
- I love their nutty aroma and crunchy bite. If you prefer a milder taste, swap with pumpkin seeds but keep the crunch.
- Honey: It acts as the glue here, giving a sweet, sticky texture. For a less sweet version, try maple syrup but watch the consistency.
- Chia seeds: They swell and turn gel-like, helping everything stick together. If you don’t have them, ground flaxseed works but adds a different texture.
Honey:
- It acts as the glue here, giving a sweet, sticky texture. For a less sweet version, try maple syrup but watch the consistency.
- Chia seeds: They swell and turn gel-like, helping everything stick together. If you don’t have them, ground flaxseed works but adds a different texture.
Notes for ingredient swaps
- Seeds: Sunflower seeds are my go-to for their nutty aroma and crunch. Swap with pumpkin seeds for a milder flavor or chia seeds for extra gel-like stickiness.
- Sweetener: Honey gives these bars their sticky sweetness. Maple syrup can work as a less floral alternative but might make the mixture a tad less cohesive.
- Binder: Coconut oil melts into the mixture and helps it set. Use a neutral oil if you prefer a subtler flavor or coconut butter for a richer taste.
- Oats: Rolled oats give structure and chew. Gluten-free oats are fine but may alter the overall texture slightly.
- Extras: Toasted sesame seeds add depth and aroma. You can skip or replace with chopped nuts for a different crunch and flavor twist.
- Additional binders: Ground flaxseed can replace chia for a similar gel effect, but it adds a slightly earthier note.
- Flavor boosters: Adding a pinch of vanilla or cinnamon can elevate the flavor without changing the core ingredients.
Equipment & Tools
- 20cm (8-inch) square pan: Holds the mixture and helps it set evenly.
- Parchment paper: Prevents sticking and makes removal easier.
- Small saucepan: Warm and combine honey and coconut oil.
- Spatula: Mix and fold ingredients thoroughly.
- Sharp knife: Cut the set mixture into bars.
- Measuring cups and spoons: Accurately measure ingredients.
Step-by-step guide to seed bars
- Gather all your ingredients and equipment. Line a 20cm (8-inch) square pan with parchment paper. This makes removal easier later.
- In a large mixing bowl, combine 1 cup sunflower seeds, 1/2 cup chopped nuts (if using), and 1/4 cup sesame seeds. Mix well to distribute evenly.
- Warm 1/4 cup honey and 2 tablespoons coconut oil in a small saucepan over low heat. Stir until just melted and combined, about 2 minutes. The mixture should be warm and slightly bubbling but not boiling.
- Pour the warm honey-oil mixture over the seed mixture. Use a spatula to fold and coat everything thoroughly. The mixture will be sticky and thick. If it feels too dry, add a teaspoon of honey or coconut oil.
- Add 2 tablespoons chia seeds and 1/2 cup rolled oats to the mixture. Fold again, ensuring even distribution. The oats and chia will help bind the bars together.
- Transfer the mixture to your prepared pan. Use the back of a spatula or your hands to press it down firmly and evenly. Aim for a compact, level surface. If the mixture is sticking, dampen your hands slightly.
- Place the pan in the fridge and let it chill for at least 2 hours, or until firm. This allows the bars to set and harden, making slicing easier.
- Once chilled, remove from the fridge. Lift the entire block out using the parchment paper and place on a cutting board.
- Cut into squares or rectangles with a sharp knife. Wipe the blade clean between cuts for a cleaner edge. Store the bars in an airtight container in the fridge for up to a week, or freeze for longer storage.
- If the bars feel too soft or sticky after chilling, pop them back in the fridge for another 30 minutes. They should be firm and hold their shape when cut.
Chill the pressed mixture in the fridge for at least 2 hours until firm. Slice into bars and store in an airtight container in the fridge. For best texture, consume within a week.
How to Know It’s Done
- The mixture is well coated and sticky, not dry or crumbly.
- The pressed mixture is firm and holds shape when pressed.
- Bars are evenly cut with clean edges and no sticking to the knife.
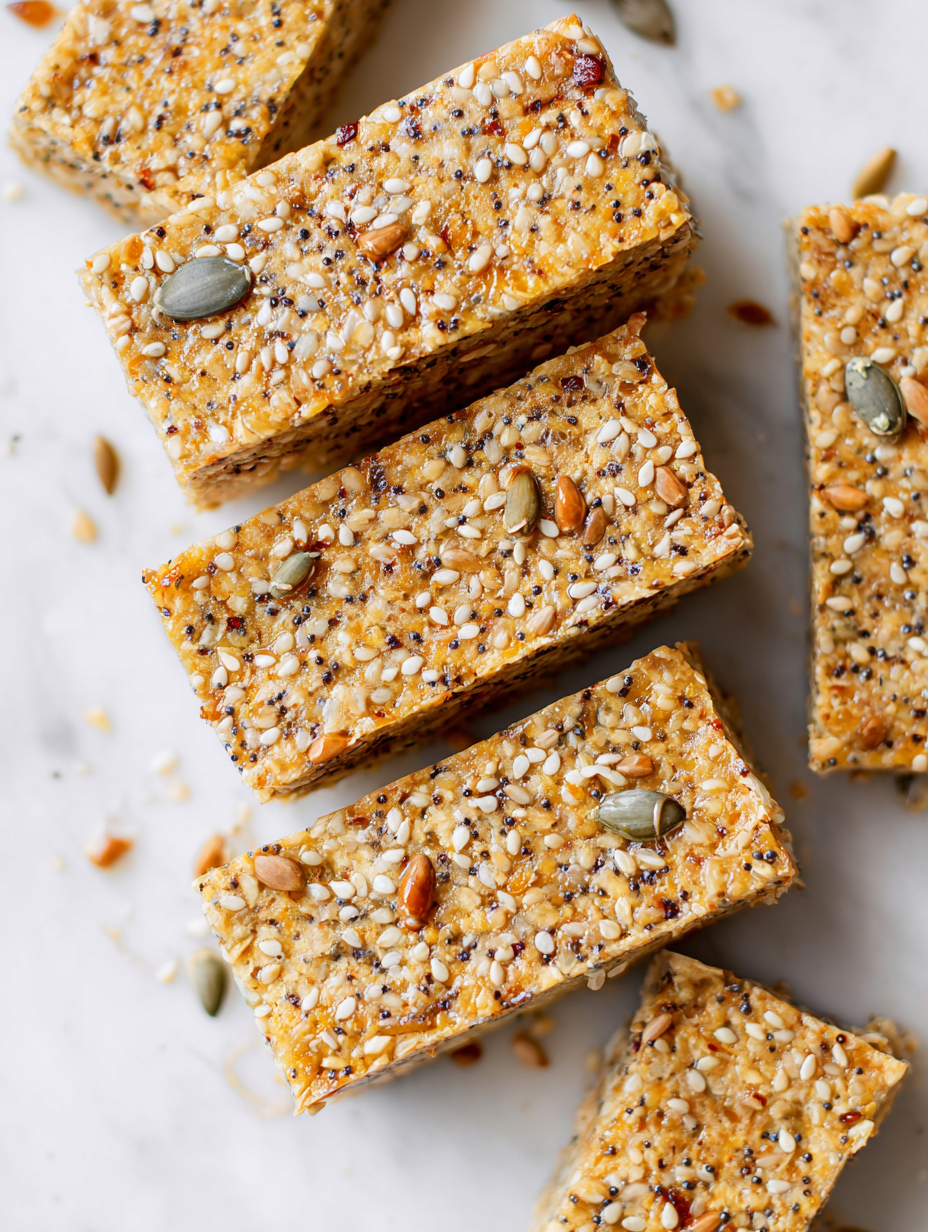
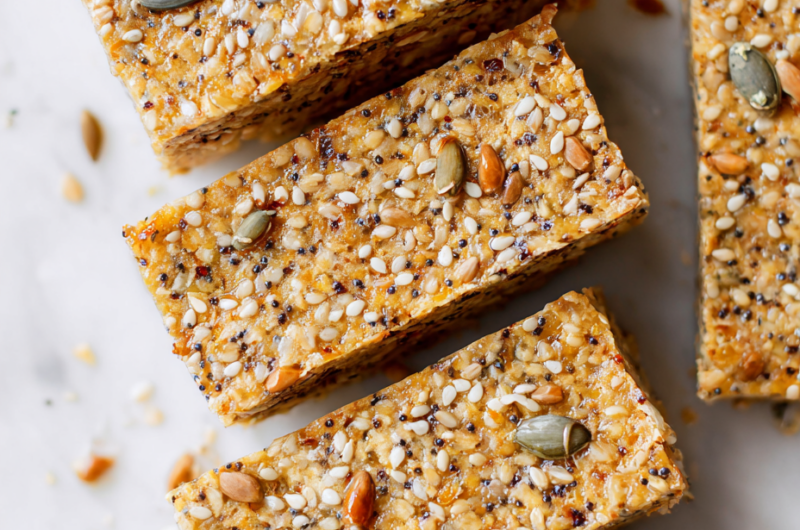
No Bake Seed Bars
Ingredients
Equipment
Method
- Line your square pan with parchment paper, making sure the edges hang over for easy removal.
- In a large bowl, combine the sunflower seeds, chia seeds, rolled oats, sesame seeds, and coconut flakes. Toss everything together until evenly mixed.
- Warm the honey and melted coconut oil in a small saucepan over low heat, just until combined and slightly bubbling, about 2 minutes. The aroma should be sweet and nutty.
- Pour the warm honey mixture over the seed and oat mixture. Use a spatula to gently fold everything together, coating all the ingredients evenly with the sticky mixture. It will become thick and slightly glossy.
- Transfer the mixture into your prepared pan. Press it down firmly with the back of a spatula or your damp hands, ensuring the mixture is compacted into an even layer. This helps create clean bars later.
- Place the pan in the fridge and chill for at least 2 hours, or until the mixture is fully firm and set. You'll hear a satisfying crunch as the mixture solidifies.
- Once set, lift the entire block out of the pan using the parchment edges, and transfer it to a cutting board.
- Using a sharp knife, cut the mixture into squares or rectangles. Wipe the blade clean between cuts to keep the edges neat.
- Arrange the bars on a plate or store in an airtight container in the fridge. They will keep fresh for about a week, and the natural flavors will deepen over time.
- Enjoy your homemade no bake seed bars as a wholesome snack or quick breakfast on busy mornings.
Pro tips for perfect seed bars
- Bold binding: Warm honey and coconut oil until just melted to help everything stick together smoothly.
- Texture check: When pressing the mixture into the pan, it should feel firm and hold shape without crumbling.
- Even pressing: Use the back of a spatula or damp hands to press mixture evenly for consistent bars.
- Chill thoroughly: Let the bars rest in the fridge for at least 2 hours until fully firm and easy to slice.
- Knife care: Wipe your knife between cuts to keep edges clean and prevent sticking, for neat squares.
- Seed toast: Lightly toast seeds before mixing to enhance their aroma and add a smoky depth.
- Flavor boost: Add a pinch of vanilla or cinnamon to the mixture for a little extra warmth and aroma.
Common mistakes and how to fix them
- FORGOT to adjust heat → use low heat for melting honey and oil slowly.
- DUMPED mixture too quickly → press firmly and evenly to avoid uneven bars.
- OVER-TORCHED seeds → toast lightly and watch closely to prevent bitterness.
- SKIPPED lining pan with parchment → mixture sticks and is hard to remove cleanly.
Quick fixes and pantry swaps
- When mixture is too dry → splash with a teaspoon of warm honey or coconut oil.
- If bars crumble when cut → chill longer or press mixture more firmly into the pan.
- DUMPED seeds or ingredients → use a spatula to redistribute evenly before pressing.
- Over-toasted seeds → toast at lower heat and keep a close eye for smoky notes.
- Splash cold water on knife blade → for cleaner cuts through sticky mixture.
Prep, store, and reheat tips
- Prepare the mixture ahead of time and keep it refrigerated for up to 24 hours; it firms up better and makes pressing easier.
- Store the finished bars in an airtight container in the fridge; they stay fresh for about a week, with flavors mellowing slightly over time.
- For longer storage, freeze the bars for up to a month; wrap individually for easy grab-and-go portions.
- Reheat slightly at room temperature or in a low oven (about 80°C / 175°F) for a few minutes if they become too firm, until just pliable and fragrant.
Top questions about seed bars
1. How do I ensure the bars hold together?
Pressing the mixture firmly into the pan helps it set better and prevents crumbling later.
2. Why is my mixture too soft to cut?
Chilling the mixture for at least 2 hours in the fridge allows it to firm up enough for neat slicing.
3. Can I skip toasting the seeds?
Using toasted seeds adds a smoky aroma, but if you prefer milder flavor, skip the toasting step.
4. My mixture is too dry, what can I do?
Adding a splash of warm honey or coconut oil can fix a mixture that’s too dry and crumbly.
5. How long do seed bars last?
Store the bars in an airtight container in the fridge for up to a week, or freeze for longer storage.
6. Can I use another sweetener?
You can swap honey for maple syrup or agave nectar, but the texture might change slightly.
7. What if I don’t have chia seeds?
Ground flaxseed can replace chia seeds if you don’t have them, but it will add a different texture.
8. How can I add more flavor or texture?
For a nutty flavor, add chopped nuts or dried fruit before pressing the mixture into the pan.
9. My mixture is sticky and hard to press, what can I do?
If the mixture sticks to your hands, dampen them slightly to make pressing easier.
10. The bars are too soft after chilling, how do I fix it?
If the bars feel too soft after chilling, pop them back in the fridge for 30 more minutes.
These no bake seed bars are more than just a quick snack; they’re a reminder that simplicity often brings the most satisfaction. Every bite carries a hint of crunch, a touch of sweetness, and the comforting feeling of knowing you made something nourishing yourself.
In a world that’s constantly rushing, these bars offer a moment of honest, spontaneous kitchen joy. They’re imperfect, messy, and real—just like the best parts of cooking. And honestly, that’s what makes them worth making again and again.

Hi, I’m Grace Morgan, and welcome to my kitchen. This is a space shaped by family meals, curious hands reaching for snacks, paws under the table, and recipes that come together in the middle of real life. I’m a food blogger, a mother, and a passionate pet keeper. Most days, I’m cooking with one eye on the stove and the other on someone who needs me, whether that’s a child asking for a taste or a dog hoping something might fall.


