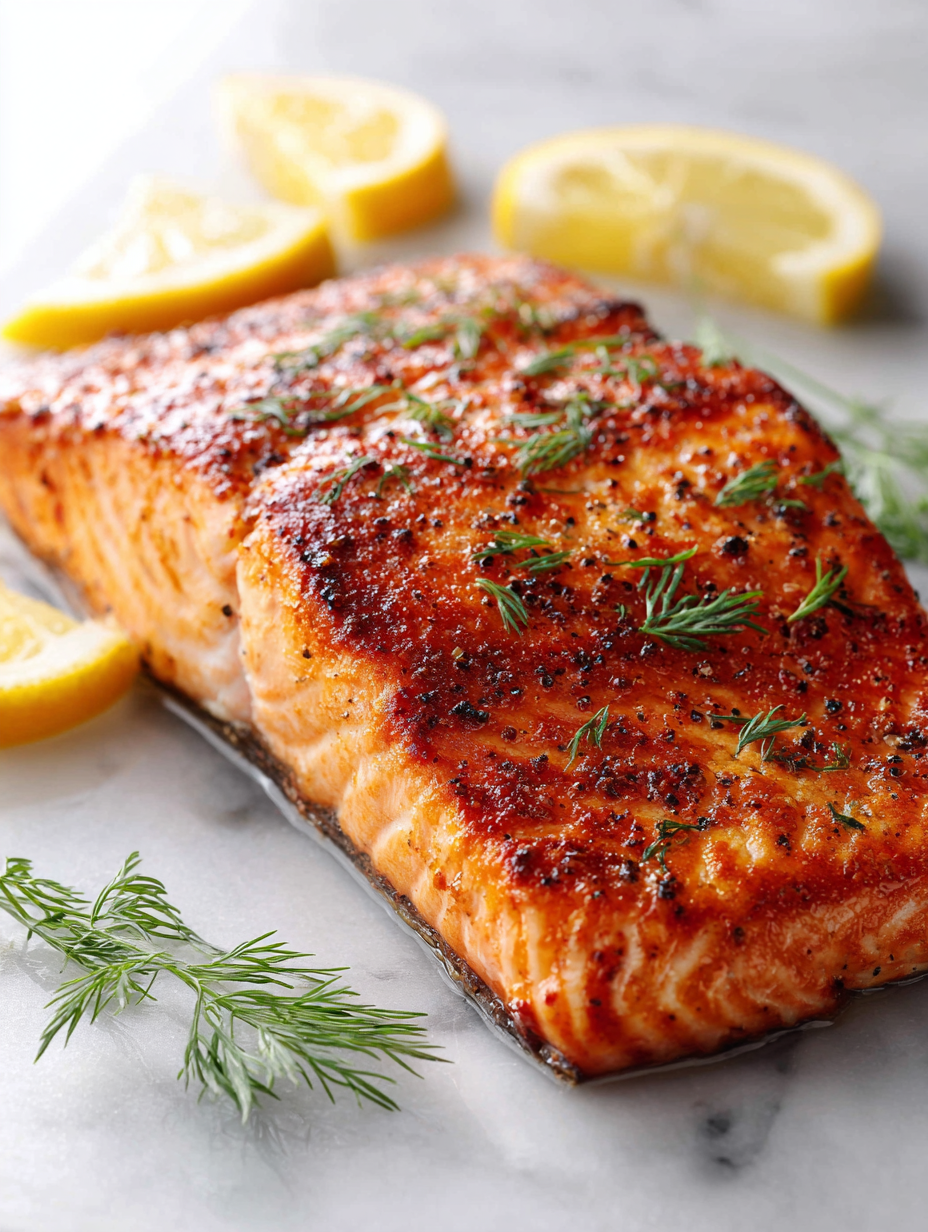
Blog

  • Whimsical Autumn: The Secret Spice Trick in Pumpkin Soup

    Whimsical Autumn: The Secret Spice Trick in Pumpkin Soup

    As the leaves turn and a cool breeze sweeps through, I find myself craving more than just another pumpkin latte. This creamy fall pumpkin soup is my secret love, especially because of one unexpected ingredient that turns a simple dish into a nostalgic whirlwind. It’s a tiny pinch of cardamom that brings a floral, mystical aroma echoing autumn evenings.

    This recipe isn’t just about pumpkin puree; it’s an adventure in a bowl, where each spoonful whispers stories of cozy fires and harvest festivals. The velvety texture and rich, earthy flavors make it perfect for a comforting lunch or a surprising starter at your next gathering. It’s not just seasonal—it’s a sensory journey waiting to happen.

    Creamy Fall Pumpkin Soup with Cardamom

    This pumpkin soup features a velvety smooth texture achieved through blending cooked pumpkin with stock and cream. The soup is flavored with spices like cinnamon and a pinch of cardamom, which adds a floral aroma, giving the final dish a rich, earthy, and inviting appearance with a vibrant orange hue.
    Prep Time 10 minutes
    Cook Time 25 minutes
    Total Time 35 minutes
    Servings: 4
    Course: Main Course
    Cuisine: Fall
    Calories: 210

    Ingredients
      

    • 1 tablespoon olive oil for sautéing
    • 1 medium yellow onion chopped
    • 2 cups pumpkin puree preferably homemade or canned
    • 3 cups vegetable broth or chicken broth
    • 1/2 cup heavy cream for creaminess
    • 1/2 teaspoon ground cinnamon
    • 1 pinch ground cardamom a tiny pinch for floral aroma
    • to taste salt preferably sea salt
    • to taste black pepper freshly ground

    Equipment

    • Large pot
    • Immersion blender or regular blender
    • Wooden spoon

    Method
     

    1. Heat the large pot over medium heat and add the olive oil. Once shimmering, add the chopped onion and sauté until translucent and fragrant, about 5 minutes.
    2. Add the pumpkin puree to the pot, stirring to combine with the onions. Cook for another 2 minutes to deepen the flavors.
    3. Pour in the vegetable broth, stirring well to incorporate all ingredients. Increase the heat slightly to bring the mixture to a gentle simmer.
    4. Allow the soup to simmer uncovered for about 15 minutes, stirring occasionally. The flavors will meld, and the soup will thicken slightly.
    5. Add the ground cinnamon, a pinch of ground cardamom, salt, and pepper to the pot, stirring to evenly distribute the spices. Smell for that aromatic floral note of the cardamom.
    6. Pour in the heavy cream and stir to create a rich, velvety consistency. Let the soup simmer for another 5 minutes to warm through and meld all flavors.
    7. Use an immersion blender to carefully blend the soup until smooth and creamy, or transfer in batches to a regular blender, blending until silky and returning to the pot.
    8. Taste and adjust seasoning with more salt or pepper if needed, then reheat gently if it has cooled slightly.
    9. Serve the soup hot, garnished with a drizzle of cream or a sprinkle of herbs if desired, revealing a vibrant orange color and smooth, velvety texture.
    In the chill of fall, a warm bowl of this pumpkin soup feels like wrapping yourself in your favorite cozy blanket. The subtle spice notes and mellow sweetness make it a memorable dish to revisit year after year. As the season shifts, I’ll be stirring up batches, rediscovering that perfect spoonful.

    This recipe has become my go-to when I need a quick, soul-warming fix. It’s a tender reminder that sometimes, the simplest ingredients—transformed with a little love and a sprinkle of unexpected magic—can turn a routine meal into an autumn ritual.

  • Tropical Escape in a Glass: The Unusual Charm of Pineapple Coconut Slushie

    Tropical Escape in a Glass: The Unusual Charm of Pineapple Coconut Slushie

    Few drinks capture the essence of summer quite like a pineapple coconut slushie. But today, I want to take you beyond the usual blend. Imagine adding a hint of ginger or a splash of lime—suddenly, this simple frozen treat becomes a layered festival of flavors that dances on your taste buds.

    This isn’t just about cooling down. It’s about reliving beach strolls and tropical sunsets, but with a twist that sparks surprise. The process is surprisingly straightforward, yet the flavor complexity makes every sip an adventure.

    WHY I LOVE THIS RECIPE?

    • I love how the sweet tang of pineapple mingles with creamy coconut in the most unexpected way.
    • The frozen texture is a perfect way to beat the scorching heat while indulging in a nostalgic tropical vibe.
    • Experimenting with different add-ins turns this slushie into a personal masterpiece every time.
    • It’s effortlessly customizable—spicy, citrusy, or extra sweet—tailoring it to any mood or craving.

    AVOID MY DISASTER (You’re Welcome)

    • FORGOT to blend long enough? It turns into icy chunks. Re-blend until smooth.
    • DUMPED too much rum? The flavor gets drowned. Add more pineapple or coconut to restore balance.
    • OVER-TORCHED the sugar? It caramelizes and ruins the taste. Use gentle heat or raw sugar instead.
    • MISSED adding lime juice? The flavor’s flat. Squeeze fresh lime for zing.

    QUICK FIXES THAT SAVE YOUR DAY

    • When the texture is too icy, splash in a little coconut water and re-blend.
    • Patch bland flavor with a dash of vanilla extract or pineapple concentrate.
    • Shield heat-sensitive ingredients—like yogurt—by adding them last and blending gently.
    • If it’s too sweet, add a splash of lime juice or a pinch of salt.
    • Crack open frozen pineapple for instant flavor boost and a bright aroma.

    Now, picture serving this icy delight at your next summer gathering. The vibrant aroma and creamy texture make it a conversation starter. It’s a playful, unexpected twist on a classic that brings the tropics to your doorstep without cumbersome prep.

    As the seasons change, the craving for something cool and revitalizing grows. This pineapple coconut slushie offers a fresh, fun way to enjoy those warm days while experimenting boldly in your kitchen—and that’s what makes it more than just a drink.

    Pineapple Coconut Slushie

    This pineapple coconut slushie combines fresh pineapple and creamy coconut milk blended into a smooth, icy beverage. The addition of ginger and lime adds layers of bright, spicy, and tangy flavors, creating a vibrant tropical treat with a refreshing texture.
    Prep Time 10 minutes
    Total Time 10 minutes
    Servings: 2
    Course: Main Course
    Cuisine: Tropical
    Calories: 150

    Ingredients
      

    • 2 cups fresh pineapple chunks preferably frozen for best texture
    • 1 cup coconut milk full-fat for creaminess
    • 1 inch fresh ginger peeled and grated
    • 1 lime lime juice freshly squeezed
    • 1 tablespoon honey or agave syrup optional for sweetness

    Equipment

    • Blender
    • Measuring cups and spoons

    Method
     

    1. Add the frozen pineapple chunks, coconut milk, grated ginger, lime juice, and honey to your blender.
    2. Blend everything on high speed for about 30-45 seconds until the mixture is smooth, icy, and creamy. You should hear a consistent whir and see the ingredients fully combined.
    3. Stop the blender and check the texture; if it’s too thick, add a splash of coconut water or more lime juice then blend briefly to loosen.
    4. Taste the slushie and adjust sweetness with more honey or lime if desired, then give it a quick pulse to combine.
    5. Pour the icy mixture into glasses, watching it hold a thick, slushy consistency with a slight frosty appearance on top.
    6. Garnish with a small wedge of lime or a sprig of mint for a vibrant finish before serving immediately.

    Preparing this slushie isn’t just about quick relief from the heat. It’s a fun, tactile process that reminds me of childhood summers and carefree afternoons. Every batch feels like a mini tropical vacation, no matter where I am.

    Plus, the versatile nature of this recipe keeps me coming back. I can tweak ingredients, add a splash of this or that, and always end up with something exciting. It’s a simple reminder that the best recipes are those that invite creativity and a little chaos.

  • Spook-tacular Halloween Mummy Meatballs

    Spook-tacular Halloween Mummy Meatballs

    Halloween is the perfect time to embrace playful and surprising flavors, especially with food that sparks conversation and nostalgia. These Mummy Meatballs are more than just a fun snack; they’re a celebration of creative chaos in the kitchen. Each bite offers a crispy, savory experience topped with googly eyes and wrapped in fragrant, seasoned meat.

    What makes these meatballs stand out is their ability to bring joy and a little chaos to your spooky gathering. They’re simple to make but deliver maximum delight with their spooky mummy wrappings and tender, flavorful interior. This recipe is perfect for anyone looking to add a touch of humor and horror to their holiday table.

    Mummy Meatballs

    Mummy Meatballs are crispy, savory meatballs wrapped with strips of puff pastry or dough, giving them a bandaged, mummy-inspired appearance. They are baked until golden and topped with googly eyes for a playful Halloween presentation, featuring a tender interior and flaky exterior. This dish combines classic meatball flavors with fun, spooky decor for festive occasions.
    Prep Time 20 minutes
    Cook Time 25 minutes
    Total Time 45 minutes
    Servings: 4
    Course: Main Course
    Cuisine: American
    Calories: 250

    Ingredients
      

    • 1 pound ground beef or preferred ground meat
    • 1/4 cup bread crumbs for binding
    • 1 large egg to help bind the mixture
    • 1 teaspoon salt
    • 1/2 teaspoon black pepper
    • 1 tablespoon olive oil for cooking
    • 1 sheet puff pastry thawed and cut into strips
    • to taste googly eyes for decoration

    Equipment

    • Baking sheet
    • Parchment paper
    • Mixing bowls
    • Small knife
    • Pastry brush

    Method
     

    1. Preheat your oven to 400°F (200°C) and line a baking sheet with parchment paper.
    2. In a large mixing bowl, combine the ground beef, bread crumbs, egg, salt, and black pepper. Mix everything gently until just combined, taking care not to overwork the meat.
    3. Form the meat mixture into small, evenly sized meatballs, about one inch in diameter, and place them on the prepared baking sheet.
    4. Bake the meatballs in the preheated oven for 15-20 minutes, or until they are cooked through and lightly browned.
    5. While the meatballs are baking, cut the puff pastry sheet into thin strips, approximately 1/4 inch wide, to create bandage-like layers.
    6. Once the meatballs are cool enough to handle, wrap each one carefully with strips of puff pastry, overlapping slightly to resemble bandages. Leave some space at the top for the googly eyes.
    7. Return the wrapped meatballs to the oven and bake for an additional 8-10 minutes, until the pastry is golden and crispy.
    8. Remove the mummy meatballs from the oven and place them on a serving platter. Top each one with a googly eye for a spooky, fun look.
    9. Serve the Mummy Meatballs warm as a festive appetizer or main dish, garnished with additional Halloween décor if desired.
    These meatballs serve up nostalgic comfort with a spooky twist, making them a hit at any Halloween party. Plus, they’re quick to prepare, so you can spend more time enjoying the screaming fun and less time in the kitchen.

    Whether you’re hosting a kid-friendly party or a grown-up horror movie marathon, these Mummy Meatballs bring festive spirit and a delightful crunch to your festivities. Keep the fun going with more creepy appetizers and watch as everyone raves about your creative culinary skills.

  • A Chilly Adventure: The Blue Raspberry Slushie Twist

    A Chilly Adventure: The Blue Raspberry Slushie Twist

    WHY I LOVE THIS RECIPE?

    • The bright blue color makes it impossible to ignore, sparking instant joy.
    • It’s a nostalgic callback to childhood while tasting surprisingly sophisticated.
    • The simplicity of ingredients means it’s quick, yet each sip feels like an adventure.
    • Watching the vibrant mix freeze is oddly satisfying, like capturing a frozen rainbow.

    AVOID MY DISASTER (You’re Welcome)

    • FORGOT the salt in the ice? It flattens the flavor. Just sprinkle a pinch—simple magic.
    • DUMPED crushed ice all over the counter? Use a damp cloth to clean quickly.
    • OVER‑TORCHED the sugar syrup? It turns bitter. Keep a close eye in the last minute.
    • SPILLED the blue raspberry syrup? Rinse with cold water, then start fresh.

    QUICK FIXES THAT SAVE YOUR DAY

    • When the slush isn’t icy enough, add more crushed ice and blend for 30 seconds.
    • Splash in extra lemon juice for a zestier flavor if it’s too sweet.
    • Patch too thin? Pour into glasses, freeze for 10 minutes, then serve.
    • Shield your mixture from melting too fast by serving immediately or using chilled glasses.
    • When missing blue raspberry flavor, add a splash of concentrated syrup—shimmering in the summer sun.

    Vibrant Blue Raspberry Slush

    This icy drink features a bright blue hue achieved through blue raspberry syrup, blended with crushed ice to create a slushy, refreshing texture. The mixture results in a visually striking beverage with a smooth, granular consistency and a sweet, tangy flavor profile reminiscent of childhood treats.
    Prep Time 10 minutes
    Cook Time 5 minutes
    Total Time 15 minutes
    Servings: 2
    Course: Main Course
    Cuisine: beverage
    Calories: 180

    Ingredients
      

    • 1 cup blue raspberry syrup adds color and flavor
    • 2 cups crushed ice for freezing and texture
    • 1 tablespoon lemon juice to enhance brightness

    Equipment

    • Blender
    • Measuring cups and spoons

    Method
     

    1. Measure out the blue raspberry syrup and pour it into the blender.
    2. Add the crushed ice to the blender, making sure to distribute it evenly over the syrup.
    3. Squeeze in the lemon juice for a fresh zing and flavor complexity.
    4. Blend on high speed until the mixture is smooth, icy, and vibrant in color, about 30-40 seconds.
    5. Stop the blender and check the consistency—should be thick, slushy, and well-blended with no large ice chunks.
    6. Pour the slush into chilled glasses, letting the icy mixture mound attractively above the rim.
    7. Serve immediately with a colorful straw or garnish of fresh berries for an extra fun touch.

    Notes

    Adjust sweetness by adding more or less syrup. For a thicker consistency, add a few more ice cubes and blend again. Serve immediately to enjoy the optimal icy texture.

    This blue raspberry slushie embodies the chaos and charm of a perfect summer day. It’s a visual treat that cools you down and sparks spontaneous smiles. The burst of tartness paired with icy crunch is a reminder that sometimes, the simplest ingredients create the wildest memories.

    Now that the season calls for refreshment, this recipe offers a playful escape. It’s a reminder that enjoyment doesn’t need fuss, just a bit of courage to chase colorful, chilled chaos. Cheers to making every sip a small adventure in the heat.

  • Hello world!

    Welcome to WordPress. This is your first post. Edit or delete it, then start writing!