This recipe is my secret weapon for effortless holiday gifting, combining simplicity with a touch of homemade love that feels special even in chaos.
There’s something satisfying about mixing a handful of ingredients and ending up with these rich, crunchy clusters that everyone loves. It’s a no-fuss treat that makes me feel like a kitchen magician, even when I’m short on time.
Plus, the smell of toasted almonds and melting chocolate filling the air as I work is pure comfort—like a little moment of calm before the busy season kicks in.
This recipe is my secret weapon for effortless holiday gifting, combining simplicity with a touch of homemade love that feels special even in chaos.
A Simple Holiday Gift
- These clusters remind me of childhood afternoons, the crunch of almonds and the bittersweet chocolate making everything feel simpler.
- Sometimes I worry they’re too easy, but the joy of watching that glossy chocolate set makes me feel like a kitchen wizard every time.
- I love how a batch like this can turn a dull afternoon into a moment of proud, homemade indulgence.
- There’s a nostalgic rush when I smell toasted almonds mingling with rich chocolate—like a cozy, familiar hug.
- Whenever I share these, I see relief and smiles—proof that simple treats can carry a lot of warmth.
The story behind this recipe
- This recipe came together on a busy weekend when I needed something quick, satisfying, and completely fuss-free. I remember rummaging through my pantry, feeling overwhelmed by complicated desserts, and then spotting a bag of almonds and a bar of chocolate. It struck me how simple ingredients could turn into something so rich and crunchy without turning on the oven.
- The first batch was a happy accident—clumps that didn’t quite hold together at first, but once I melted the chocolate just right and added the almonds, it all clicked. Now, these clusters are my go-to for last-minute gifts, impromptu snacks, or just a little treat that doesn’t demand much fuss but feels special.
- heading: ‘A Kitchen Emergency Turned Favorite’
Historical & Cultural Tidbits
- These clusters may trace back to humble home kitchens where no-bake treats were a quick fix for sweet cravings.
- Historically, similar recipes emerged during wartime shortages, relying on pantry staples like chocolate and nuts.
- In some cultures, making sweet clusters was a way to preserve nuts and chocolate, blending utility with indulgence.
Ingredient breakdown: key components
- Dark chocolate: I love using a high-quality bar for that deep, rich flavor that melts smoothly—if you prefer less intense, try semi-sweet, but skip milk chocolate for a more decadent feel.
- Almonds: Toasted almonds bring a smoky, nutty aroma that really wakes up the clusters; if you’re out, pecans or walnuts work but may change the flavor profile.
- Sweetener: A touch of honey adds a subtle floral note and helps the chocolate set glossy—if you want it vegan, maple syrup can stand in; just expect a slightly different sweetness.
- Butter or coconut oil: I use a bit of butter for richness, but coconut oil makes it dairy-free with a slight coconut scent—both help the chocolate spread evenly.
- Sea salt: Just a pinch enhances the chocolate’s richness and balances the sweetness—don’t skip it, even if you’re wary of salt in sweets.
- Optional add-ins: Dried cranberries or shredded coconut can add chew and texture—you might want to adjust the quantity so the clusters don’t get overwhelmed.
- Parchment paper: Lining your baking sheet prevents sticking and makes cleanup a breeze—don’t skip this step, or you’ll be scraping hardened chocolate off the tray.
Spotlight on key ingredients
Dark chocolate:
- I love using a high-quality bar for that deep, rich flavor that melts smoothly—if you prefer less intense, try semi-sweet, but skip milk chocolate for a more decadent feel.
- Almonds: Toasted almonds bring a smoky, nutty aroma that really wakes up the clusters; if you’re out, pecans or walnuts work but may change the flavor profile.
Almonds:
- I love using a high-quality bar for that deep, rich flavor that melts smoothly—if you prefer less intense, try semi-sweet, but skip milk chocolate for a more decadent feel.
- Toasted almonds bring a smoky, nutty aroma that really wakes up the clusters; if you’re out, pecans or walnuts work but may change the flavor profile.
Notes for ingredient swaps
- Dairy-Free: Swap regular chocolate for a good quality dairy-free dark chocolate bar. It melts just as smoothly and keeps the clusters rich without the dairy.
- Nuts: Almonds can be replaced with walnuts, pecans, or even hazelnuts. Each brings a different toastiness and oiliness that’s worth experimenting with.
- Sweetener: Honey adds a floral note and helps the chocolate set glossy. Maple syrup can be a vegan alternative, but expect a slightly different sweetness and aroma.
- Oil: Coconut oil makes the chocolate silkier and adds a subtle coconut scent, while butter gives a richer, more traditional flavor. Use whichever you prefer or have on hand.
- Salt: Sea salt enhances the chocolate’s depth. If you’re out or prefer less salt, you can omit or replace with a pinch of flaky sea salt after setting.
- Add-ins: Dried cranberries, shredded coconut, or chopped dried apricots can add chew and texture. Use sparingly so clusters don’t get overwhelmed.
- Parchment paper: Essential for easy cleanup. If you don’t have it, lightly greasing the tray with butter or oil works, but expect a stickier cleanup.
Equipment & Tools
- Baking sheet with parchment paper: To hold the clusters and prevent sticking.
- Heatproof bowl: For melting chocolate evenly over heat.
- Spatula: To stir and combine ingredients smoothly.
- Spoon or small scoop: For forming uniform clusters.
Step-by-step guide to no bake clusters
- Equipment & Tools: Line a baking sheet with parchment paper; use a heatproof bowl for melting chocolate; a spatula for mixing; and a spoon or small scoop for forming clusters.
- Toast the almonds: Preheat oven to 180°C (350°F). Spread almonds on a baking sheet. Toast for 8-10 minutes until fragrant and slightly golden. Cool completely.
- Melt the chocolate: Break chocolate into small pieces. Use a double boiler or microwave (30-second bursts, stirring in between) until smooth and glossy, about 2 minutes total. Be careful not to overheat.
- Combine ingredients: Add toasted almonds to the melted chocolate. Stir gently until evenly coated. If the mixture thickens, warm slightly or add a small spoon of coconut oil to loosen.
- Form clusters: Use a spoon or small scoop to drop spoonfuls onto the prepared baking sheet. Press lightly to slightly flatten each cluster. Work quickly before chocolate firms up.
- Chill to set: Place the tray in the fridge for about 20-30 minutes. The chocolate should harden fully and the clusters become crisp and shiny. If they seem soft, give them more time.
- Optional drizzle: For an extra touch, melt a little white or dark chocolate and drizzle over the clusters once set. Return to fridge for 5 minutes to set the drizzle.
- Final check: The clusters should be firm, with a glossy surface. They should crack when gently pressed and hold their shape when lifted. If sticky, they need more chilling.
- Resting & Finishing: Transfer clusters to an airtight container. Keep refrigerated for up to a week or frozen for longer storage. Serve at room temperature for maximum crunch and flavor.
- Checkpoints & How to Know It’s Done: Clusters are firm and shiny; chocolate is fully set and no longer sticky; almonds are toasted and fragrant.
Allow the clusters to rest in the fridge until fully set. Store in an airtight container in the fridge or at cool room temperature. Serve directly from the fridge for maximum crunch or let sit a few minutes to soften slightly before eating.
How to Know It’s Done
- Chocolate is glossy and firm to the touch.
- Clusters crack when gently pressed.
- Almonds are toasted and fragrant.
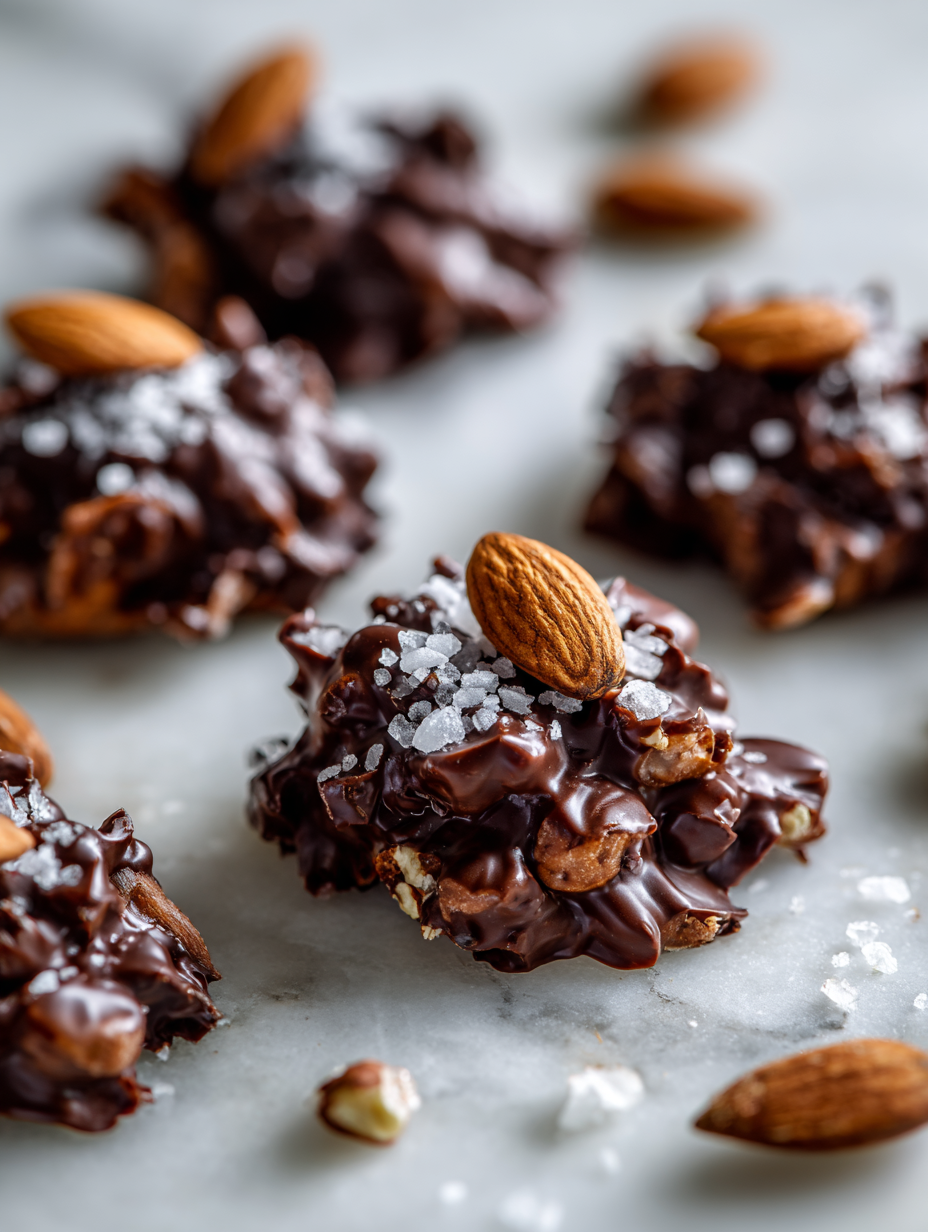
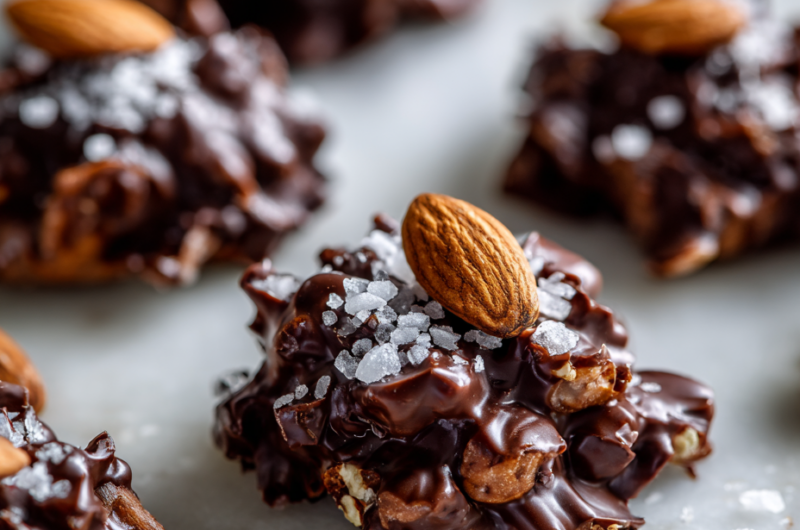
Chocolate Almond Clusters
Ingredients
Equipment
Method
- Preheat your oven to 180°C (350°F) and spread the almonds on a baking sheet. Toast for about 8-10 minutes until fragrant and slightly golden, then let them cool completely.
- Break the dark chocolate into small pieces and place in a heatproof bowl. Melt the chocolate gently using a microwave in 30-second intervals, stirring each time, or over a double boiler until smooth and glossy. Be careful to avoid overheating.
- Stir in the toasted almonds and honey into the melted chocolate, folding gently until evenly coated and glossy. The mixture should be thick but pourable.
- Drop spoonfuls of the mixture onto a parchment-lined baking sheet, pressing down lightly to shape into small clusters. Leave space between each for easy removal.
- Sprinkle a tiny pinch of sea salt over each cluster to enhance the chocolate flavor, if desired.
- Place the baking sheet in the refrigerator and chill for about 20-30 minutes until the chocolate is fully set and the clusters are crisp and glossy.
- Once set, remove the clusters from the fridge and gently lift them off the parchment. They should crack easily and have a beautiful shine.
- Transfer the clusters to an airtight container. Store at room temperature or in the fridge for up to a week. Serve at room temperature for optimal crunch and flavor.
Notes
Pro tips for perfect clusters
- Use high-quality chocolate for a glossy, rich finish that melts smoothly.
- Toast almonds until fragrant and slightly browned for extra flavor and crunch.
- Warm the melted chocolate gently and stir constantly to prevent burning or seizing.
- Drop spoonfuls onto parchment and press lightly for uniform clusters and easy removal.
- Chill clusters until fully set, about 20-30 minutes, for crisp, crackable edges.
- For a shiny finish, let the chocolate cool slightly before forming the clusters.
- Add a pinch of sea salt on top after chilling to enhance chocolate flavor.
Common mistakes and how to fix them
- FORGOT to temper chocolate? Use gentle heat, stir constantly, and avoid water contact.
- DUMPED in cold ingredients? Warm the mixture slightly, or add a bit more melted chocolate.
- OVER-TOASTED nuts? Next time, keep a close eye, remove early for perfect crunch.
- MISSED the parchment paper? Grease the tray lightly or risk sticking and difficult cleanup.
Quick fixes and pantry swaps
- When chocolate seizes, splash in a bit of coconut oil and stir gently.
- If clusters stick, patch with a quick smear of warm honey or maple syrup.
- Dumped in too much salt? Rinse lightly, then re-chill your clusters for a fresh look.
- Over-torched nuts? Rescue by quickly tossing in more almonds or switching to pecans.
- If smell of burnt chocolate hits, shield with a handful of fresh chocolate and melt again.
Prep, store, and reheat tips
- Prepare the clusters by melting the chocolate and toasting almonds a day in advance; store separately in airtight containers. The aroma of toasted almonds the next day is irresistible.
- Store the finished clusters in an airtight container at room temperature for up to a week; for longer shelf life, keep refrigerated for 2 weeks, with a slight increase in crunch.
- Refrigerate the clusters to keep them firm; to reheat, briefly warm at room temperature or in a low oven (about 90°C/200°F) until just softened, watching for glossy sheen and a gentle crackle when broken.
- Chilling makes the clusters crisp and shiny; avoid leaving them out in warm, humid spots which can cause melting or streaking of chocolate.
- Flavor intensifies slightly after a day or two in storage, as the chocolate melds with toasted almond aroma—a good reason to make a batch early.
Top questions about clusters
1. Can I use milk chocolate instead of dark?
Yes, using milk chocolate will make the clusters sweeter and less rich, and they might not set as firmly. Dark or semi-sweet chocolate is best for that glossy, crisp finish.
2. Can I substitute the almonds?
Absolutely. You can swap almonds for walnuts, pecans, or hazelnuts. Each will bring a different toastiness and flavor profile, so choose what you love or have on hand.
3. Can I use a different sweetener?
Yes, honey adds a floral note and helps the chocolate set glossy. Maple syrup is a good vegan alternative, but it might give a slightly different sweetness and aroma.
4. What about oil or butter substitutes?
Coconut oil makes the chocolate silkier and adds a subtle coconut scent. Butter gives a richer, more traditional flavor. Use whichever fits your dietary needs or flavor preference.
5. Is salt necessary?
A pinch of sea salt enhances the chocolate’s depth and balances sweetness. You can skip it if you prefer a less salty taste, or sprinkle flaky sea salt after chilling for extra crunch.
6. Can I add other ingredients?
Add dried cranberries, shredded coconut, or chopped dried apricots for extra chew and texture. Be careful not to overdo it so the clusters stay firm and manageable.
7. Do I need parchment paper?
Parchment paper is essential for easy removal and clean-up. If you don’t have it, lightly greasing the tray with butter or oil works, but expect messier cleanup.
8. How long do they keep?
Yes, you can store the clusters in an airtight container in the fridge for up to a week or freeze for a month. They might get a bit crunchier after refrigeration.
9. How do I reheat them?
To reheat, let them sit at room temperature for a few minutes or warm gently in the oven at about 90°C (200°F) until slightly softened. Watch for a glossy sheen and a gentle crackle when broken.
10. What if the chocolate seizes or sticks?
If the chocolate seizes or gets grainy, splash in a little coconut oil and stir well. For sticky clusters, refrigerate briefly or fix with a quick drizzle of melted chocolate.
These clusters are more than just a quick treat; they hold a little piece of my kitchen chaos and calm. When I make them, I’m reminded how simple ingredients can come together into something that feels both nostalgic and special, especially in a busy season or a moment of needing comfort.
Sharing these bites of chocolate and almonds always feels like passing on a small secret—something homemade and genuine. They’re imperfect, easy, and honest, much like the best kind of sweet moment in the midst of everyday life.

Hi, I’m Grace Morgan, and welcome to my kitchen. This is a space shaped by family meals, curious hands reaching for snacks, paws under the table, and recipes that come together in the middle of real life. I’m a food blogger, a mother, and a passionate pet keeper. Most days, I’m cooking with one eye on the stove and the other on someone who needs me, whether that’s a child asking for a taste or a dog hoping something might fall.


