This no bake chocolate rice bars recipe is a nod to those afternoons when you just want something sweet and crunchy without turning on the oven. It’s like childhood wrapped in a simple, no-fuss snack that’s perfect for chaotic days or lazy weekends. The best part? It’s a pantry rescue—just a handful of ingredients, and you’re good to go.
I’ve always loved how these bars come together with such honest ease. No melting, no baking, just a quick stir and a press into a pan. It’s a recipe that feels like a little rebellion against the usual fuss, a reminder that sometimes, the simplest treats are the most satisfying. Plus, they’re a hit with kids and grown-ups alike—crunchy, chocolatey, and just enough sweetness to keep you coming back for more.
This recipe is inspired by the chaotic joy of childhood snack times, where simplicity and nostalgia collide. I love how a handful of pantry staples can create something both satisfying and comforting without any fuss. It’s about reclaiming those carefree moments in a busy adult life, one crispy, chocolatey bite at a time.
The story behind this recipe
- This recipe was born out of a lazy Sunday afternoon, when I rummaged through my pantry and found a bag of rice cereal that needed using up. I remembered how my childhood afternoons often involved simple, no-fuss snacks that felt like a little treat in a busy day. The idea of combining chocolate and crunch in a quick, no-bake form just clicked into place then and there.
- One afternoon, I was trying to distract my kids from the TV and thought, why not make something they can help with that doesn’t involve turning on the oven? The smell of melting chocolate, mingling with the crisp rice, instantly took me back. It’s one of those recipes that feels like a small act of nostalgia—simple, satisfying, and a little bit rebellious against the fuss of fancy desserts.
- heading
- story_type
Ingredient breakdown: key components
- Chocolate: I prefer a good quality dark chocolate, it melts smoothly and gives a rich, slightly bitter note. Use semi-sweet if you like a milder sweetness, but avoid overly sweet chocolates that can make the bars cloying.
- Rice cereal: The crunch is what makes these bars addictive, so I stick to classic puffed rice. If you want more flavor, try toasted rice or even adding a handful of toasted nuts for extra oomph.
- Butter: I use unsalted butter for control over saltiness, and it adds a silky richness that binds everything nicely. For a dairy-free version, coconut oil works but can alter the texture slightly—less firm.
- Sweetener: Usually just sugar with the chocolate, but I sometimes add a drizzle of honey or maple syrup to enhance sweetness and add a little shine. Keep it simple—don’t overdo it, or the bars can get sticky.
- Optional add-ins: I love tossing in a handful of dried fruit or mini marshmallows for extra texture. If you’re feeling adventurous, a pinch of sea salt on top before chilling really makes the chocolate pop.
- Vanilla extract: Just a splash helps deepen the overall flavor, especially if your chocolate is a bit on the dull side. Skip if you want a pure chocolate punch—sometimes less is more.
- Pan and tools: I prefer a 20x20cm (8×8 inch) square pan for a thick, manageable bar. Use parchment paper to lift the set mixture easily, and a spatula for pressing it down smoothly.
Spotlight on key ingredients
Chocolate:
- I prefer a good quality dark chocolate, it melts smoothly and gives a rich, slightly bitter note. Use semi-sweet if you like a milder sweetness, but avoid overly sweet chocolates that can make the bars cloying.
- Rice cereal: The crunch is what makes these bars addictive, so I stick to classic puffed rice. If you want more flavor, try toasted rice or even adding a handful of toasted nuts for extra oomph.
- Butter: I use unsalted butter for control over saltiness, and it adds a silky richness that binds everything nicely. For a dairy-free version, coconut oil works but can alter the texture slightly—less firm.
Rice cereal:
- Puffed rice provides that signature crunch. During melting, it stays crisp and adds a light, airy texture that balances the richness of chocolate.
- Chocolate: Melts into a glossy, oozy pool that coats every grain of rice cereal. It’s the aroma of cocoa and butter that signals the start of something delicious.
- Butter: It melts into the chocolate mixture, giving it a smooth, velvety consistency. When it cools, it helps the bars set with a slight sheen and firm bite.
Notes for ingredient swaps
- Dairy-Free: Swap butter for coconut oil. It’ll add a subtle coconut aroma and slightly change the texture, making it a bit more brittle when set.
- Vegan Chocolate: Use a dairy-free dark chocolate or cacao mass. The flavor stays rich, but the texture might be slightly softer or more crumbly.
- Sweetener: Substitute honey or maple syrup for sugar. Expect a slightly different sweetness profile and a touch of extra moisture, which might make the mixture stickier.
- Rice Cereal: Try toasted rice or add a handful of chopped nuts for crunch. Toasted rice intensifies flavor, nuts add richness and extra bite.
- Add-ins: Mini marshmallows or dried fruits can be mixed in. Marshmallows will add gooeyness, dried fruit offers chewy bursts of flavor.
- Chocolate Type: Milk chocolate instead of dark will make the bars sweeter and creamier but less intense cocoa flavor.
- Pan Size: Use a larger or smaller pan for thinner or thicker bars. Thinner bars set faster and may be crisper, thicker ones stay chewy longer.
Equipment & Tools
- 20x20cm (8×8 inch) square pan: Holds the mixture and shapes the bars
- Parchment paper: Prevents sticking and makes removal easy
- Microwave-safe bowl: Melts the chocolate evenly
- Spatula: Mixes and presses the mixture
- Sharp knife: Cuts the bars cleanly
Step-by-step guide to no bake bars
- Equipment & Tools: Prepare a 20x20cm (8×8 inch) square pan, line with parchment paper for easy removal. Use a heatproof spatula for mixing, and a microwave-safe bowl for melting chocolate.
- Melt the chocolate: Break into small pieces, microwave in 30-second bursts on 50% power, stirring in between, until smooth and shiny, about 1-2 minutes total. Smell that rich cocoa aroma.
- Combine ingredients: Pour melted chocolate into a large mixing bowl. Add a tablespoon of butter and stir until melted and glossy. If it thickens too much, warm slightly again.
- Mix in rice cereal: Add 3 cups of puffed rice cereal. Gently fold with spatula until evenly coated. The mixture should be sticky but not runny. If it feels dry, add a teaspoon of melted butter.
- Transfer to pan: Spoon the mixture into your prepared pan. Use the spatula to press it down firmly and evenly. The top should look smooth and compact.
- Chill and set: Place the pan in the fridge for at least 2 hours, or until firm. The chocolate should look matte and feel solid when pressed gently.
- Cut into bars: Remove from fridge, lift the block out of the pan using the parchment paper. Use a sharp knife to cut into squares. Wipe the knife between cuts for clean edges.
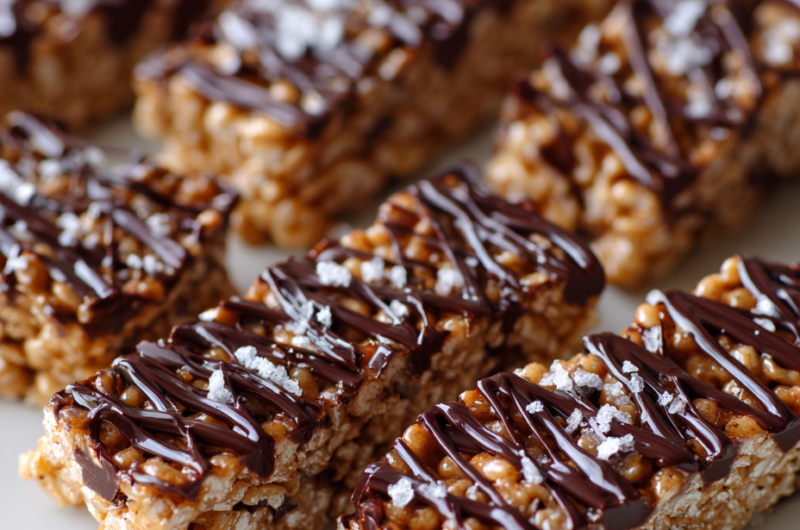
- Resting & Finishing: Let the bars come to room temperature for a few minutes before serving. For a glossy finish, you can drizzle with melted chocolate or sprinkle sea salt on top before chilling.
- Checkpoints & How to Know It’s Done: The bars should be firm and hold shape when pressed; the chocolate should be set and not sticky; edges should be clean and not crumbly.
Chill the bars in the fridge for at least 2 hours until firm. Let sit at room temperature a few minutes before cutting for clean edges. Optional: drizzle melted chocolate or sprinkle sea salt for extra flair.
How to Know It’s Done
- Chocolate is fully melted and glossy
- Mixture is sticky and holds together when pressed
- Bars are firm and set after chilling
No Bake Chocolate Rice Bars
Ingredients
Equipment
Method
- Line your square pan with parchment paper, leaving some overhang for easy removal.
- Break the dark chocolate into small pieces and microwave in a microwave-safe bowl at 30-second intervals, stirring each time until the chocolate is smooth and glossy—about 1-2 minutes total.
- Add the butter and vanilla extract to the melted chocolate, stirring until fully incorporated and the mixture is silky and shiny.
- Pour the warm chocolate mixture over the puffed rice cereal in a large bowl, then gently fold with a spatula until all the cereal is evenly coated.
- Transfer the coated cereal mixture into your prepared pan, then press it down firmly with the back of a spatula or your fingers to create a compact, even layer.
- If desired, drizzle honey or maple syrup over the top and sprinkle a pinch of sea salt for extra flavor.
- Place the pan in the refrigerator and chill for at least 2 hours, or until the mixture is firm and set.
- Once chilled, lift the set mixture out of the pan using the parchment overhang and place on a cutting board.
- Use a sharp knife to cut into bars or squares, wiping the knife clean between cuts for clean edges.
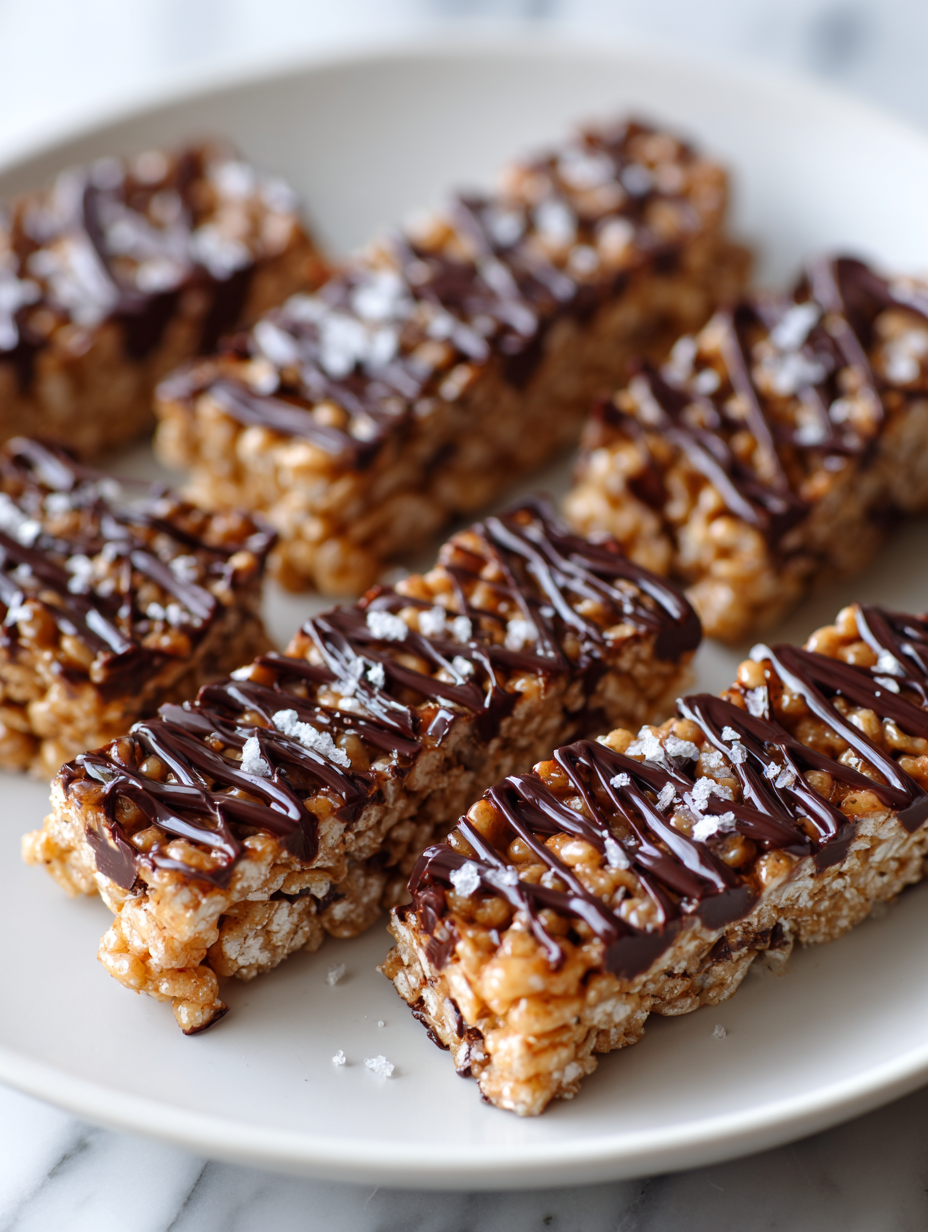
- Arrange the bars on a serving plate and enjoy immediately or store in an airtight container for up to 3 days at room temperature.
Notes
Pro tips for perfect bars
- Use a gentle heat when melting chocolate to keep it smooth and glossy.
- Stir constantly during melting to prevent lumps and scorching, especially at the edges.
- Press the mixture firmly into the pan to ensure bars hold together when set.
- Wipe your knife clean between cuts for sharp, clean edges without crumbling.
- Chill thoroughly—at least 2 hours—so the bars become firm and slice easily.
- If the mixture feels too dry, add a tiny bit more melted butter to restore stickiness.
- For extra shine, drizzle with melted chocolate just before serving for a tempting finish.
Common mistakes and how to fix them
- FORGOT to check the chocolate melting point → Use low power and stir often.
- DUMPED too much butter → Reduce butter or add more cereal to balance.
- OVER-TORCHED the chocolate → Remove from heat immediately, it burns quickly.
- MISSED stirring during melting → Keep stirring to prevent lumps and scorching.
Quick fixes for common issues
- When chocolate seizes, splash in a teaspoon of vegetable oil to smooth it out.
- If mixture feels dry, add a quick spoonful of melted butter to revive stickiness.
- Dumped too much cereal? Stir in a touch more melted chocolate to balance texture.
- Over-torched chocolate? Remove immediately, then gently re-melt with a splash of warm water.
- When bars don’t set properly, chill longer or add a pinch more butter for firmness.
Prep, store, and reheat tips
- The mixture can be prepared a day in advance; keep covered in the fridge to prevent drying out, and the flavors will meld slightly, enhancing that deep chocolate aroma.
- Once set, these bars stay fresh in an airtight container at room temperature for up to 3 days, though they become slightly softer and more chewy over time.
- For longer storage, wrap bars individually in plastic wrap and freeze for up to 2 weeks. They develop a firmer texture and a more intense chocolate scent after freezing.
- Reheat by letting the frozen bars sit at room temperature for 10 minutes or briefly warming in a low oven (around 70°C/160°F) until slightly melty—watch for shiny, gooey chocolate.
Top questions about no bake bars
1. Can I use milk chocolate instead of dark?
Yes, you can use milk chocolate, but it will be sweeter and less intense than dark chocolate. It melts just as smoothly, adding a creamier flavor.
2. Is this recipe vegan or dairy-free?
Absolutely. Use dairy-free chocolate or vegan chocolates, which melt well and keep the bars suitable for dairy-free diets.
3. Can I make these with coconut oil instead of butter?
Yes, you can replace butter with coconut oil or a neutral oil like canola. Expect a slightly different texture—less creamy but still delicious.
4. Can I add nuts or dried fruit?
Definitely. Try adding chopped nuts or dried fruits to add extra texture and flavor, especially if you want more crunch or sweetness.
5. My bars are soft or crumbly, what do I do?
If your bars aren’t firm enough, chill them longer—up to 4 hours or overnight. If too hard, let sit at room temp for a few minutes.
6. How do I get clean cuts?
Use a sharp knife and wipe it clean between cuts to get clean edges. Warming the knife slightly helps slice smoothly without cracking.
7. How should I store these bars?
Store in an airtight container at room temperature for up to 3 days or freeze for longer. Wrap individually for convenience.
8. Can I freeze the mixture before setting?
Yes, you can freeze the mixture before pressing it into the pan. It firms up faster and makes pressing easier, especially on hot days.
9. What if the chocolate seizes during melting?
If the chocolate seizes or becomes lumpy, add a teaspoon of vegetable oil or warm water while stirring gently to smooth it out.
10. Can I make these thinner or thicker?
Yes, you can press the mixture into a thinner layer for delicate, crisp bars, or a thicker layer for chewier, more substantial treats.
These no bake chocolate rice bars are more than just a quick treat; they’re a nostalgic reminder of simpler times when a handful of ingredients could bring joy. Making them feels like a small act of rebellion against busy days, offering a moment to pause and indulge. Sometimes, it’s these effortless bites that satisfy the most, bringing a bit of comfort whenever you need it.
When you bite into one, you’re met with that perfect crunch and rich cocoa flavor that lingers just right. They’re a little messy, a little sweet, and utterly satisfying—exactly what you need for a quick, homemade fix.

Hi, I’m Grace Morgan, and welcome to my kitchen. This is a space shaped by family meals, curious hands reaching for snacks, paws under the table, and recipes that come together in the middle of real life. I’m a food blogger, a mother, and a passionate pet keeper. Most days, I’m cooking with one eye on the stove and the other on someone who needs me, whether that’s a child asking for a taste or a dog hoping something might fall.


