In the rush of mornings, I’ve learned that a quick, portable snack can make or break the day. These no bake energy balls are my go-to because they’re mess-free and ready in minutes, perfect for grabbing on the way out the door. Plus, they pack a punch of energy without the fuss of baking or complicated prep, which is a relief when everything else feels chaotic.
What I love most is how customizable they are—sweet, nutty, a little chewy, with bits of dried fruit or chocolate that make each bite satisfying. They’re a small victory in my busy schedule, a moment of control when store-bought snacks feel uninspired. Making them yourself means I can tweak ingredients to suit whatever I have on hand, always fresh, always quick.
Focusing on how these energy balls serve as a portable, non-messy snack for busy mornings, highlighting their convenience and how they fit into a hectic, on-the-go lifestyle.
A No-Fuss, Portable Snack
- I used to rely on store-bought snacks that felt dull and uninspired, until I discovered how easy these energy balls are to whip up.
- There’s a kind of satisfaction in mixing these together quickly, especially when I’m juggling a busy morning and need something reliable.
- Every batch I make feels like a small, personal victory—like I’ve tamed a tiny chaos in my kitchen.
- I love how adaptable they are; I’ve added everything from coconut flakes to espresso powder just to keep things interesting.
- Sharing these with friends or family always sparks a little joy, especially when they realize how simple and satisfying they are.
The story behind this recipe
- I stumbled upon these energy balls during a particularly hectic week when I needed a quick, nourishing snack that wouldn’t add to the chaos. I was tired of relying on store-bought bars that tasted like cardboard or were overly processed. One afternoon, I threw together what I had in the pantry—oats, nut butter, a drizzle of honey—and the result was surprisingly satisfying. It became my little secret weapon for busy mornings or when I needed a boost mid-afternoon.
- What keeps me coming back is how forgiving and adaptable they are. I’ve added chopped nuts, dried fruit, or even a pinch of sea salt depending on what mood I’m in. They’re a reminder that simple ingredients, mixed with a little intention, can turn into something comforting and energizing. Plus, they’re a tangible example of how a tiny kitchen experiment can turn into a little daily ritual.
- heading: ‘The story behind this recipe’
Trivia and Origins
- These energy bites trace back to ancient nomadic diets, where portable, nutrient-dense snacks were essential for long journeys.
- The modern no-bake version gained popularity in the health food scene of the early 2000s, emphasizing simplicity and whole ingredients.
- Originally, they were called ‘power balls’ in wellness circles, meant to boost energy during hectic days without processed sugars.
Key ingredients and tweaks
- Oats: I love the chewy texture they add; using rolled oats gives the best bite. Swap with quick oats if you’re in a pinch, but expect a slightly softer result.
- Nut Butter: It’s the glue that holds everything together, bringing richness and a hint of nutty aroma. Almond or peanut works, but tahini can add a smoky note if you like that twist.
- Honey: Adds natural sweetness and helps bind the mixture; I prefer it for its sticky, floral scent. Maple syrup is a good vegan alternative, but it’s a bit milder in flavor.
- Dried Fruit: I use chopped dates or cranberries for bursts of sweetness and chew. Dried apricots or cherries work well too—look for vibrant, plump pieces.
- Add-ins: Chocolate chips, shredded coconut, or chopped nuts make these more exciting. Use dark chocolate for a rich, bittersweet contrast, or skip for a cleaner taste.
- Flavor Enhancers: A pinch of sea salt or a sprinkle of cinnamon can elevate the flavor profile. I often toss in a dash of vanilla extract for warmth and depth.
- Optional Boosters: Chia seeds or flaxseed for extra fiber and omega-3s. They add a faint crunch and nutty flavor, especially if you like a bit of texture.
Spotlight on key ingredients
Oats:
- I love the chewy texture they add; using rolled oats gives the best bite. Swap with quick oats if you’re in a pinch, but expect a slightly softer result.
- Nut Butter: It’s the glue that holds everything together, bringing richness and a hint of nutty aroma. Almond or peanut works, but tahini can add a smoky note if you like that twist.
- Honey: Adds natural sweetness and helps bind the mixture; I prefer it for its sticky, floral scent. Maple syrup is a good vegan alternative, but it’s a bit milder in flavor.
Dried Fruit & Add-ins:
- Dried Fruit: I use chopped dates or cranberries for bursts of sweetness and chew. Dried apricots or cherries work well too—look for vibrant, plump pieces.
- Add-ins: Chocolate chips, shredded coconut, or chopped nuts make these more exciting. Use dark chocolate for a rich, bittersweet contrast, or skip for a cleaner taste.
- Flavor Enhancers: A pinch of sea salt or a sprinkle of cinnamon can elevate the flavor profile. I often toss in a dash of vanilla extract for warmth and depth.
Notes for ingredient swaps
- Dairy-Free: Nut butters like almond or sunflower seed butter swap in smoothly, keeping that creamy richness without dairy. Expect a slightly different nutty flavor.
- Sweetener: Maple syrup or agave nectar can replace honey for a vegan touch. They’re milder and might make the bites a tad softer in texture.
- Add-ins: Dried fruit like chopped apricots or cherries add bright, chewy bursts. Fresh fruit won’t work well here—stick to dried for texture and flavor.
- Oats: Use quick oats if you need a softer, finer texture or don’t have rolled oats. Expect a less chewy, more tender bite.
- Chocolate: Swap chocolate chips for cacao nibs or chopped dark chocolate for less sweetness and more intense cocoa aroma. Adjust amount based on your preference.
- Flavor Boost: Vanilla extract or a dash of cinnamon can enhance the flavor. Use sparingly—about 1/2 teaspoon—to avoid overpowering.
- Seeds: Chia or flaxseed can be added for extra fiber and omega-3s. They add a faint crunch and nutty note—perfect for texture lovers.
Equipment & Tools
- Large mixing bowl: Combine all ingredients thoroughly.
- Sturdy spoon: Mix ingredients evenly and scrape down sides.
- Cookie scoop or tablespoon: Portion out the mixture uniformly.
- Baking sheet with parchment: Hold the formed energy balls during chilling.
Step-by-step guide to energy balls
- Gather your equipment: a large mixing bowl, a sturdy spoon, a small cookie scoop or tablespoon, and a baking sheet lined with parchment. These tools will help you mix, portion, and set the energy balls efficiently.
- In the mixing bowl, add 1 cup of rolled oats, 1/2 cup of nut butter, and 1/4 cup of honey. Stir well until fully combined. The mixture should be sticky but hold together when pressed.
- If the mixture feels too dry, add a teaspoon of water or a splash more honey. If too wet, sprinkle in a little more oats until it reaches a workable consistency.
- Fold in 1/4 cup of dried fruit and optional add-ins like chocolate chips or shredded coconut. Mix until evenly distributed. The mixture should be chunky and inviting.
- Using the cookie scoop or tablespoon, portion out the mixture and roll into balls between your palms. Place each ball on the prepared baking sheet, spacing them about 2 inches apart.
- Once all the balls are formed, refrigerate them uncovered for at least 30 minutes. This helps them firm up and makes them easier to handle. If you’re in a rush, a quick freeze for 10 minutes works too.
- After chilling, store the energy balls in an airtight container in the fridge for up to a week, or freeze for up to a month. They’re perfect for grabbing on busy mornings or when you need a quick energy boost.
- When ready to serve, no reheating is necessary. Just enjoy straight from the fridge, feeling the chewy texture and tasting the burst of nutty, sweet flavors.
Refrigerate the balls uncovered for at least 30 minutes. Serve chilled, stored in an airtight container, and enjoy fresh or frozen for later.
How to Know It’s Done
- Mixture holds together when pressed, not too sticky or dry.
- Balls are evenly coated and hold their shape after chilling.
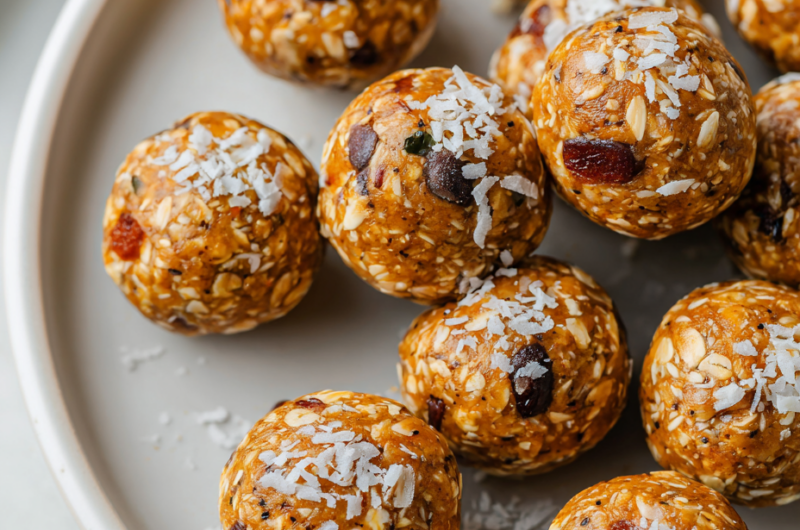
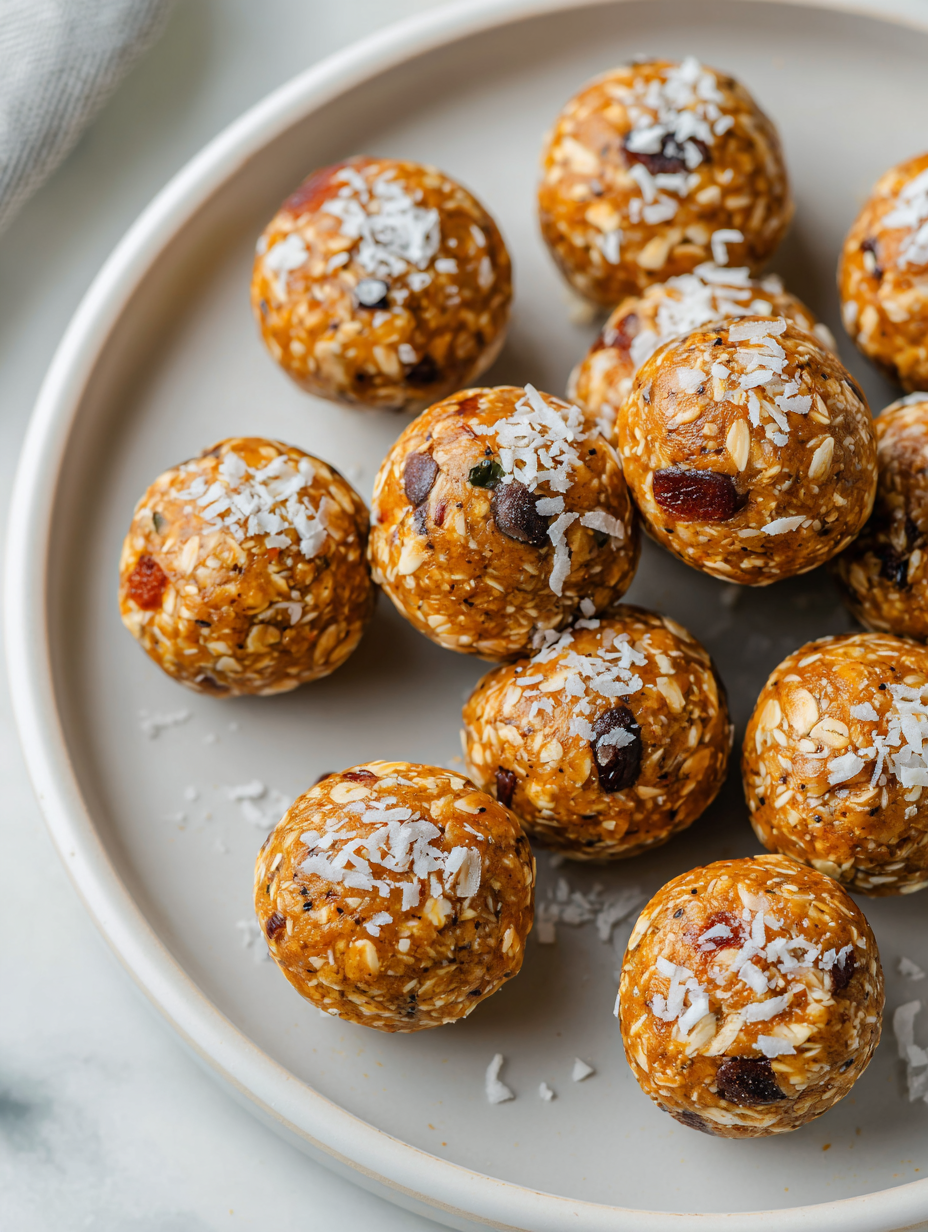
- Appearance: golden-brown from the oats, with visible chunks of fruit and add-ins.
No-Bake Energy Balls
Ingredients
Equipment
Method
- Add the rolled oats, nut butter, honey, chopped dried fruit, chocolate chips, and vanilla extract into your large mixing bowl. Use a sturdy spoon to stir everything together until the mixture is evenly combined and sticky, with a slightly thick consistency.
- Once mixed, scoop out about a tablespoon of the mixture using a cookie scoop or your tablespoon, then gently roll it between your palms to form a compact ball. Repeat with the remaining mixture, placing each ball on a parchment-lined baking sheet.
- After all the balls are shaped, place the baking sheet in the fridge and chill for at least 30 minutes. This helps the energy bites firm up and become easier to handle.
- Once chilled, transfer the energy balls to an airtight container. They can be stored in the fridge for up to a week or frozen for longer storage. Enjoy these chewy, nutty bites straight from the fridge or at room temperature for a quick, energizing snack.
Notes
Pro tips for perfect energy balls
- Bolded mini-head: Use slightly chilled nut butter to prevent stickiness, making mixture easier to roll.
- Bolded mini-head: Add a splash of water or milk if mixture feels too crumbly—just enough to bring it together.
- Bolded mini-head: Incorporate chopped nuts or dried fruit last to keep their texture intact during mixing.
- Bolded mini-head: Chill the mixture for 10-15 minutes if it’s too sticky, to firm it up before shaping.
- Bolded mini-head: For even-sized bites, use a small cookie scoop or measure with a tablespoon for uniformity.
- Bolded mini-head: Store energy balls in an airtight container in the fridge; they firm up and stay fresh longer.
- Bolded mini-head: To enhance flavor, sprinkle a tiny pinch of sea salt on the balls before refrigerating.
Common mistakes and how to fix them
- FORGOT to check mixture consistency → Add more oats or nut butter as needed.
- DUMPED mixture too wet → Refrigerate for 15 minutes before shaping again.
- OVER-TORCHED the chocolate chips → Use low heat and stir constantly to prevent burning.
- MISSED chilling time → Ensure minimum 30-minute fridge rest for firm balls.
Quick fixes and pantry swaps
- When mixture feels too dry, splash in a teaspoon of water or honey to loosen it up.
- If energy balls crack or crumble, chill the mixture 10 minutes to firm before shaping.
- Splash a little more honey or nut butter if mixture isn’t sticky enough to roll.
- Patch burnt chocolate by quickly melting new chips and mixing in, then re-chill the balls.
- Shield delicate add-ins like dried fruit with a light hand to prevent breaking during mixing.
Prep, store, and reheat tips
- Prepare the mixture ahead of time by mixing all ingredients; it can be stored in the fridge for up to 24 hours, making assembly quicker later. The mixture should smell nutty and sweet, with a sticky but workable texture.
- Once formed into balls, they can be kept in an airtight container in the fridge for up to a week. The cold preserves their chewy texture and fresh flavor, with a slight emphasis on the nutty aroma.
- For longer storage, freeze the energy balls in a single layer on a baking sheet for 1-2 hours, then transfer to a freezer-safe bag. They’ll keep well for up to a month, tasting just as good when thawed.
- Refrigerate or freeze the balls before consuming to maintain their firm, chewy bite. To reheat, let them sit at room temperature for a few minutes; they’re best enjoyed cool or slightly chilled, with nose-tingling aroma of toasted oats and chocolate.
Top questions about energy balls
1. Can I make these vegan?
Yes, you can swap honey for maple syrup or agave. It will change the flavor slightly, making it a bit milder and sometimes softer.
2. What if I don’t have dried fruit?
Absolutely. Use plant-based nut butters and maple syrup instead of honey. The texture stays chewy and satisfying.
3. Can I add protein powder?
You can skip dried fruit or replace it with chopped nuts or seeds for crunch. It won’t be as sweet but still tasty.
4. How long do they last?
Sure, stir in a scoop of protein powder after mixing the base ingredients. Expect a slightly denser texture.
5. Can I freeze them?
Stored in an airtight container in the fridge, they keep for about a week. Freeze for up to a month for longer storage.
6. Do I need to refrigerate?
Yes, freeze the formed balls on a tray for a few hours, then transfer to a bag. Thaw at room temp or in the fridge.
7. Can I make them ahead?
Refrigeration helps keep them firm and fresh. They taste best chilled but are fine at room temp for a few hours.
8. Why are my balls falling apart?
Absolutely. Make the mixture the day before, shape the balls, then keep refrigerated or frozen until needed.
9. My energy balls are too dry, how can I fix it?
If too crumbly, add a tiny bit of honey or nut butter. If too sticky, refrigerate for 10-15 minutes before shaping.
10. Can I customize flavors?
Add a splash of water or extra honey to loosen the mixture. Mix well, then chill before shaping again.
These no-bake energy balls are a testament to how simple ingredients can come together into something satisfying and portable. They’re perfect for busy days, offering a quick energy boost with just a few bites. When you make them yourself, you control the sweetness and add-ins, tailoring each batch to your mood or pantry.
In the end, it’s about small moments of nourishment—crunchy, chewy, and subtly sweet—that keep me going without fuss. Plus, they come together so quickly that even chaotic mornings feel manageable. Sometimes, the simplest snacks leave the biggest impression, especially when they’re homemade.

Hi, I’m Grace Morgan, and welcome to my kitchen. This is a space shaped by family meals, curious hands reaching for snacks, paws under the table, and recipes that come together in the middle of real life. I’m a food blogger, a mother, and a passionate pet keeper. Most days, I’m cooking with one eye on the stove and the other on someone who needs me, whether that’s a child asking for a taste or a dog hoping something might fall.


