This no-bake oatmeal cookies recipe is my secret weapon for those days when time feels tight but I still need something sweet. It’s a messy, honest kitchen creation—no fancy techniques, just good ingredients coming together with a little patience. There’s something so satisfying about mixing everything in one pot and then watching those cookies set in the fridge, like a small victory.
I’ve made these cookies hundreds of times, especially during busy weekends or when I’m craving a nostalgic treat that’s quick and honest. They remind me of my childhood afternoons, the smell of melting chocolate and warm oats filling the kitchen. It’s the kind of comfort food that’s rooted in simplicity but offers a deep, unpretentious pleasure.
This recipe is my go-to for when I need a quick, comforting treat that’s almost too simple to be true. It’s the kind of dessert that feels like a warm hug from childhood but with a modern twist — no baking, just a handful of pantry staples and a little patience as they set. It’s especially perfect on busy days or when I want something sweet without the fuss.
A nostalgic shortcut
- This recipe is my go-to for when I need a quick, comforting treat that’s almost too simple to be true.
- It’s the kind of dessert that feels like a warm hug from childhood but with a modern twist — no baking, just a handful of pantry staples and a little patience as they set.
- It’s especially perfect on busy days or when I want something sweet without the fuss.
- Making these cookies always takes me back to lazy afternoons in my grandma’s kitchen, the smell of melted chocolate and oats filling the air.
- There’s a quiet pride in pulling a tray of these out of the fridge—no fuss, just honest, satisfying sweetness.
A nostalgic shortcut
I first stumbled upon this recipe during a hectic week when I needed something quick and satisfying. It was a mess of ingredients on my counter—oats, chocolate, a splash of vanilla—and I just threw them together, hoping it would work. When I tasted the first batch, I realized it was more than just a quick fix; it was a tiny act of rebellion against overcomplicated desserts. These cookies became a staple in my kitchen, a reminder that sometimes, simplicity makes the best treat.
Historical snippets of no-bake cookies
- These cookies reportedly gained popularity during wartime rationing, when quick, no-fuss treats were a necessity.
- They often appear in community cookbooks from the 1950s, showcasing how resourcefulness shaped dessert traditions.
- The no-bake aspect likely emerged from the need to avoid oven use during sugar shortages or hot summers.
- Variations with peanut butter or bits of dried fruit started popping up in mid-century kitchens, adding personal twists.
- Despite their humble origins, these cookies have persisted as a nostalgic staple across generations, often passed down informally.
Ingredient breakdown: key components
- Rolled oats: I love the chewy texture they bring, but if you want a softer bite, try quick oats instead—just watch out, they may make the cookies a tad more fragile.
- Chocolate chips: I opt for semi-sweet because they balance richness without overpowering, but dark chocolate chunks add a smoky depth if you’re feeling bold.
- Butter: I always use unsalted, it’s creamy and melts smoothly, but a splash of coconut oil can give a faint coconut aroma and extra sheen.
- Sweetener: I stick with brown sugar for its caramel notes, but honey or maple syrup will add a touch of floral sweetness—adjust the texture slightly if you do.
- Vanilla extract: I prefer real vanilla for its warm, floral aroma, but vanilla bean paste can intensify the flavor with tiny specks of vanilla seeds.
- Cocoa powder: I use natural, unsweetened cocoa for a rich, slightly bitter kick, but Dutch-processed cocoa smooths out the acidity if you want a mellower taste.
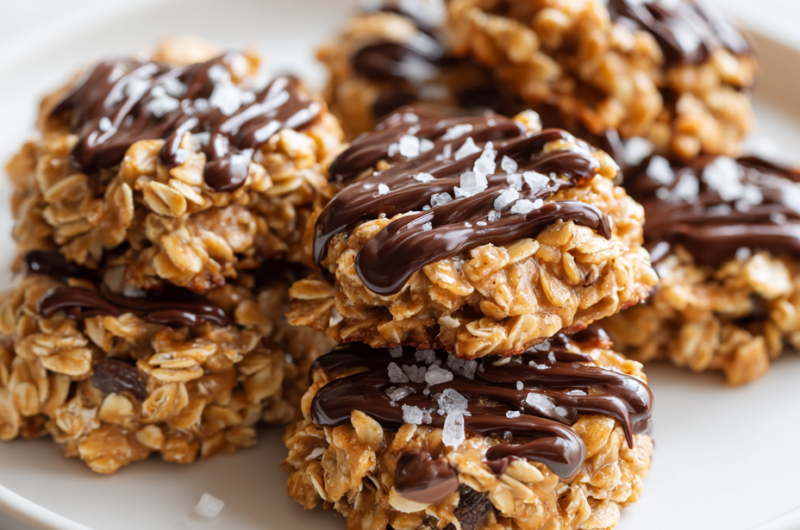
- Pinch of salt: It’s my secret to balancing the sweetness, and a tiny sprinkle of sea salt crystals on top makes them irresistible.
Spotlight on key ingredients
Rolled oats:
- I love the chewy texture they bring, but if you want a softer bite, try quick oats instead—just watch out, they may make the cookies a tad more fragile.
- Chocolate chips: I opt for semi-sweet because they balance richness without overpowering, but dark chocolate chunks add a smoky depth if you’re feeling bold.
Chocolate & cocoa powder:
- Butter: I always use unsalted, it’s creamy and melts smoothly, but a splash of coconut oil can give a faint coconut aroma and extra sheen.
- Cocoa powder: I use natural, unsweetened cocoa for a rich, slightly bitter kick, but Dutch-processed cocoa smooths out the acidity if you want a mellower taste.
Notes for ingredient swaps
- Dairy-Free: Coconut oil instead of butter adds richness with a subtle coconut aroma, but may alter the creaminess.
- Sweetener: Honey or maple syrup can replace brown sugar for a floral or caramel note, but might make the mixture more runny.
- Chocolate: Dark chocolate chunks for a smoky depth, or milk chocolate chips for a sweeter, creamier flavor.
- Oats: Quick oats for a softer, more tender cookie—watch out, they may break apart more easily.
- Vanilla: Vanilla bean paste for intense flavor specks, or omit if you want a more straightforward chocolate taste.
- Cocoa powder: Dutch-processed for a smoother, mellow chocolate flavor, natural cocoa for a brighter, more acidic note.
- Add-ins: Dried fruit, nuts, or coconut flakes—use sparingly to avoid overloading the mixture or affecting setting.
Equipment & Tools
- Medium saucepan: For melting ingredients and boiling the mixture.
- Wooden spoon or heatproof spatula: To stir ingredients evenly during cooking.
- Parchment paper: To prevent sticking and make cleanup easier.
- Baking sheet: To hold the cookies as they set.
- Measuring cups and spoons: For accurate ingredient portions.
Step-by-step guide to no bake cookies
- Gather your equipment: a medium saucepan, a spoon, parchment paper, and a baking sheet. The saucepan is for melting, the spoon for mixing, and the sheet for setting the cookies.
- Measure out 1 cup (240 ml) of milk, 1/2 cup (115 g) of unsalted butter, and 2 cups (400 g) of sugar. Have these ready to go before you start.
- In the saucepan, combine the milk, butter, and sugar. Turn the heat to medium (about 160°C/320°F). Stir constantly until the mixture begins to bubble and the sugar dissolves, about 3-4 minutes.
- Increase the heat slightly to bring the mixture to a rolling boil, and let it boil for exactly 1 minute. You should hear a gentle crackle and see a steady boil. Remove from heat immediately after.
- Quickly stir in 1/2 cup (50 g) of unsweetened cocoa powder, 1 teaspoon of vanilla extract, and a pinch of salt. Mix until smooth and shiny. The chocolate should be fully incorporated and smell rich and sweet.
- Add 3 cups (240 g) of rolled oats to the hot mixture. Stir vigorously until the oats are evenly coated and the mixture starts to thicken, about 2 minutes. It should be slightly sticky but still scoopable.
- Using a spoon or small ice cream scoop, drop spoonfuls of the mixture onto prepared parchment paper-lined baking sheet. Space them about 2 inches apart. Flatten slightly if desired.
- Let the cookies sit at room temperature for 15-20 minutes, then transfer to the fridge for at least 30 minutes to set firm. The cookies should be firm to the touch and hold their shape.
- Once set, serve directly from the fridge or at room temperature. They keep well in an airtight container for up to a week, or freeze for longer storage.
Allow the cookies to cool and set at room temperature, then refrigerate for best firmness. Serve directly from fridge or at room temp, depending on preference. Store in an airtight container for up to a week or freeze for longer storage.
How to Know It’s Done
- Mixture bubbles and boils evenly, with a steady crackle sound.
- Cookies hold shape and develop a glossy chocolate coating.
- Cookies feel firm and set when touched, not sticky or runny.
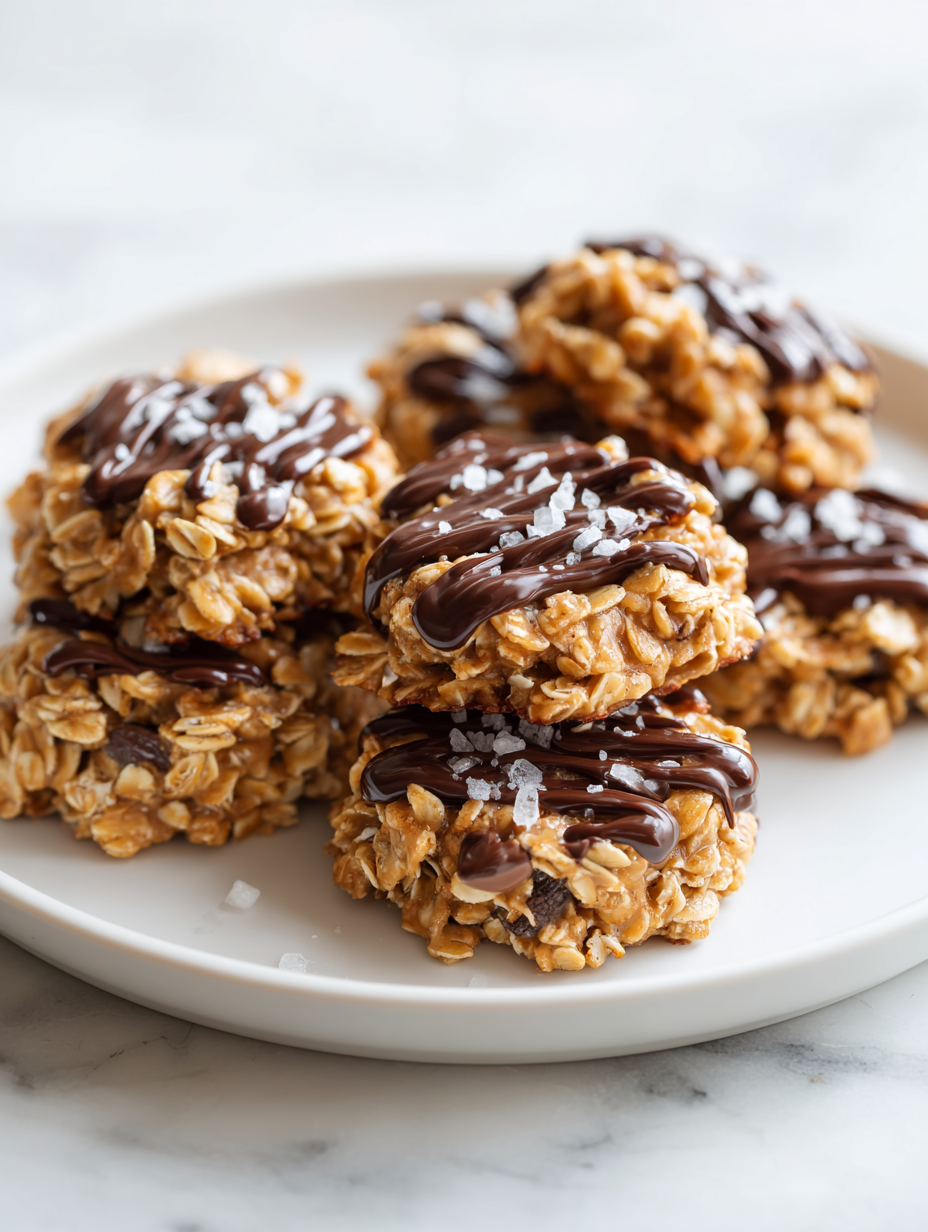
No-Bake Oatmeal Cookies
Ingredients
Equipment
Method
- Gather all your ingredients and measure out the milk, butter, sugar, cocoa powder, and oats. Line a baking sheet with parchment paper to prepare for setting the cookies.
- Combine the milk, butter, and sugar in a medium saucepan over medium heat. Stir constantly as the mixture begins to melt and bubble gently, filling the kitchen with a sweet, chocolatey aroma.
- Increase the heat slightly and bring the mixture to a rolling boil, maintaining steady bubbling. Let it boil for exactly 1 minute, counting carefully to ensure proper setting.
- Remove the saucepan from the heat and quickly stir in the cocoa powder, vanilla extract, and a pinch of salt. Mix vigorously until smooth, shiny, and fully combined, with a rich chocolate scent wafting up.
- Fold in the rolled oats with a wooden spoon, stirring briskly until the oats are coated and the mixture thickens slightly, becoming sticky and easy to scoop.
- Using a spoon or small scoop, drop spoonfuls of the mixture onto the prepared parchment paper, spacing them about 2 inches apart. Flatten each slightly with the back of your spoon for a traditional look.
- Let the cookies sit at room temperature for about 15 minutes, then transfer the baking sheet to the refrigerator. Chill for at least 30 minutes until the cookies are firm, glossy, and hold their shape.
- Once set, remove the cookies from the fridge and serve immediately, or store in an airtight container at room temperature for up to a week. For longer storage, freeze them for up to a month and enjoy chewy, chocolatey treats anytime.
Tips for perfect no-bake cookies
- Use high-quality chocolate chips for maximum melty richness.
- Stir continuously during boiling to prevent sticking and burning.
- Let the mixture reach a full rolling boil to ensure proper setting.
- Chill the cookies thoroughly in the fridge for at least 30 minutes for best firmness.
- Use a cookie scoop for uniform size and shape every time.
- Flatten cookies slightly before setting for a more traditional look.
- Store in an airtight container to keep them fresh and chewy.
Common mistakes and how to fix them
- FORGOT to stir continuously → Stir constantly to prevent burning.
- DUMPED in too much sugar → Measure sugar carefully for consistent texture.
- OVER-TORCHED the mixture → Remove from heat immediately after boiling to avoid burnt flavor.
- SKIPPED the refrigeration step → Chill thoroughly for cookies to set properly.
Quick fixes and pantry swaps
- When mixture is too thick → Splash in a bit more milk and stir until smooth.
- If cookies spread too much → Chill the mixture for 10 minutes before scooping.
- Splash with vanilla extract → Adds brightness if flavor feels dull.
- Patch dull color by adding a small pinch of cocoa powder for richer appearance.
- Shield from humidity → Store in an airtight container to prevent cookies from becoming sticky.
Prep, store, and reheat tips
- You can prepare the cookie mixture a day in advance; keep it covered in the fridge to prevent drying out, and it will be easy to scoop and set later.
- Cookies can be stored in an airtight container at room temperature for up to a week, with the chocolate still glossy and oats tender to the bite.
- For longer storage, freeze the cookies in a single layer, then transfer to a zip-top bag. They’ll keep for up to a month and stay chewy.
- Reheat by letting the cookies sit at room temperature for 10 minutes or briefly warming in the microwave—watch for melty chocolate and a soft, warm center.
Top questions about no bake cookies
1. Can I use quick oats instead of rolled oats?
Yes, using quick oats makes the cookies softer and more delicate, but they may fall apart easier.
2. Can I substitute the chocolate chips?
Absolutely. You can swap dark chocolate for semi-sweet or milk chocolate, adjusting sweetness to your taste.
3. Is there a dairy-free alternative?
Yes, coconut oil can replace butter for a dairy-free version, adding a faint coconut aroma and sheen.
4. What sweetener can I use instead of brown sugar?
You can use honey or maple syrup instead of brown sugar. They add floral or caramel notes but may change the texture.
5. How do I prevent the mixture from burning?
Stir continuously during boiling to prevent sticking or burning. Use medium heat and keep a close eye.
6. How do I know when the cookies are ready?
Refrigerate the cookies for at least 30 minutes until firm. They should feel set and hold their shape.
7. My mixture is too thick, what do I do?
If the mixture is too thick, splash in a little milk and stir until smooth. For a runnier mix, add more oats.
8. How should I store these cookies?
Store cookies in an airtight container at room temperature for up to a week, or freeze for longer storage.
9. My cookies are spreading too much, how can I fix it?
If cookies spread too much, chill the mixture for 10 minutes before scooping to firm it up.
10. How do I know when the cookies are finished?
When mixture bubbles and crackles steadily, and cookies feel firm after chilling, they’re done and ready to eat.
These cookies are more than just a quick treat—they’re a reminder that simplicity can carry deep comfort, especially during busy days or when nostalgia hits hard. The smell of melting chocolate and oats, the satisfying crunch after a quick chill, it’s honest food that doesn’t ask for perfection.
Sharing them with someone or just sneaking a few myself feels grounding. Sometimes, the simplest recipes hold the most unexpected moments of joy — and that’s exactly what these no-bake cookies give me every time.

Hi, I’m Grace Morgan, and welcome to my kitchen. This is a space shaped by family meals, curious hands reaching for snacks, paws under the table, and recipes that come together in the middle of real life. I’m a food blogger, a mother, and a passionate pet keeper. Most days, I’m cooking with one eye on the stove and the other on someone who needs me, whether that’s a child asking for a taste or a dog hoping something might fall.


