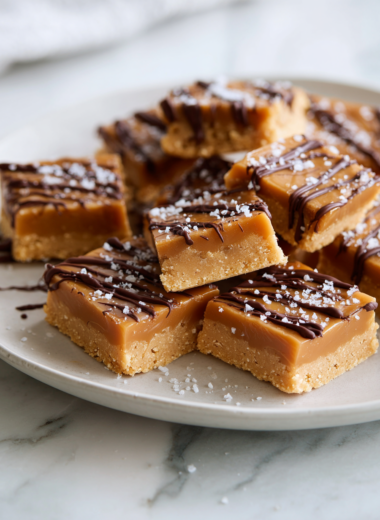
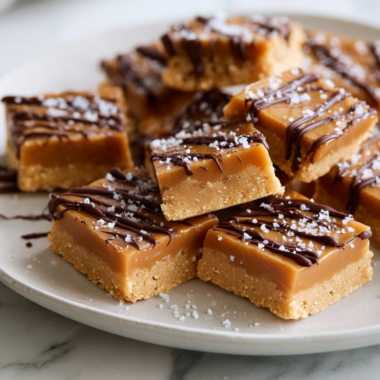
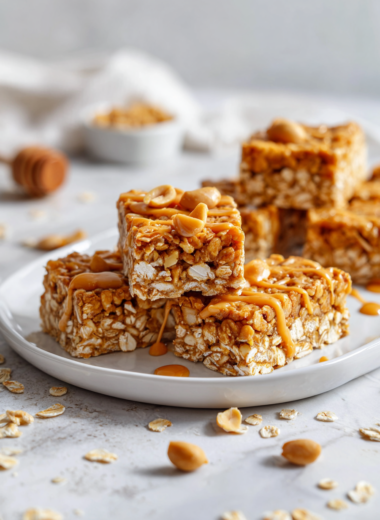
Cheese balls feel like a relic now, but they’re surprisingly fun to make. It’s almost like sculpting with your hands, pressing and shaping until it feels just right. Plus, they’re flexible—sweet, savory, spicy—you can tweak them to match whatever mood or craving you have.
This recipe is about more than just cheese; it’s about the messy joy of creating something that’s both rustic and elegant. It’s an invitation to slow down, play with textures, and enjoy the process as much as the result.
A Cheese Ball as a nostalgic, hands-on appetizer that sparks memories of family gatherings and holiday tables, with tips on customizing flavors and textures to fit your mood and ingredients on hand.
Why This Cheese Ball Means So Much to Me
- I love how messy and satisfying it is to roll cheese into a perfect sphere.
- Making a cheese ball reminds me of holiday family kitchens, crowded and warm.
- It’s one of those recipes that feels both old-school and totally customizable.
The Charm Behind This Classic
- Growing up, cheese balls were the centerpiece at every family gathering.
- I learned to love the tactile joy of rolling and coating, feeling the textures change.
- Now, I see it as a way to connect with simple pleasures and shared memories.
A Brief History of the Cheese Ball
- Cheese balls date back to the 1950s, gaining popularity at parties and potlucks.
- Originally, they were made with processed cheese, but now fresh and aged cheeses shine.
- The name ‘cheese ball’ is literal—shaped like a small globe, easy to handle and dip into.
- Nuts and herbs used for coating vary by region—think pecans in the South, pistachios in the Middle East.
- They were once considered fancy, but now they’re a nostalgic comfort food for many.
Ingredient Breakdown
- Cream Cheese: First-time softening makes mixing easier; use block for better texture, cream cheese tub can be too soft.
- Sharp Cheddar: Bright, tangy flavor adds depth; opt for aged cheddar for a sharper taste.
- Herbs: Fresh herbs like chives or parsley brighten the flavor but can be substituted with dried, less vibrant.
- Nuts: Toasted pecans give crunch and smoky notes; substitute with walnuts for similar texture.
- Spices: Paprika adds color and subtle warmth; cayenne for heat, in small amounts.
Spotlight on Key Ingredients
Cream Cheese:
- It’s the creamy backbone that holds everything together. When softened, it blends smoothly, making shaping easier.
- Keep it at room temp for about 30 mins to avoid lumps.
Sharp Cheddar:
- It’s the flavor punch that makes the cheese ball memorable. It melts into the cream cheese for a savory bite.
- Use aged cheddar for a more pronounced, nutty flavor.
Ingredient Substitutions
- Dairy-Free: Use dairy-free cream cheese, though expect a slightly different texture and flavor.
- Vegan Cheese: Try a good-quality vegan cheese; it melts and tastes different but still tasty.
- Nut-Free: Skip nuts or use toasted sunflower seeds for crunch.
- Herb Variations: Swap parsley for basil or cilantro for a different fresh note.
- Spice Level: Adjust paprika or cayenne to tame or boost heat.
Equipment & Tools
- Mixing bowl: To blend ingredients smoothly.
- Rubber spatula: To fold and combine ingredients.
- Plastic wrap: To shape and chill the cheese ball.
- Sharp knife: To slice for serving.
- Chopping board: To chop nuts and herbs.
Step-by-step Guide to a Cheese Ball
- Gather your ingredients: cream cheese, sharp cheddar, herbs, and nuts.
- Soften the cream cheese at room temp, about 30 minutes, until smooth.
- Mix in shredded cheese, herbs, and spices until well combined.
- Shape the mixture into a ball with your hands, about 15 minutes.
- Roll the ball in chopped nuts or herbs for coating.
- Wrap tightly in plastic wrap and chill for at least 1 hour, up to 24 hours.
- Before serving, bring to room temperature for easier slicing and fuller flavor.
- Serve with crackers, bread slices, or veggie sticks, and enjoy the tactile fun.
Chill the cheese ball in the fridge for at least an hour before serving to let flavors meld and shape set.
How to Know It’s Done
- Cheese ball is firm but not hard, about 1 hour in the fridge.
- Coating sticks well and looks even.
- Smells cheesy with fresh herbal notes, ready for slicing.
Homemade Cheese Ball
Ingredients
Equipment
Method
- Place the softened cream cheese in a mixing bowl and use a spatula to stir until smooth and creamy, about 2 minutes. The mixture should be soft and slightly fluffy.
- Add the shredded sharp cheddar cheese to the cream cheese. Fold together until evenly combined, creating a marbled, vibrant mixture with a cheesy aroma.
- Stir in the chopped herbs and paprika, mixing thoroughly. You should see flecks of green and a hint of red, infusing the mixture with fresh flavor and color.
- Use your hands to gently shape the cheese mixture into a round ball, pressing firmly but smoothly to create a rustic sphere. It should feel firm but pliable.
- Place the chopped toasted pecans in a shallow dish. Roll the cheese ball in the nuts, pressing lightly to coat evenly with crunchy, toasted bits.
- Wrap the coated cheese ball tightly in plastic wrap and refrigerate for at least 1 hour, allowing flavors to meld and the shape to firm up.
- Once chilled, remove the plastic wrap and let the cheese ball sit at room temperature for about 15 minutes to soften slightly for easier slicing.
- Slice the cheese ball with a sharp knife into wedges or rounds and arrange on a platter. Serve with crackers, bread slices, or fresh veggie sticks for dipping.
Notes
Cooking Tips & Tricks
- Use full-fat cream cheese for richer flavor and better binding.
- Chill the mixture thoroughly for easier shaping.
- Lightly dampen hands to prevent sticking when shaping.
- Toast nuts briefly to enhance flavor and crunch.
- Incorporate fresh herbs at the last minute for vibrant flavor.
Common Mistakes & How to Fix Them
- FORGOT TO CHILL THE MIXTURE: Chill longer or add more cream cheese.
- DUMPED TOO MUCH NUTS: Use a lighter coating or add more cheese to balance.
- OVER-TORCHED THE COATING: Use a lower heat or cook for less time.
- CRACKED WHILE ROLLING: Chill longer or slightly dampen hands before shaping.
Quick Kitchen Fixes
- When mixture is too soft, chill it longer to firm up.
- When nuts are soggy, toast them longer or add after coating.
- Splash a little lemon juice if cheese mixture tastes flat.
- Patch cracks in the cheese ball with extra cheese or herbs.
- Shield the cheese ball with plastic wrap if it starts to dry out.
Make-Ahead & Storage Tips
- Prep the cheese mixture a day ahead; it tastes even better after resting.
- Wrap tightly and store in the fridge for up to 3 days, flavors deepen.
- Let it sit at room temp for 15-20 minutes before serving, to soften slightly.
- Refrigerated cheese balls can be frozen for up to a month, just thaw before serving.
10 Practical Q&As About Making a Cheese Ball
1. Can I use different cheeses?
Use a mix of sharp cheddar and cream cheese for rich flavor and smooth texture.
2. What if I want a milder flavor?
Yes, adding a touch of blue cheese or feta gives a tangy twist.
3. How long should I chill it?
Chill the cheese ball for at least an hour to let flavors meld and shape firm up.
4. Can I make it ahead?
Use chopped nuts like walnuts or pecans for crunch, or herbs for freshness.
5. How do I store leftovers?
Wrap the cheese ball tightly and store in the fridge for up to 3 days.
6. What’s good for pairing?
Serve with crackers, sliced baguette, or crisp veggie sticks.
7. The mixture is too runny, what do I do?
If it’s too soft, refrigerate longer before shaping and serving.
8. It’s too crumbly, how can I fix it?
Add a bit more cream cheese or let it chill longer to firm up.
9. My cheese ball cracked while rolling, how do I prevent it?
Moisten with a tiny bit of milk or more cream cheese and knead gently.
10. Can I make a smaller or larger cheese ball?
Chill the mixture briefly before shaping to keep it smooth and manageable.
Once you get the hang of shaping and rolling, it’s easy to whip up a batch for spontaneous gatherings or quiet nights. The best part? Watching everyone’s face light up when they see that little globe of cheesy goodness.
This cheese ball isn’t just a snack; it’s a small act of comfort, a reminder that simple ingredients can bring a lot of joy, especially when shared.